Wednesday, 4 November 2020

Retro Game Wednesdays (Part 2)

2.0 A Machine to Run Two Decades of Gaming (1989-2001)

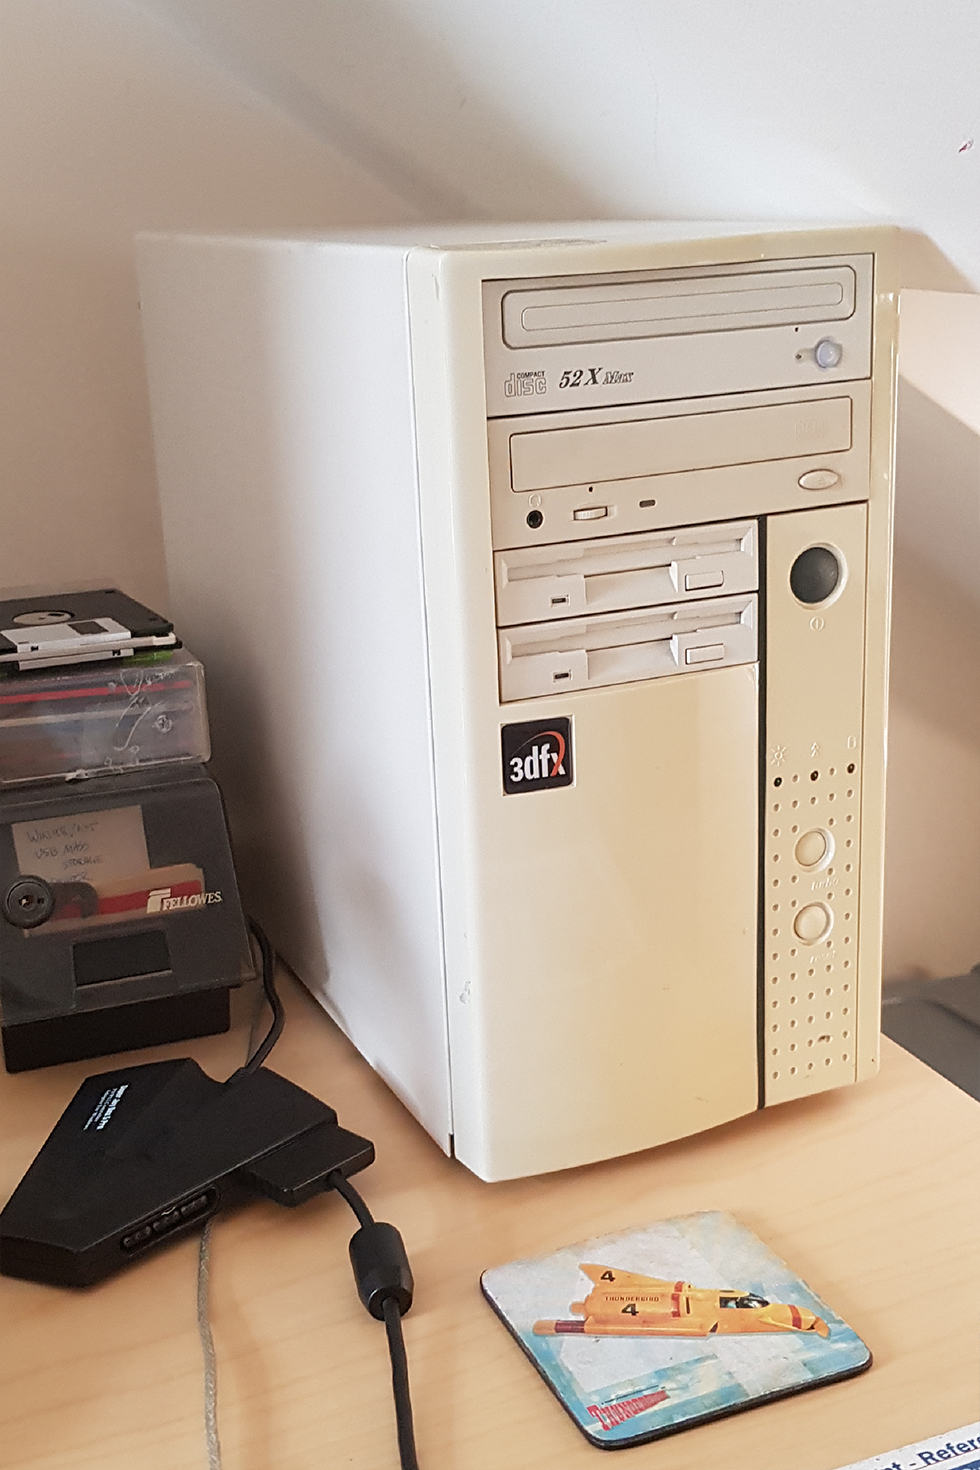
I’ll going to start off looking at the oldest machine (referred to as ‘Retro Rig #1’ in my previous post), which I use for DOS and Windows 9x games. I’ll cover my hardware choices, any changes I had to make to those choices, discoveries I made while tweaking, optimising and fixing the problems that arose during usage. My aim was to build a single machine which could give an enjoyable experience playing a wide range of games, from early DOS all the way to the end of Windows 9x with the release of XP in 2001. I initially began building this machine in 2016 and made a thread on vogons.org at the time, since then its evolved somewhat.

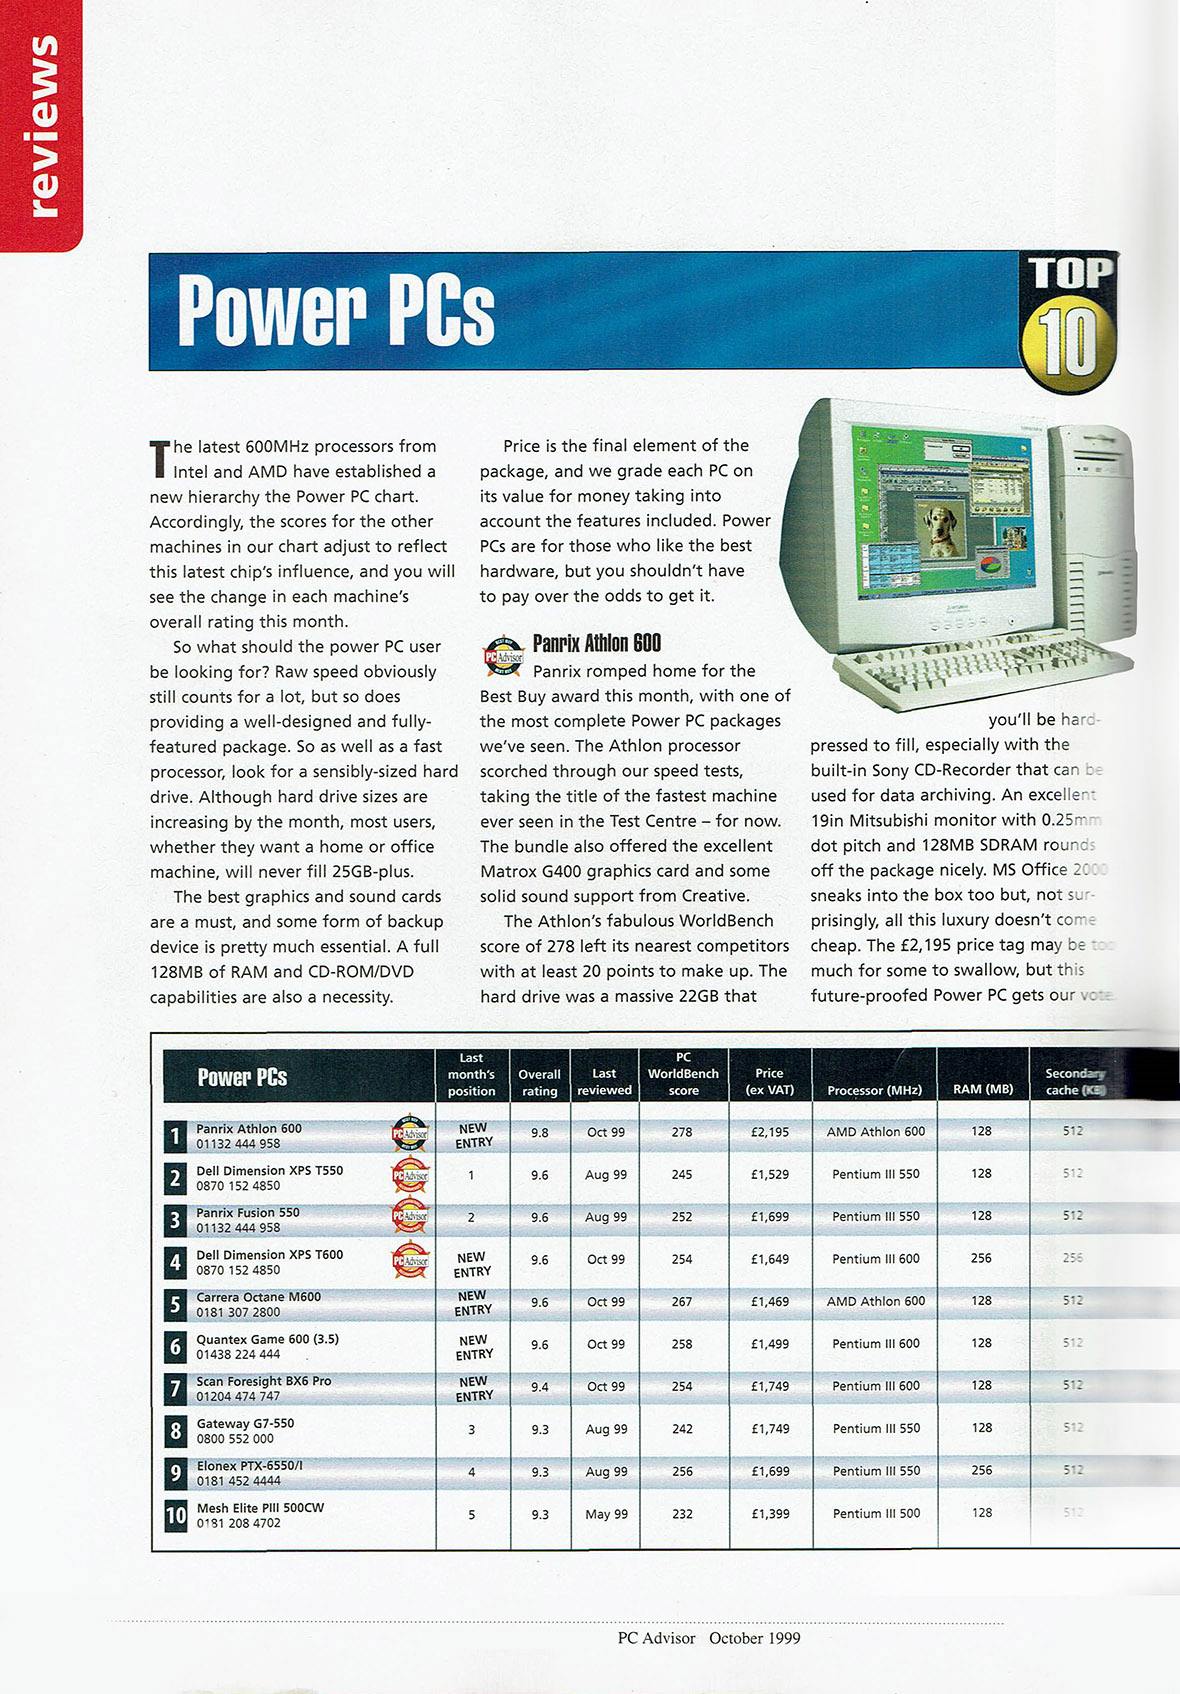
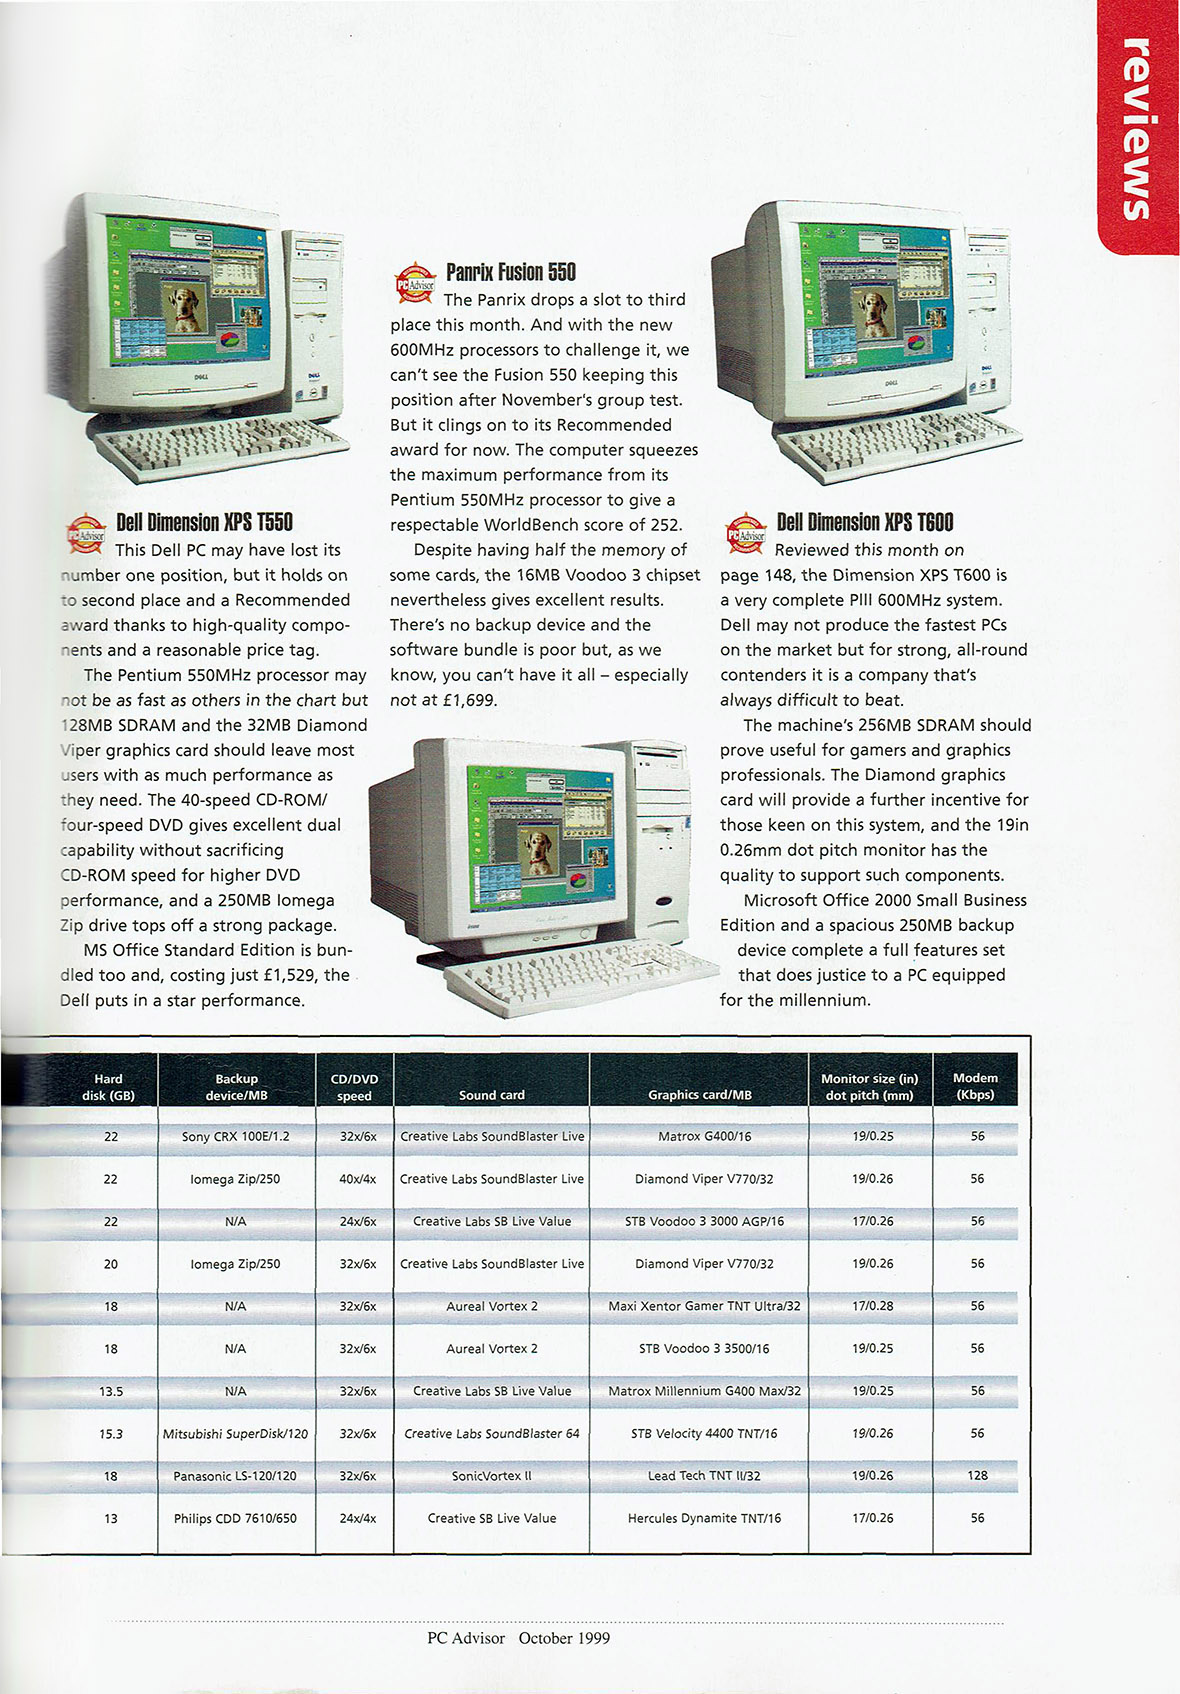
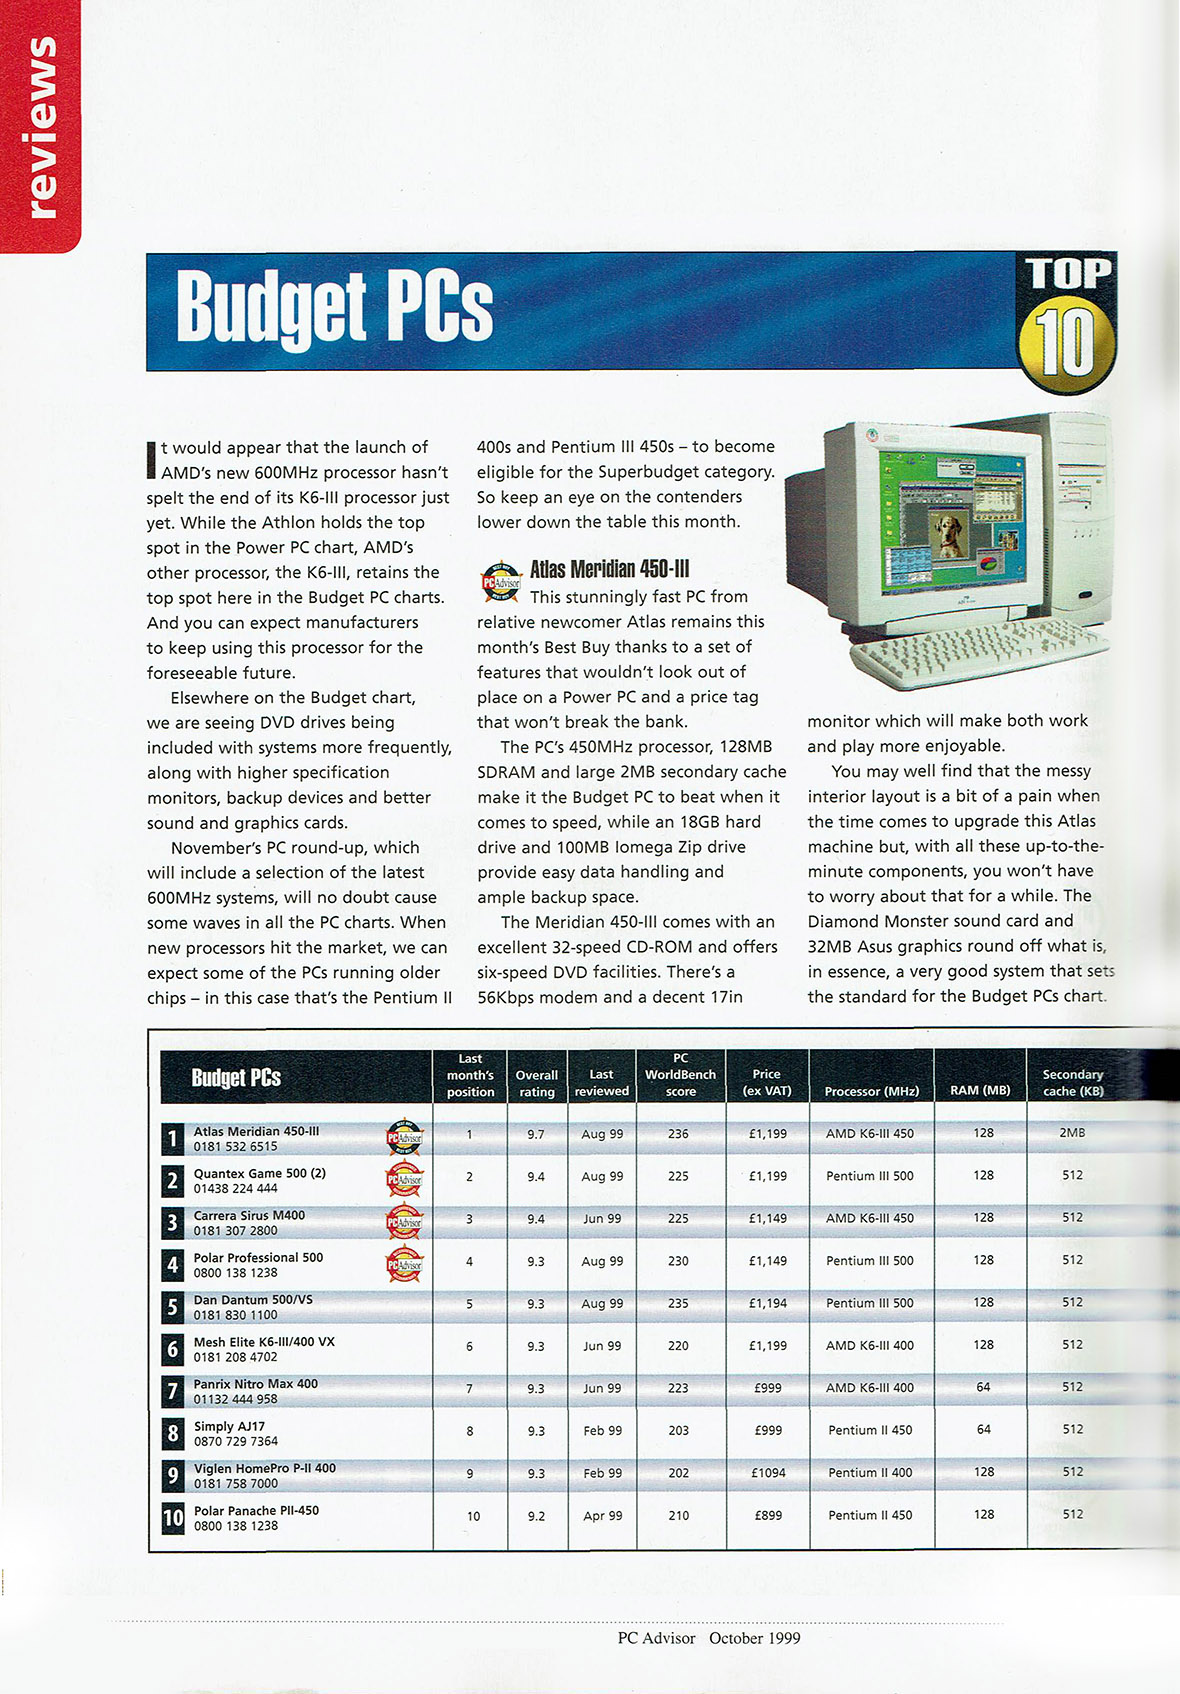
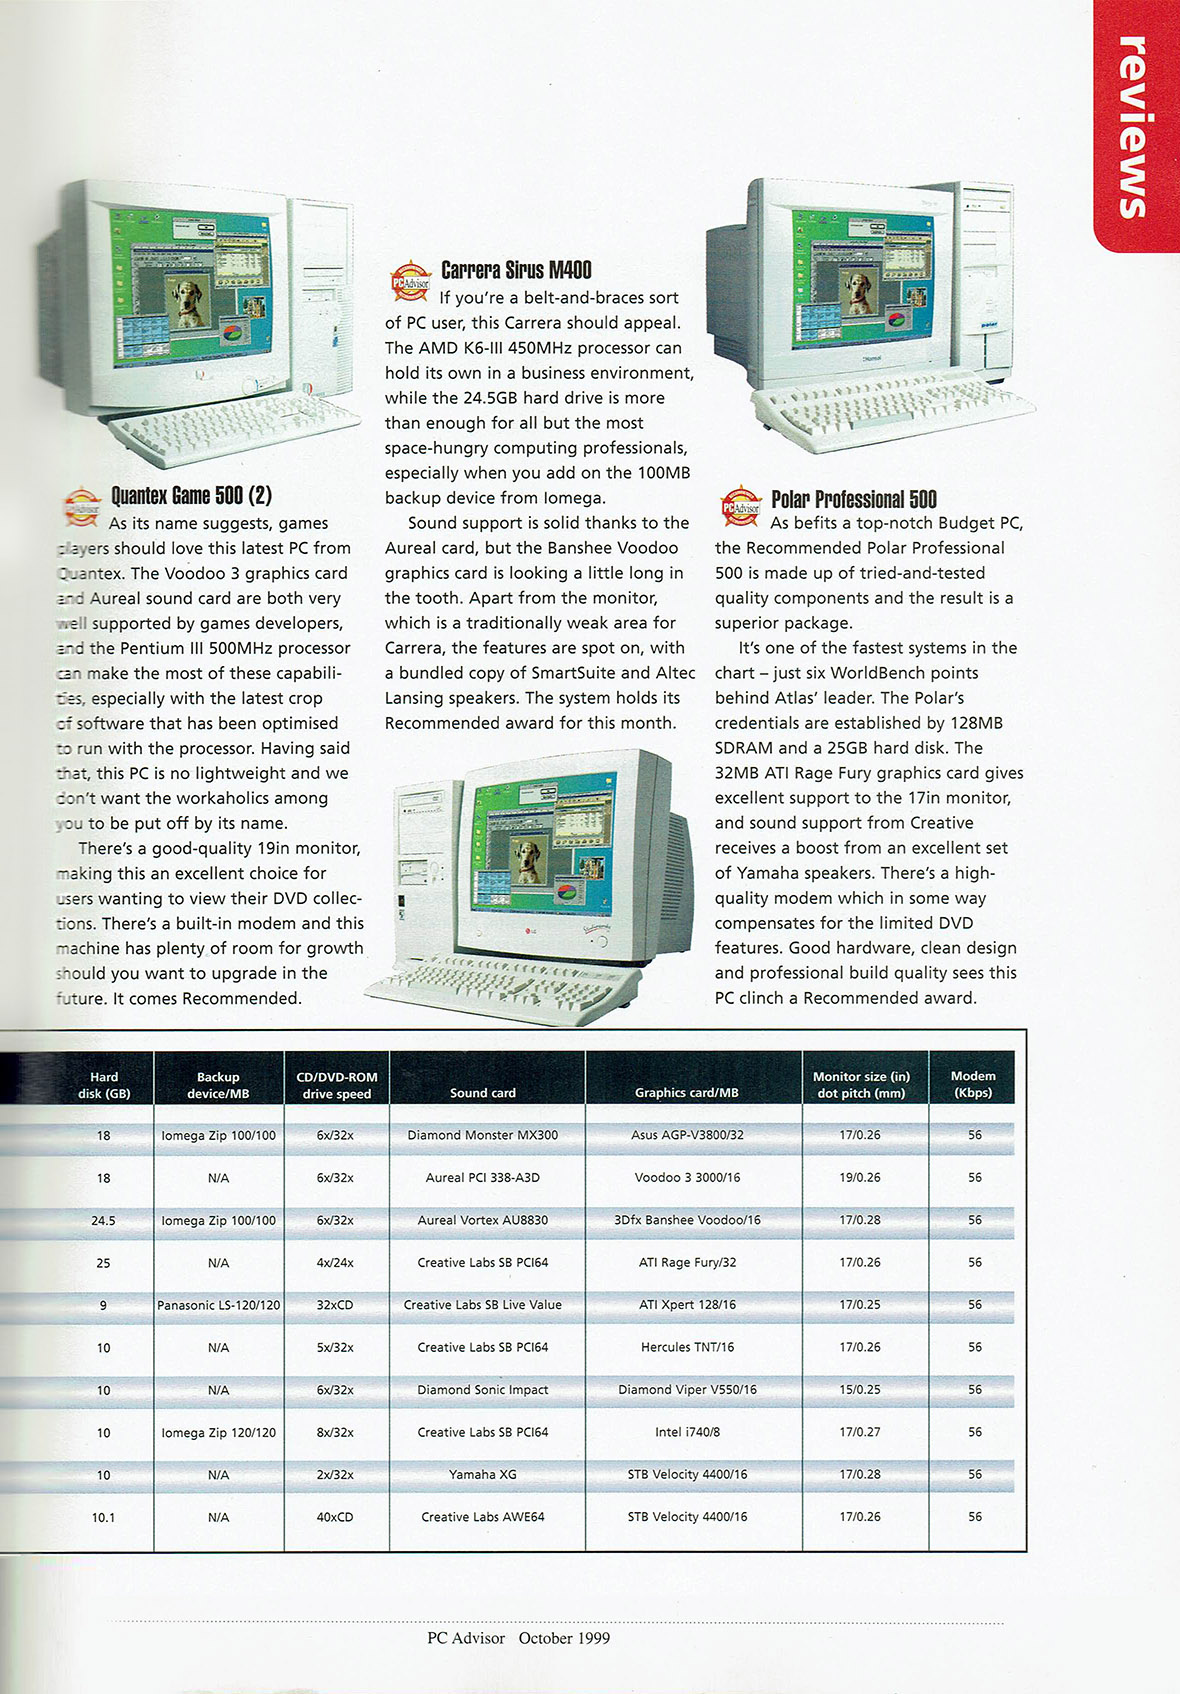
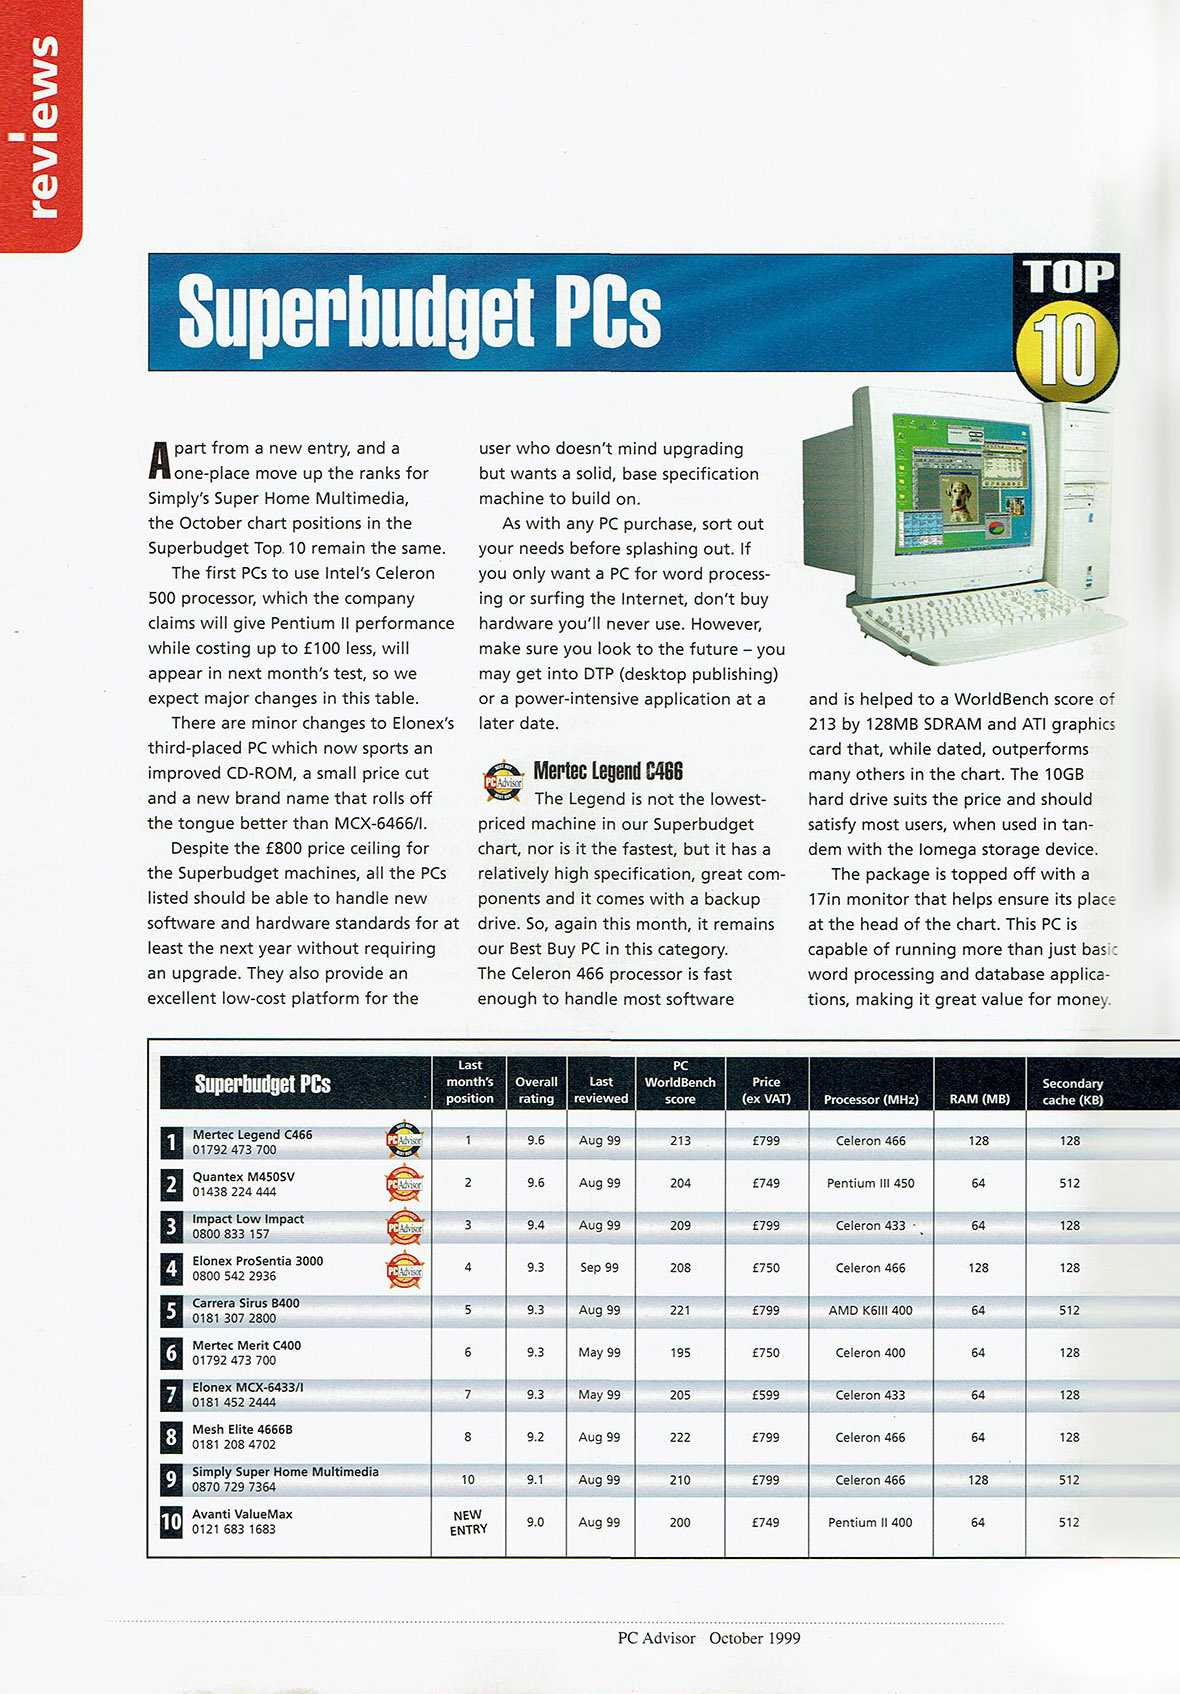
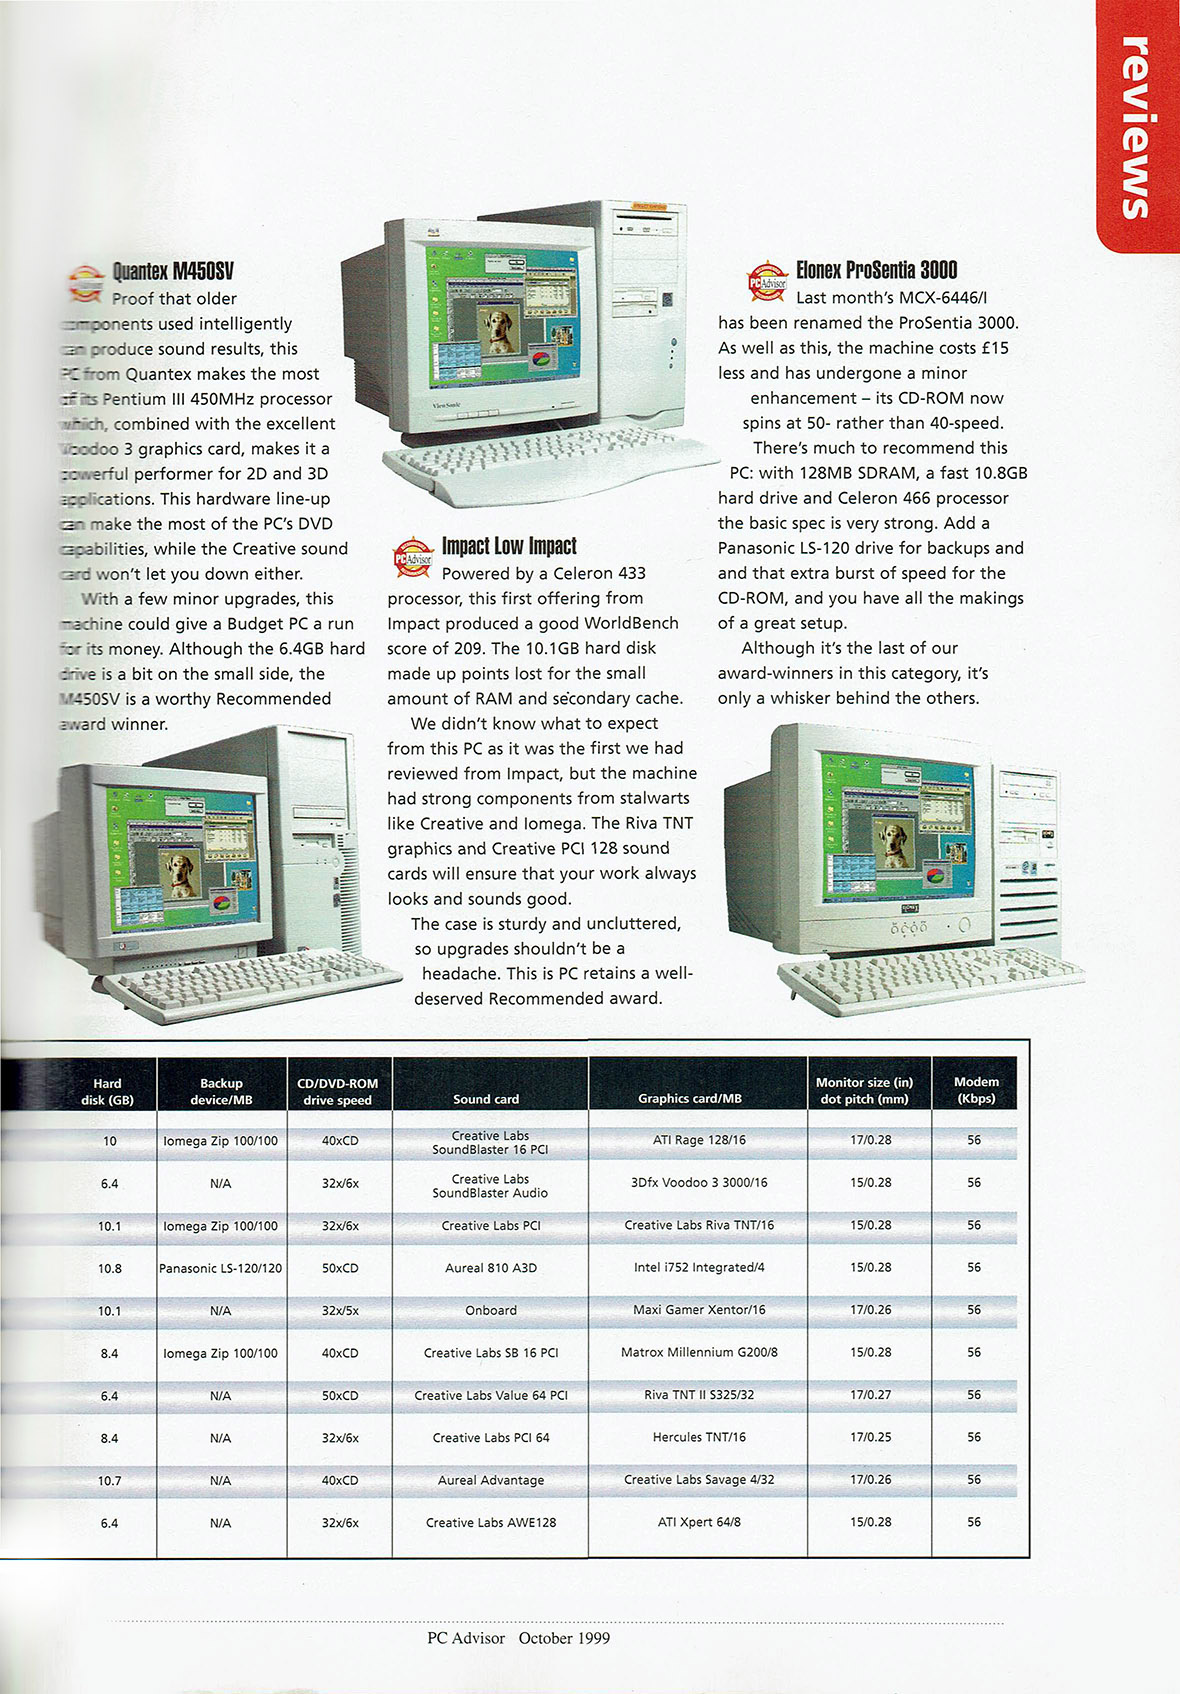
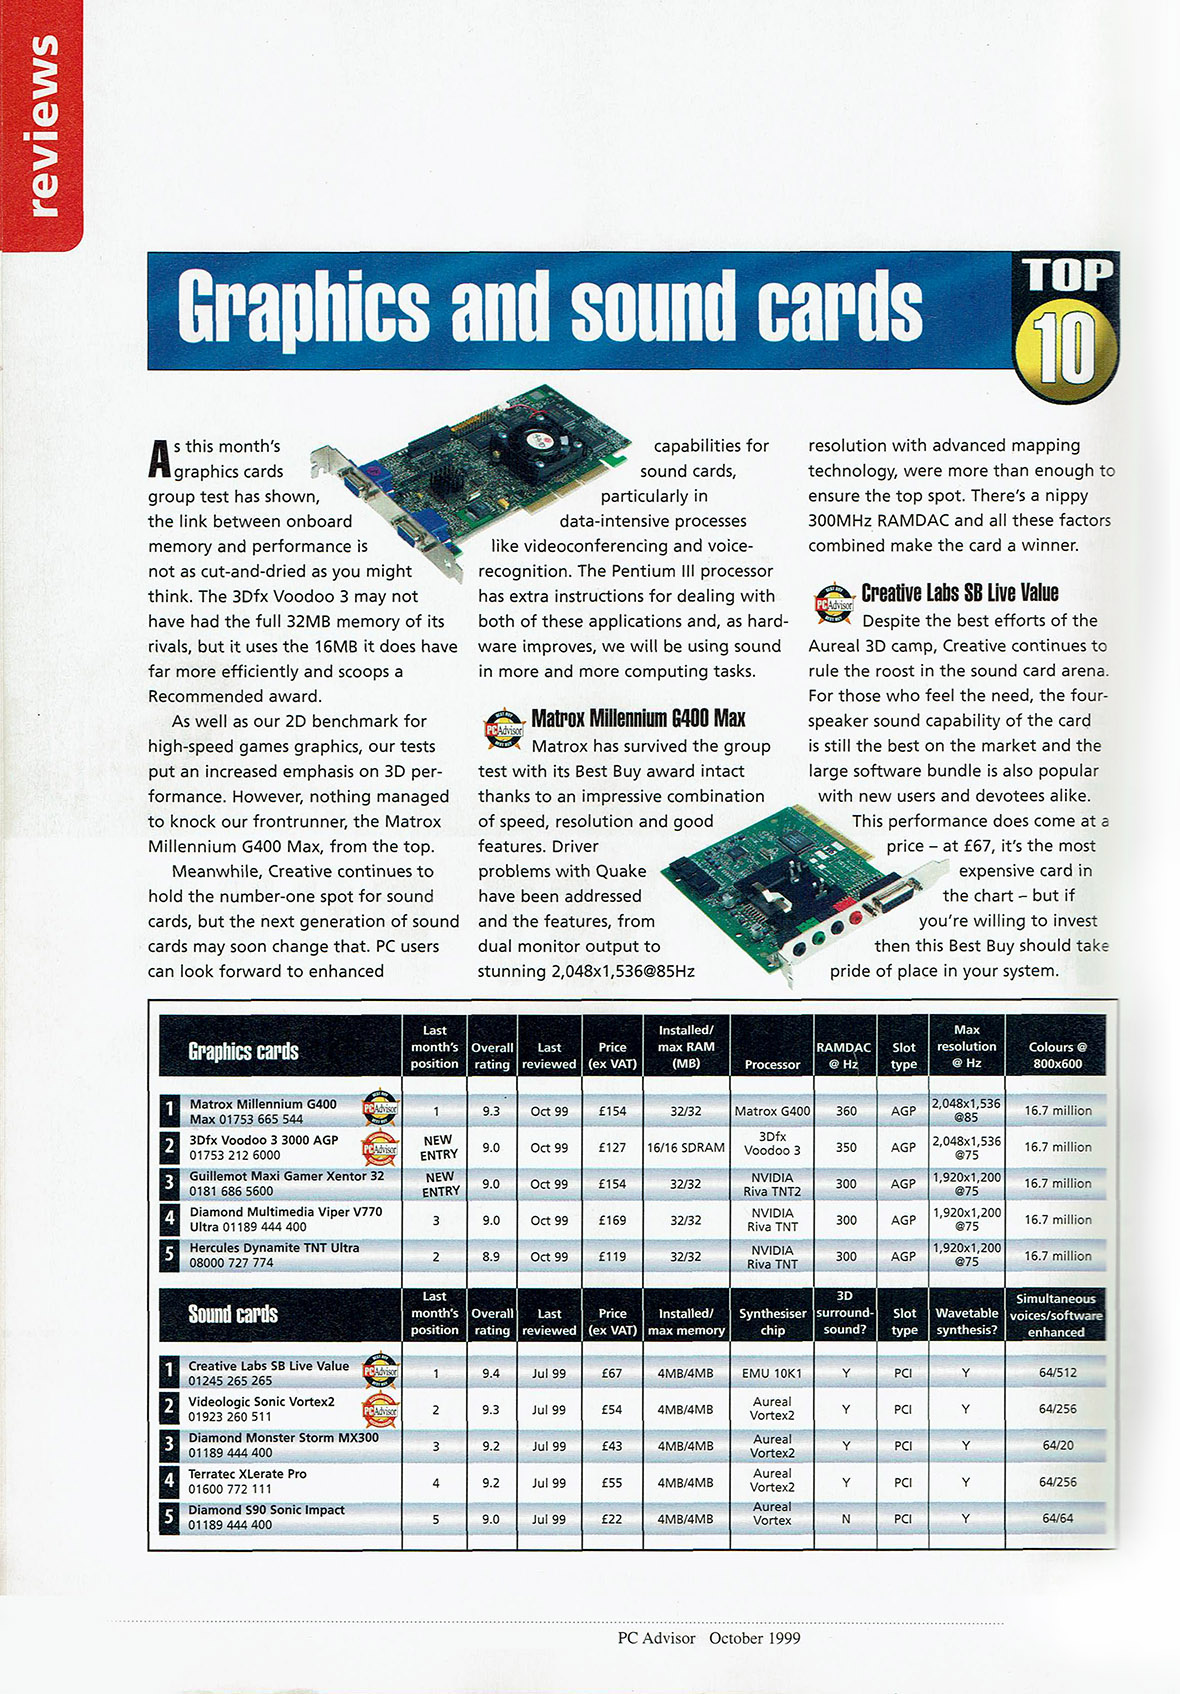
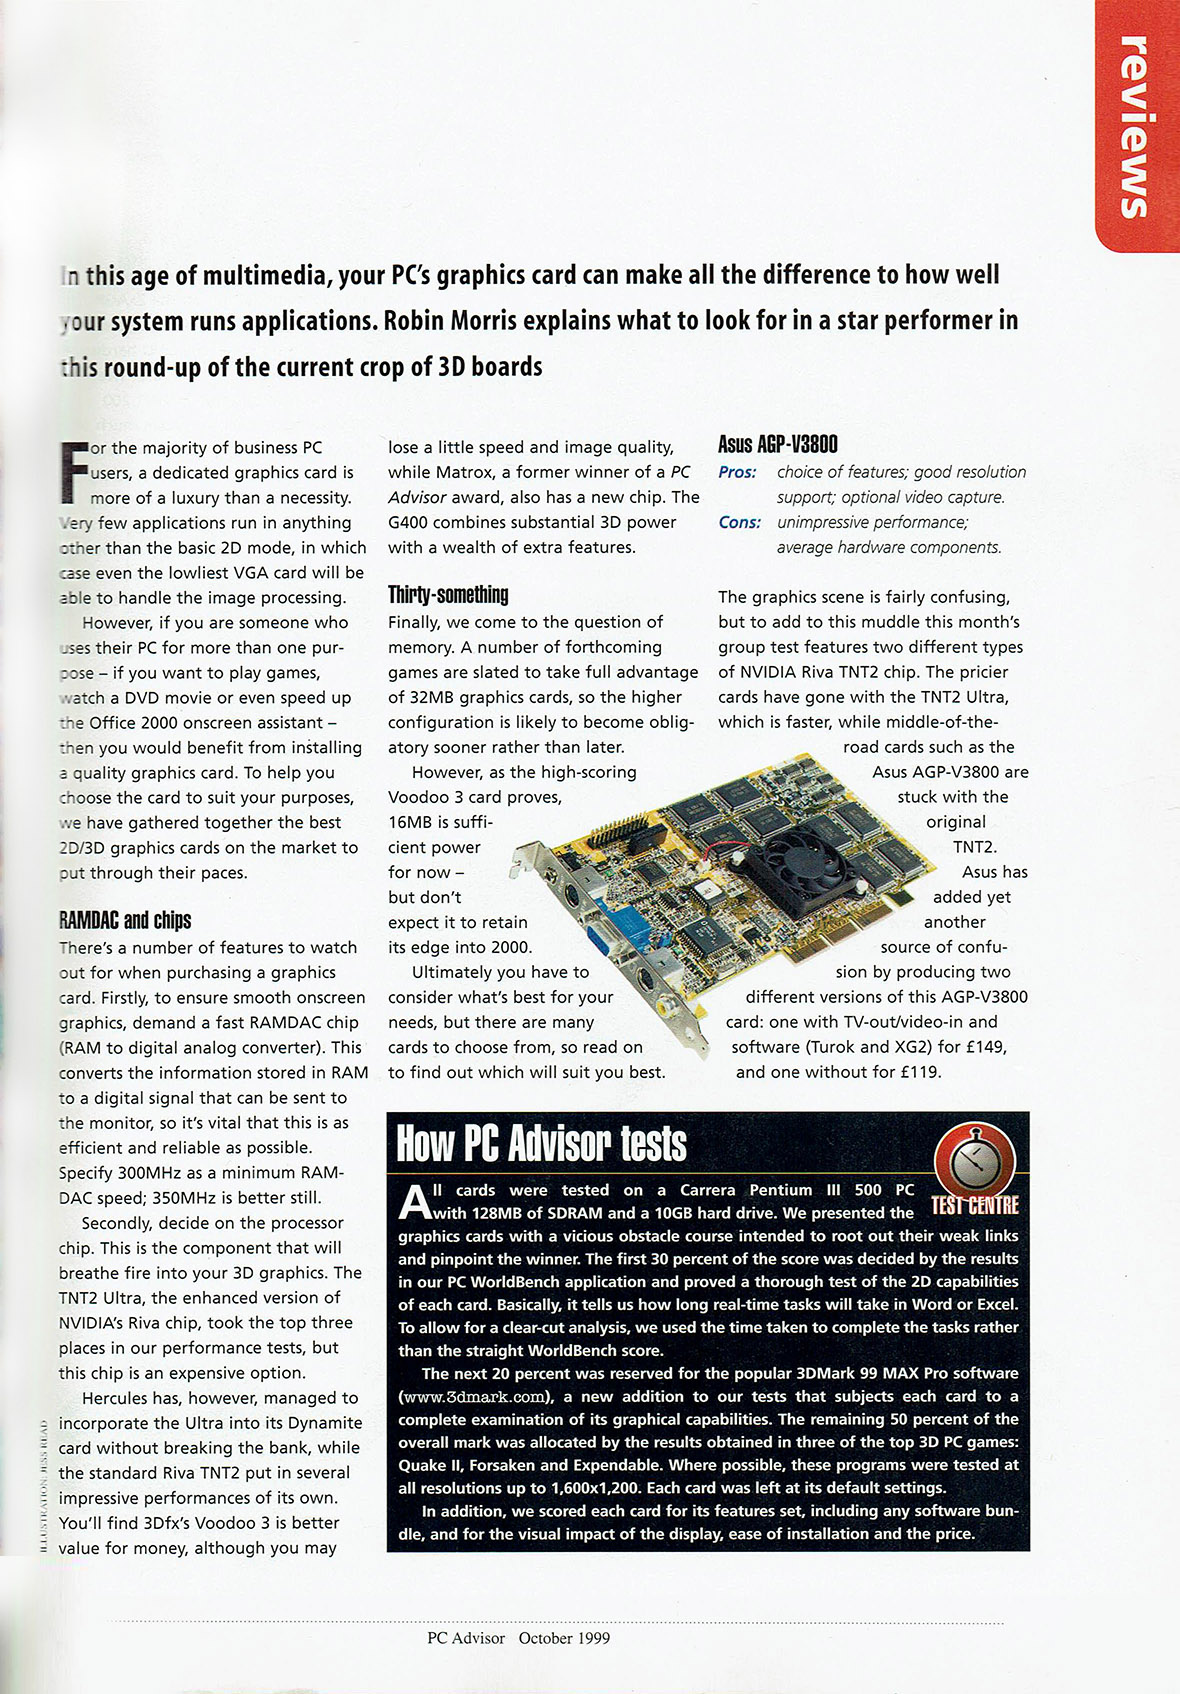
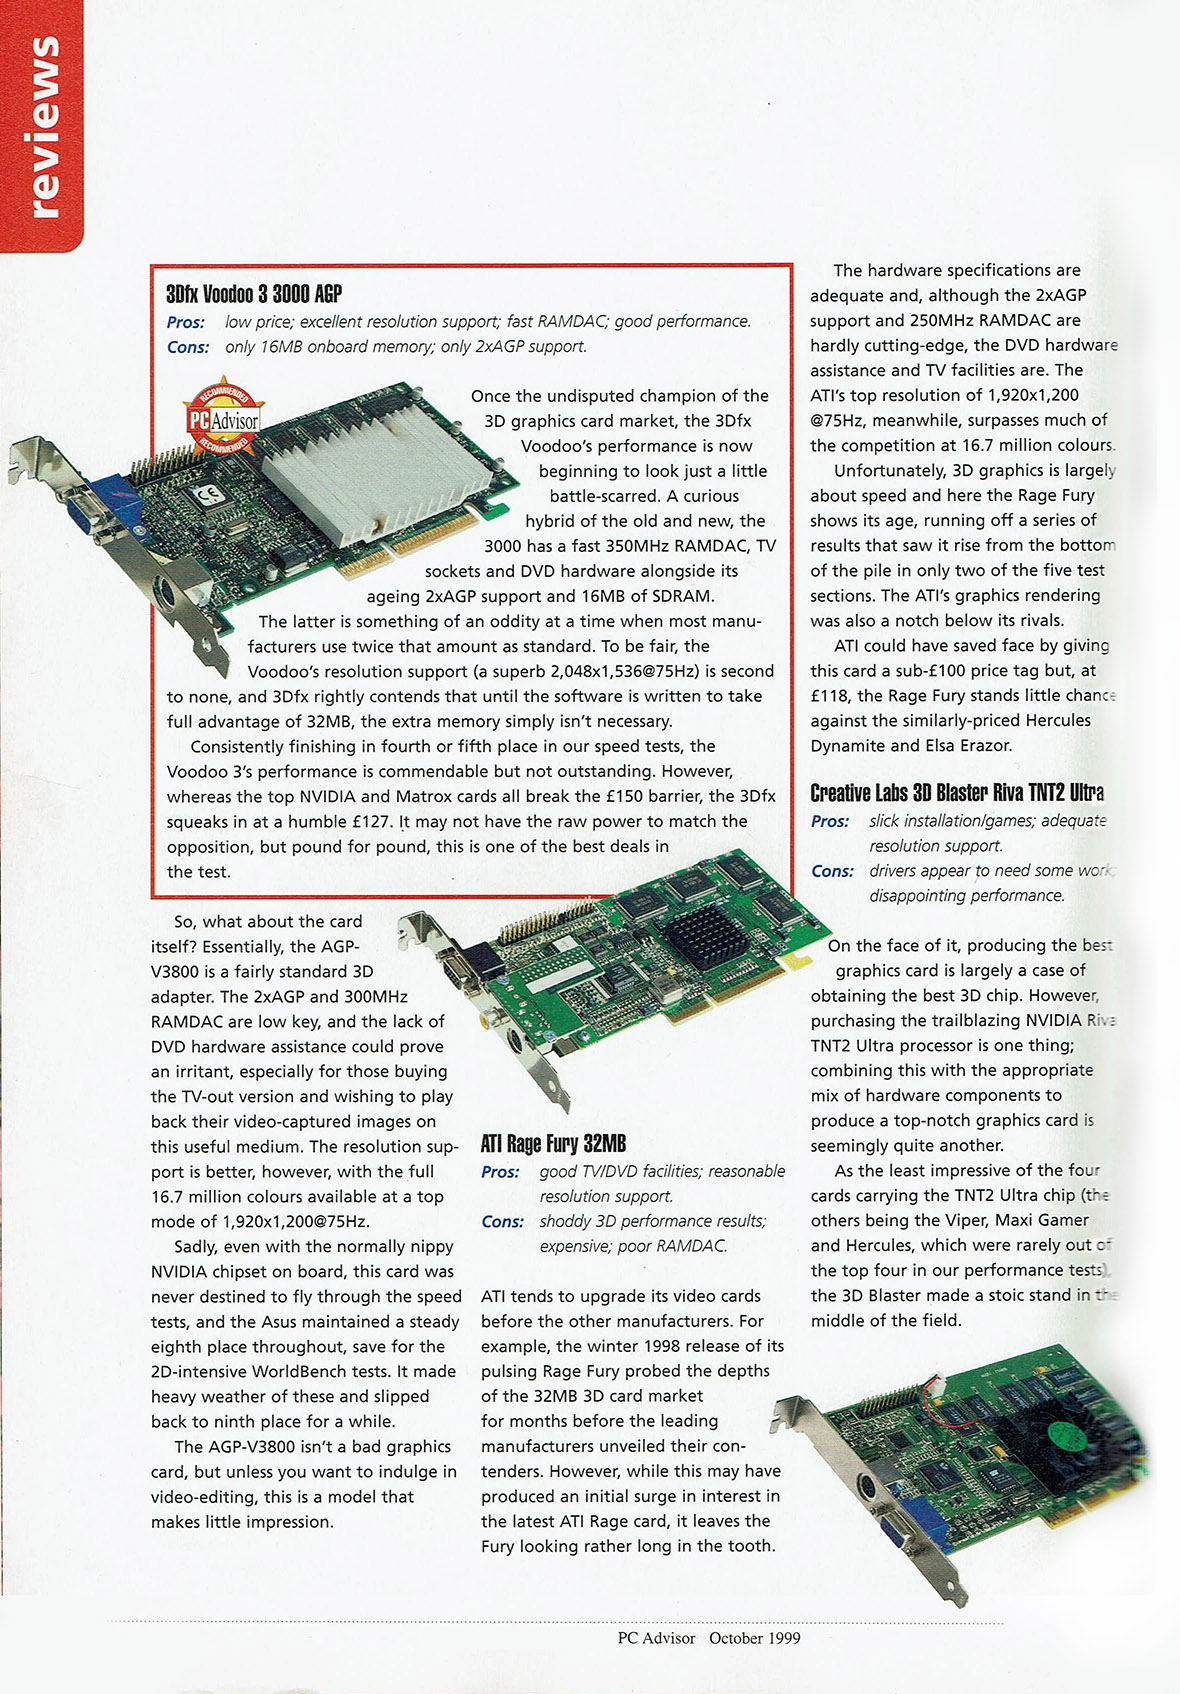
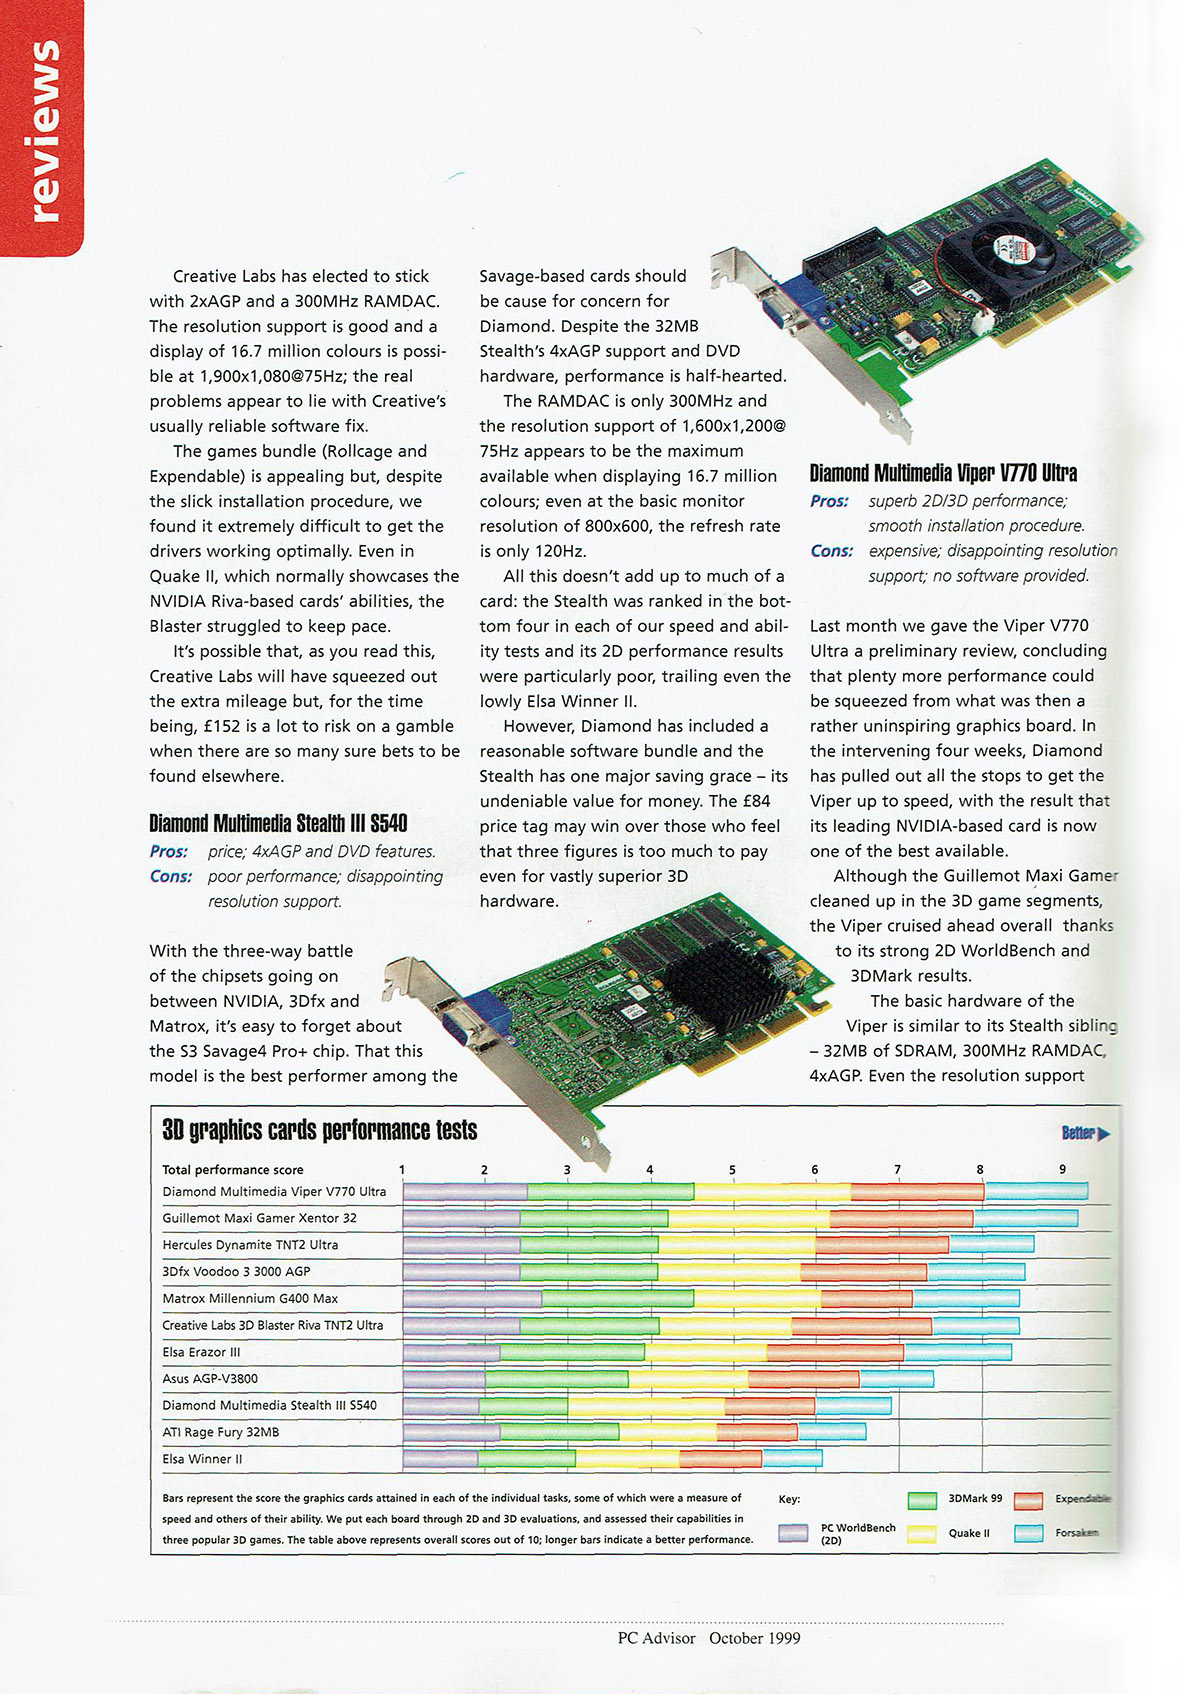
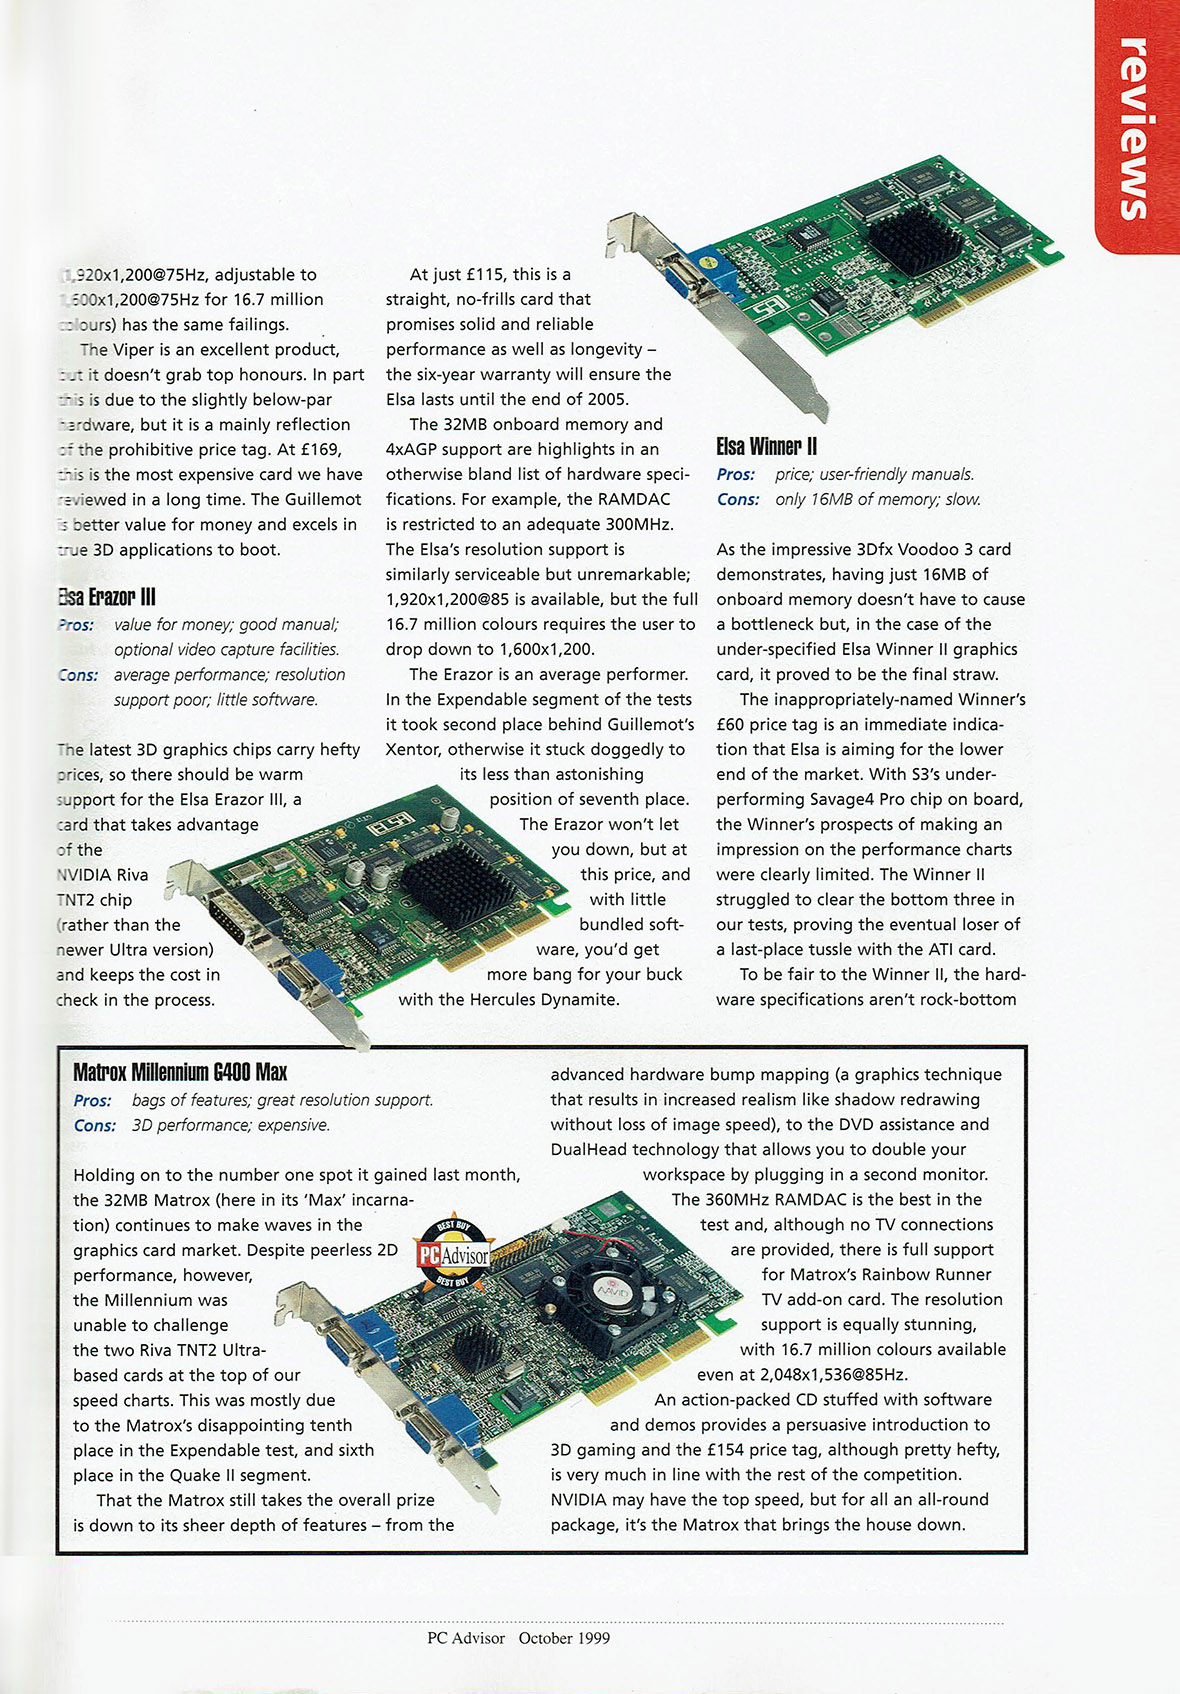
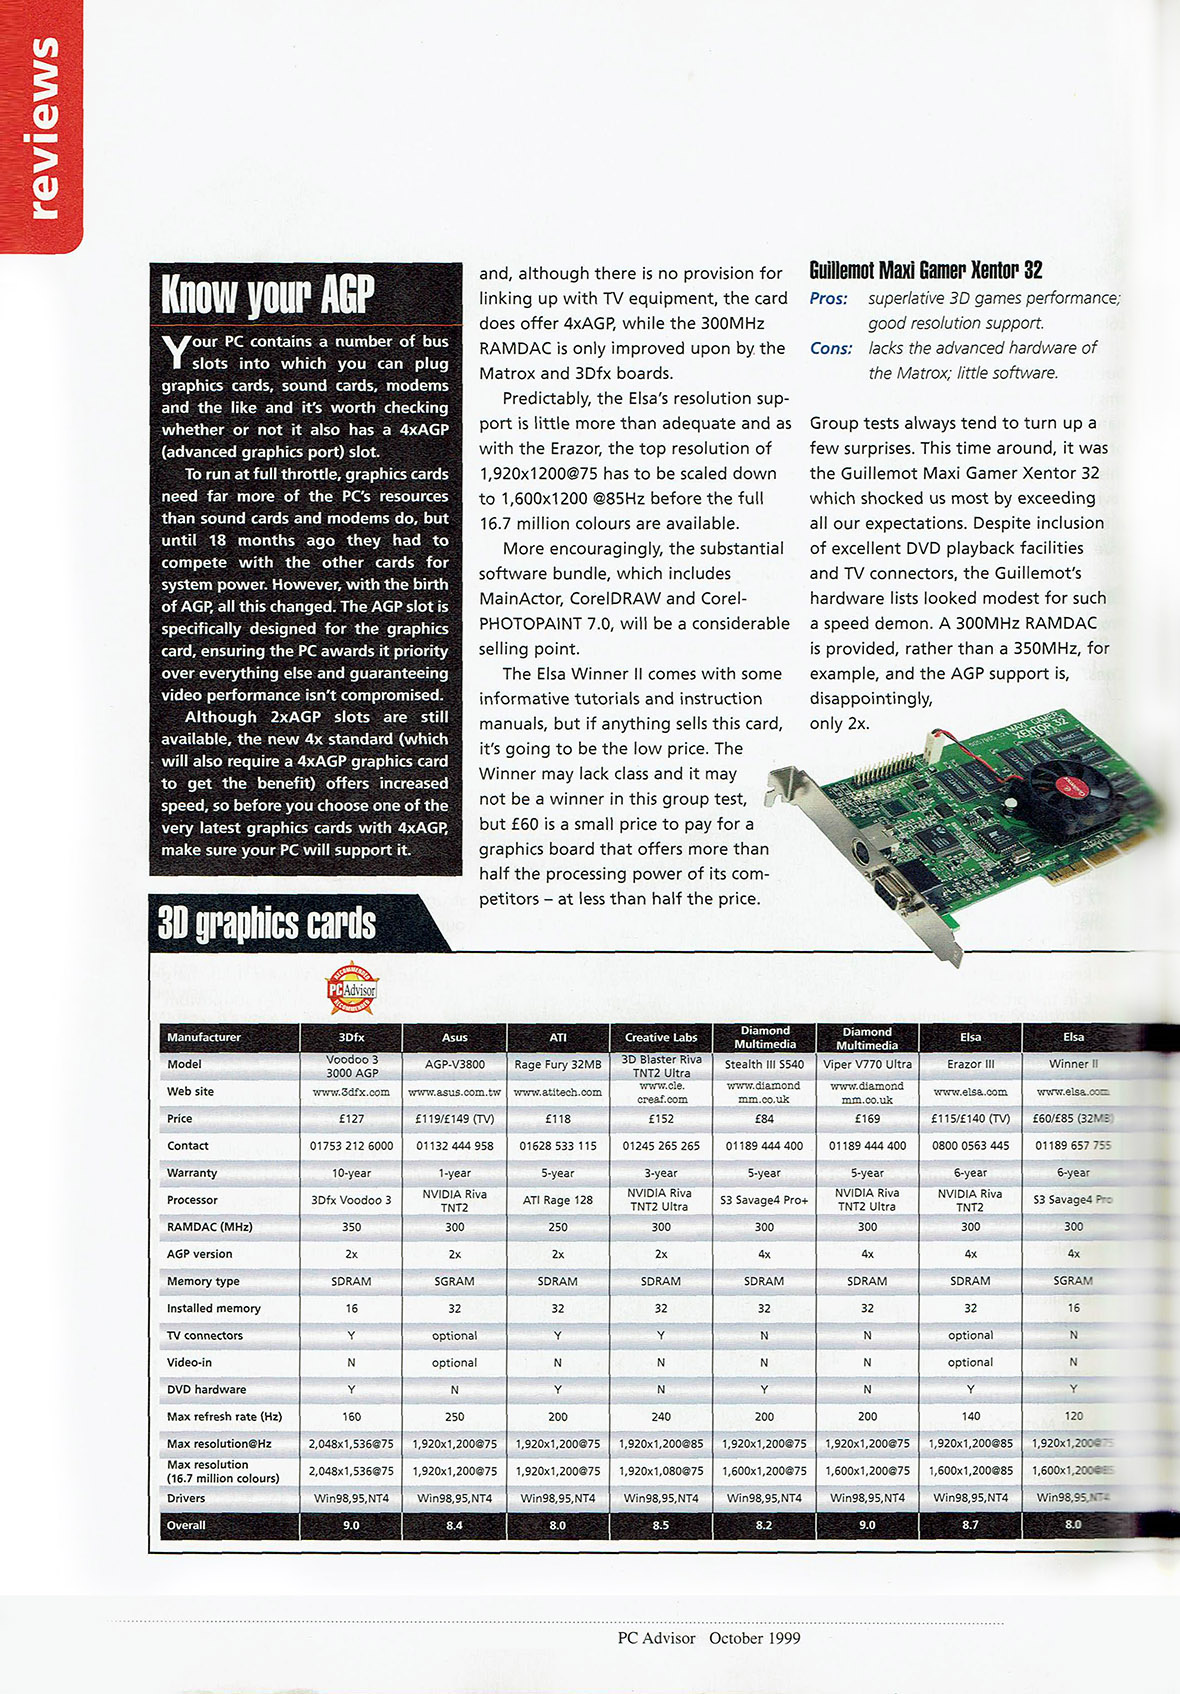
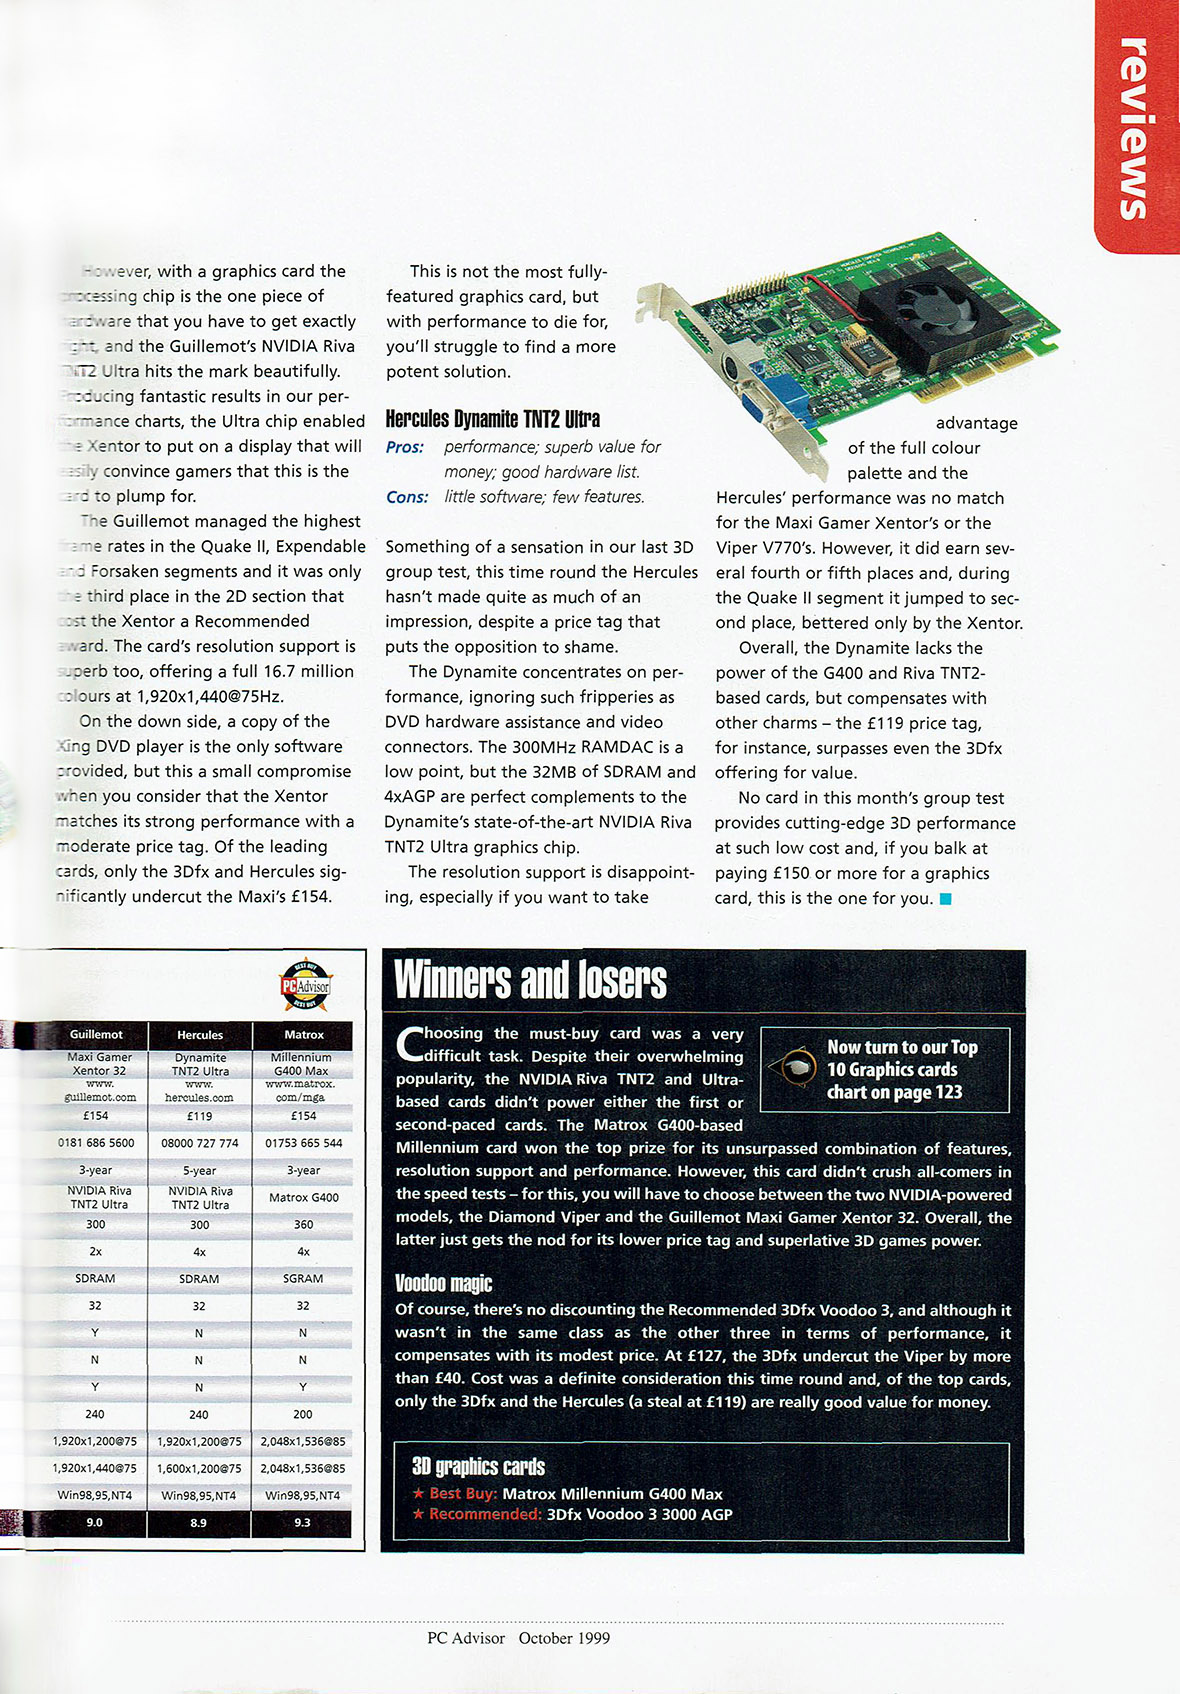
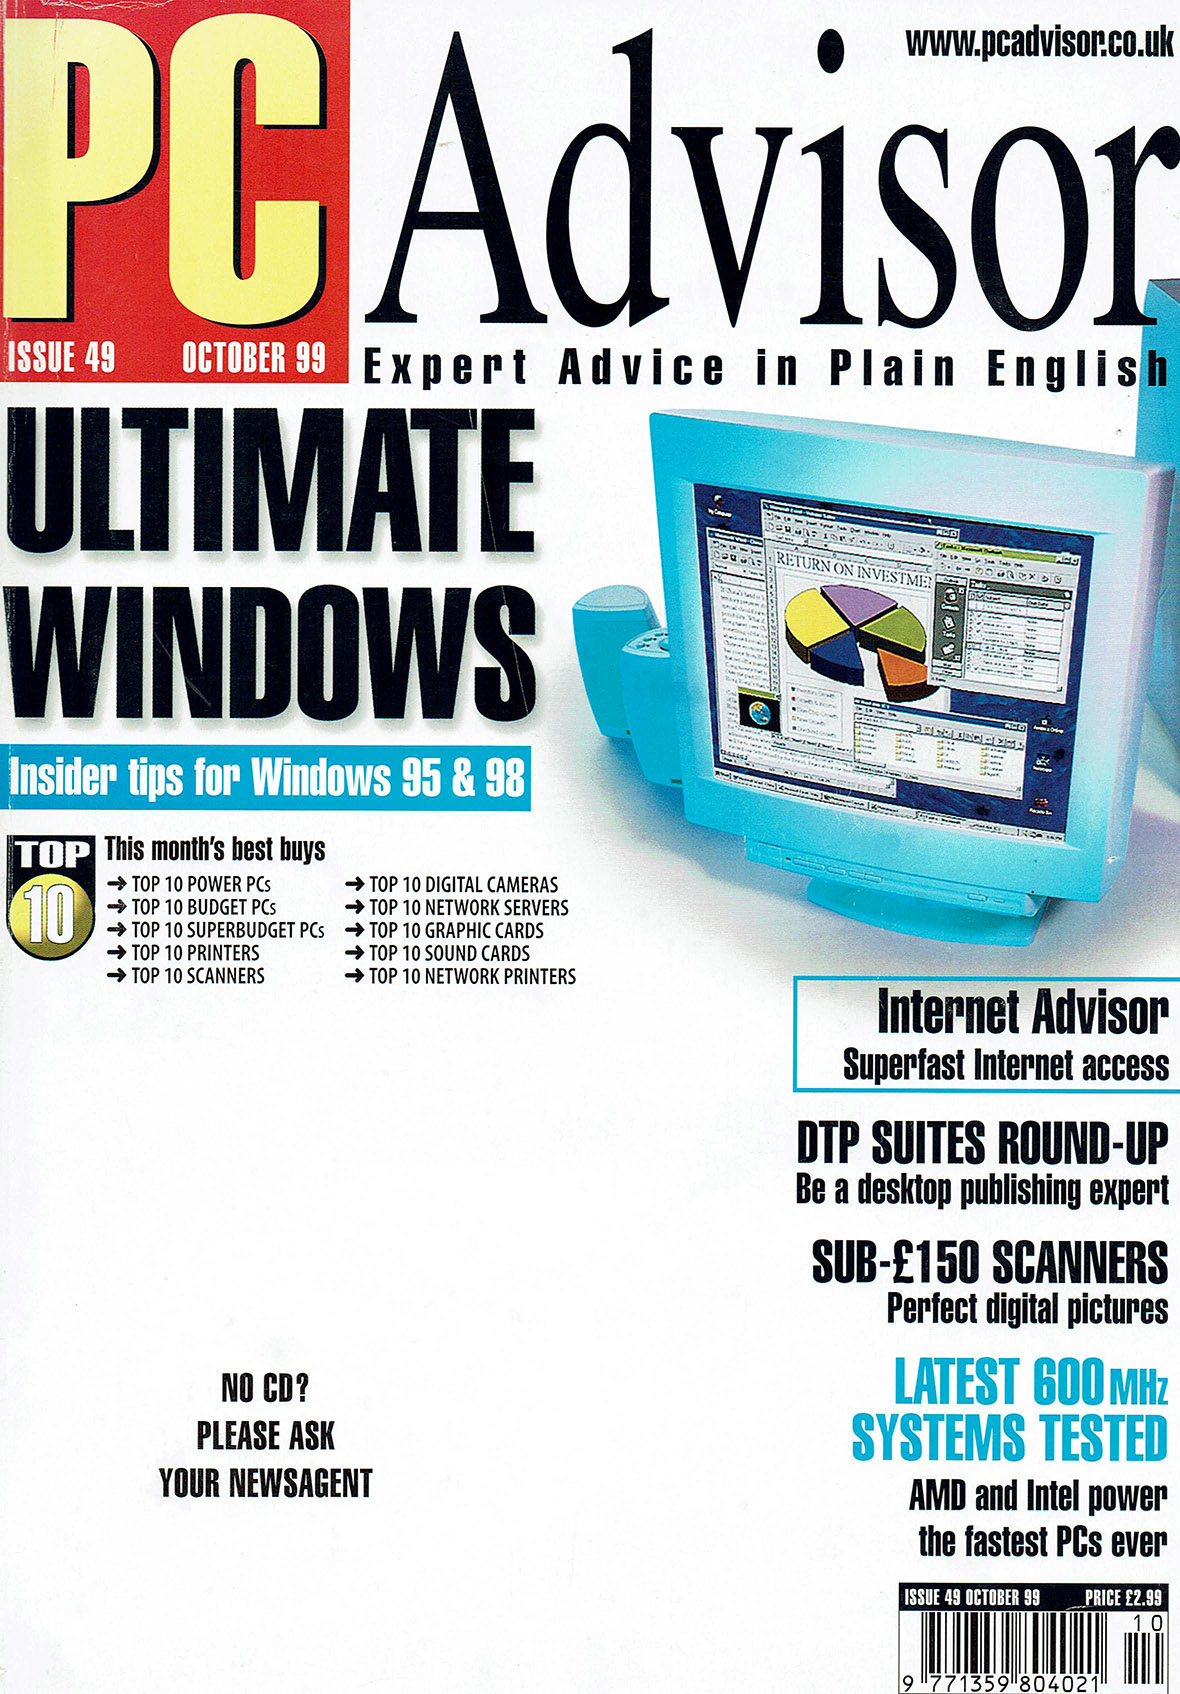
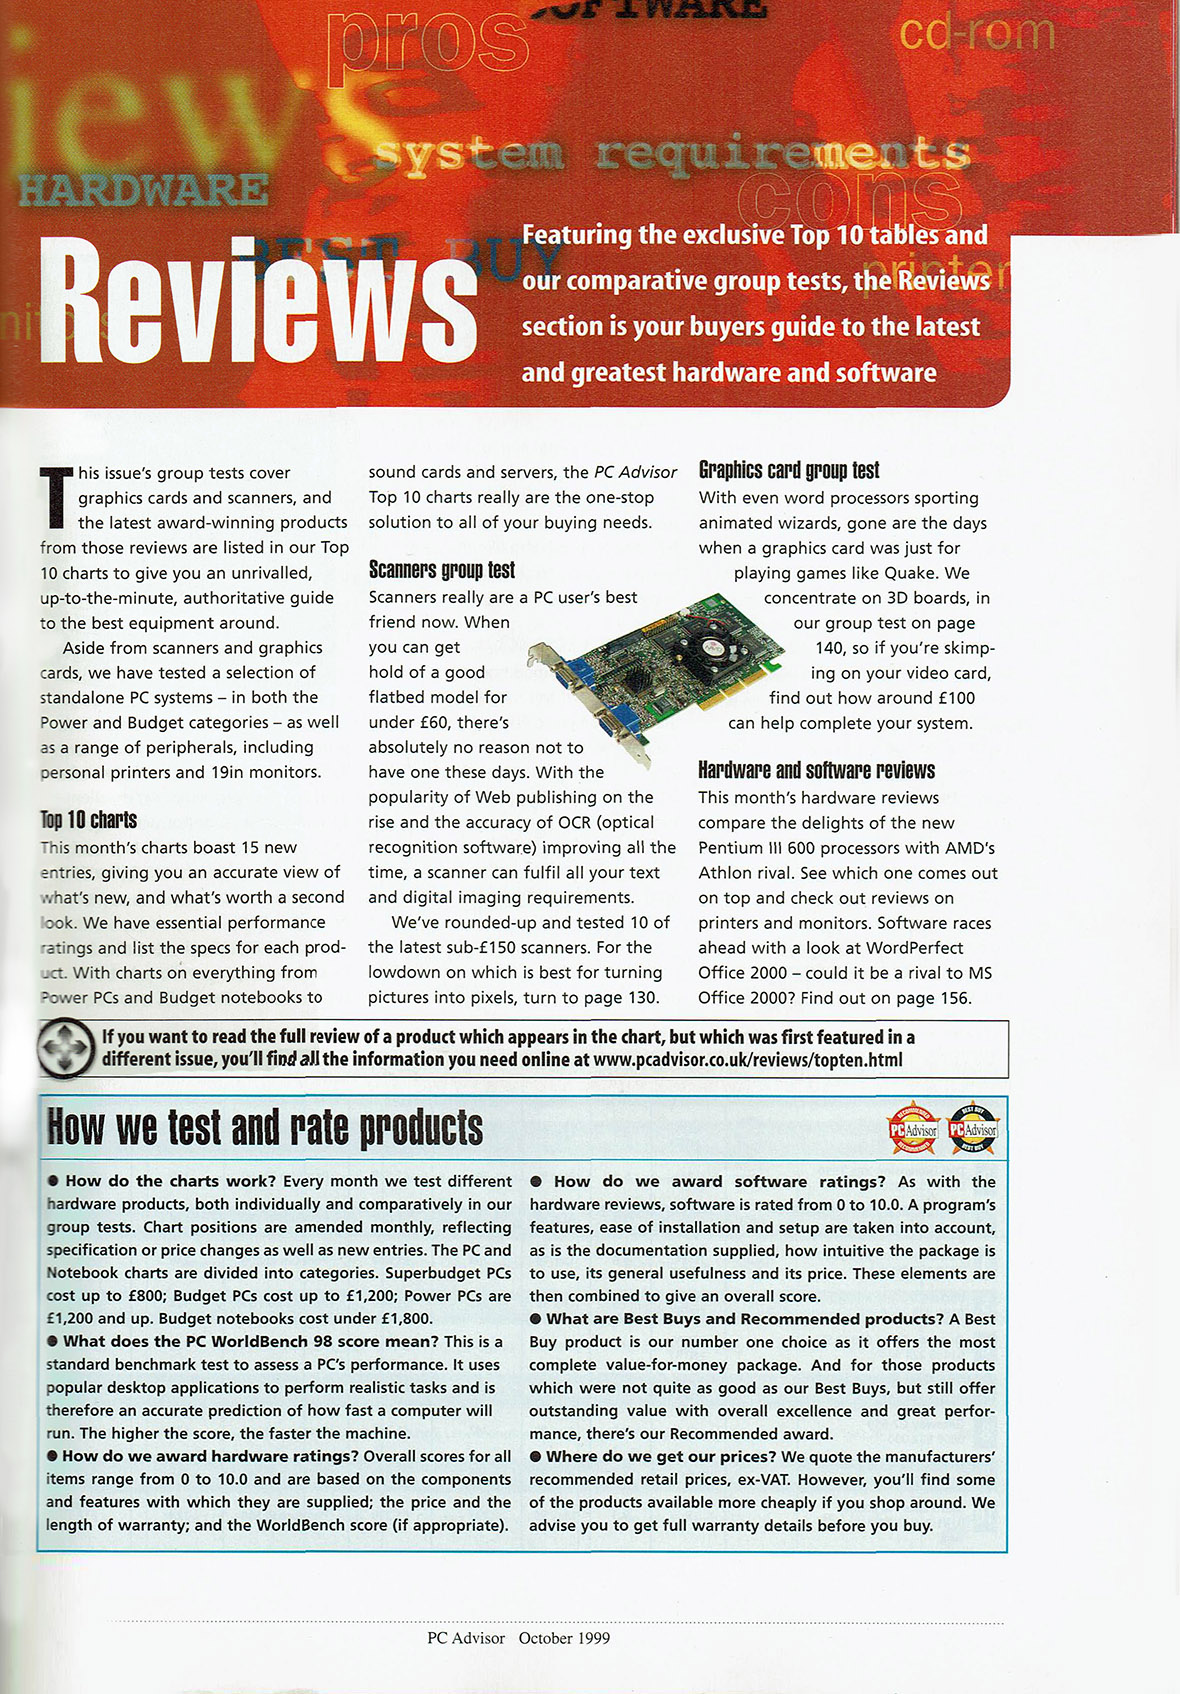
To achieve this I needed a versatile processor at the computers core, which allows for good compatibility with speed sensitive 16-bit DOS software but also has enough oomph for demanding 32-bit 3D accelerated games. Both Intel and AMD had good offerings in 1999 with a range of Pentium II/III models and K6/K7 (Athlon) CPU’s respectively. The Higher end being the 600Mhz AMD K7 Athlon and the Intel Pentium III with more affordable mid-range chips sitting at the 450~500Mhz at almost two thirds up-to half of the cost in pre-built machines of the time. See the scanned system round-up from Issue 49 of PC Advisor dated October 1999.*

Mobile variants of these popular chips had speed-stepping or other power management technologies which allowed laptops to save battery by limiting performance and power of the CPU on the fly. It’s these processors which are perfect for older more stubborn DOS games which depend on slower speeds to function as intended. As far as I could tell the Intel chips needed to have their multipliers ‘unlocked’ and even then the multiplier value could only be changed in the bios on a system reboot. This left the AMD K6 mobile series denoted by a plus, in this case I used a K6-III+ 450Mhz.

It can downclock to 200Mhz or effectively even slower by disabling the L1 and/or L2 caches which makes it ideal for the slow stuff, but it can also overclock nicely to 500Mhz for a nice little boost. This speed pairs it nicely with a must-have piece of hardware from 1999 – a 3Dfx Voodoo 3D accelerator card for all games that support the 3D graphics API Glide. Luckily I still have my original STB Voodoo 3 3000 AGP 16MB which should hopefully run early Windows 3D games like a dream and even get a decently playable experience out of more demanding games like Quake 3 Arena or UT ’99. The Voodoo 3 also benefits from having drivers that are optimised for AMD’s 3DNow! instruction-set and many games received special 3DNow! patches to boost performance.

I now had a list of requirements to help me pick a suitable motherboard. It needed to be Socket 7 for the CPU, and it needed AGP as the variant of the Voodoo 3 I had was in that formfactor. While searching for candidates I stumbled upon a WYSIWYG computer that was retired from some factory floor on ebay listed as “Computer Cyrix M II 333Mhz 64MB SDRAM 4.3GB 2xISA 3xPCI”. No real details in the listing but I could see from the photos that it had an AGP slot and the CPU socket was branded with SOCKET 7, not bad for £30 for a complete system. When it arrived it did contain a Cyrix M-II as listed but to my surprise the motherboard was a Gigabyte GA-5AA which is a Super Socket 7 board.

The chipset is a ALi Aladdin V which before it’s release was not expected to be much compared to the likes of Intel, VIA or even SiS chipsets, based on it’s predecessor the Aladdin IV reputation which was a budget chipset used in some really cheap boards. The Aladdin V however ended up being a power house chipset which met all the requirements for the AMD’s Super7 specification plus more. It supported all current Socket-7 processors, the new Accelerated Graphics Port standard and the fast at the time 100MHz Frontside Bus. The Gigabyte website even claims it supports up-to 140Mhz FSB. The chipset also featured an internal L2 cache, cacheable 133Mhz fast memory SD-RAM support and a USB 1.1 header on the board. So by chance the Gigabyte GA-5AA ended up being a perfect fit for what I needed. This chipset guide article from anandtech.com was very insightful and helped me tremendously at the time when I was identifying the board and its features.

For memory I went with 256 Mega Bytes of 133Mhz SD-RAM since it’s supported by the chipset, later on I discovered that the memory bandwidth caps out at about 313MB/s so any value higher than that would just be diminishing returns. The storage devices I used were a MAXTOR DiamondMax 10 120GB Hard-Disk Drive for game storage and a generic SD to IDE adapter paired with a Samsung Pro 64GB SDHC Card. The Drive shows up as SINTECHI HighSpeed SD to CF Adapter and while it doesn’t get linear speeds as high as the HDD it does have a really low random access time at 0.78ms. I believe the model is SD35VC0 and has a FC1307A chipset. There are two optical disc drives; one 52x speed Samsung CD-ROM drive and a generic CD-RW drive (CDR-7S52), oddly the CD-RW drive has problems reading discs burnt on other machines.

Lastly the most important decision when building a DOS gaming pc is the sound card. I wanted good adlib sound in dos, support for General MIDI, Creative Sound Blaster compatibility and some basic 3D sound support. This meant it had to be an ISA card for true DOS support, some PCI sound cards were able to give DOS sound support through emulation but this always comes at a performance cost.

I started with a Sound Blaster 16 CT2230 which worked well until it didn’t. After an hour or so the voice channels on the card would stop leaving only the MIDI output but no adlib sound or PCM samples. This problem couldn’t be solved so I moved onto a Creative Sound Blaster AWE64 Value ISA CT4500 which worked fantastically and had both support for Sound Blaster 16/AWE and SB2.0/Pro. The General MIDI samples on the AWE64 were somewhat lacking and left a lot to be desired.

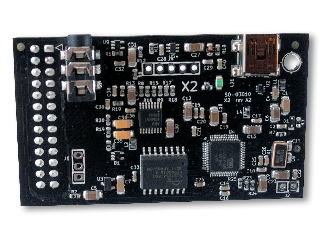
The solution to the lacklustre MIDI sound was to switch to a sound card with a Wavetable header. I used the ESS Technology Schubert v1.2 with a AudioDrive ES1868F chip. This card ended up sounding fantastic in DOS and the Wavetable header allowed use of any of the Serdaco DreamBlaster daughterboard solutions. I started with the S1 and upgraded to the X2. Here’s some posts I made on the X2 and how it sounded at the time. The ES1868F drivers were simple to setup in DOS and has a fast VXD driver component for Windows 9x.
Tuesday, 3 November 2020

Retro Game Wednesdays (Part 1)

A year of streaming with retro hardware.
On September 27th 2019 I began streaming retro pc games on a variety of systems at twitch.tv/whiskey_juliet. I now do this every Wednesday from around 12 midday until 5.30pm GMT.

Over this last year I’ve worked hard to create a decent setup of hardware and software to allow me to stream some of my favourite games and discover some gems I missed thanks to the suggestions of a great community.
During this time I’ve done a lot to tweak and improve that setup. Swapping out hardware, changing methods of capture and solving all the usual problems that go hand in hand with old exhausted computers.

I figured it might be sensible to document the details of what I’ve learned along the way, lest I forget some vital step and have to spend hours pulling my hair out trying to remember some odd config.sys setting.
As an extra bonus it might be useful to some one else.

1.0 The Systems

First up are the computers themselves. There are three rigs which together allow me to play roughly 30 years of gaming history on their intended hardware without emulation or (that many) technical issues. Each rig is connected via a KVM switch (Keyboard, Video and Mouse). This allows for easy switching between each source, without having to rely on changing OBS/capture settings or constantly having to un-plug and swap hardware.

1.1 Retro Rig #1 (DOS/98)

AMD K6-3+ 450Mhz – CPU
Gigabyte GA-5AA Super Socket 7 – Motherboard
256MB 133Mhz SDRAM – RAM
3DFX Voodoo 3 3000 AGP – GPU
ESS Audiodrive ES1868F ISA – Soundcard
X2 Dreamblaster – MIDI Daughterboard

1.2 Retro Rig #2 (XP)

AMD Athlon 64 X2 4600+ 2.4 GHz – CPU
ASUS A8N-SLI Deluxe – Motherboard
4GB Patriot DDR PC3200 – RAM
ATI Sapphire Radeon HD 7770 PCI-E – GPU
Creative Audigy Platinum PCI – Soundcard
Creative Audigy Front Panel – 5″1/4 Bay

1.3 Retro Rig #3 (XP/7)

Intel Core 2 Quad Q9650 3GHz – CPU
Gigabyte GA-P35-DS3L – Motherboard
8GB OCZ DDR2 PC2-8500 – RAM
ATI Sapphire Radeon HD 7970 PCI-E – GPU
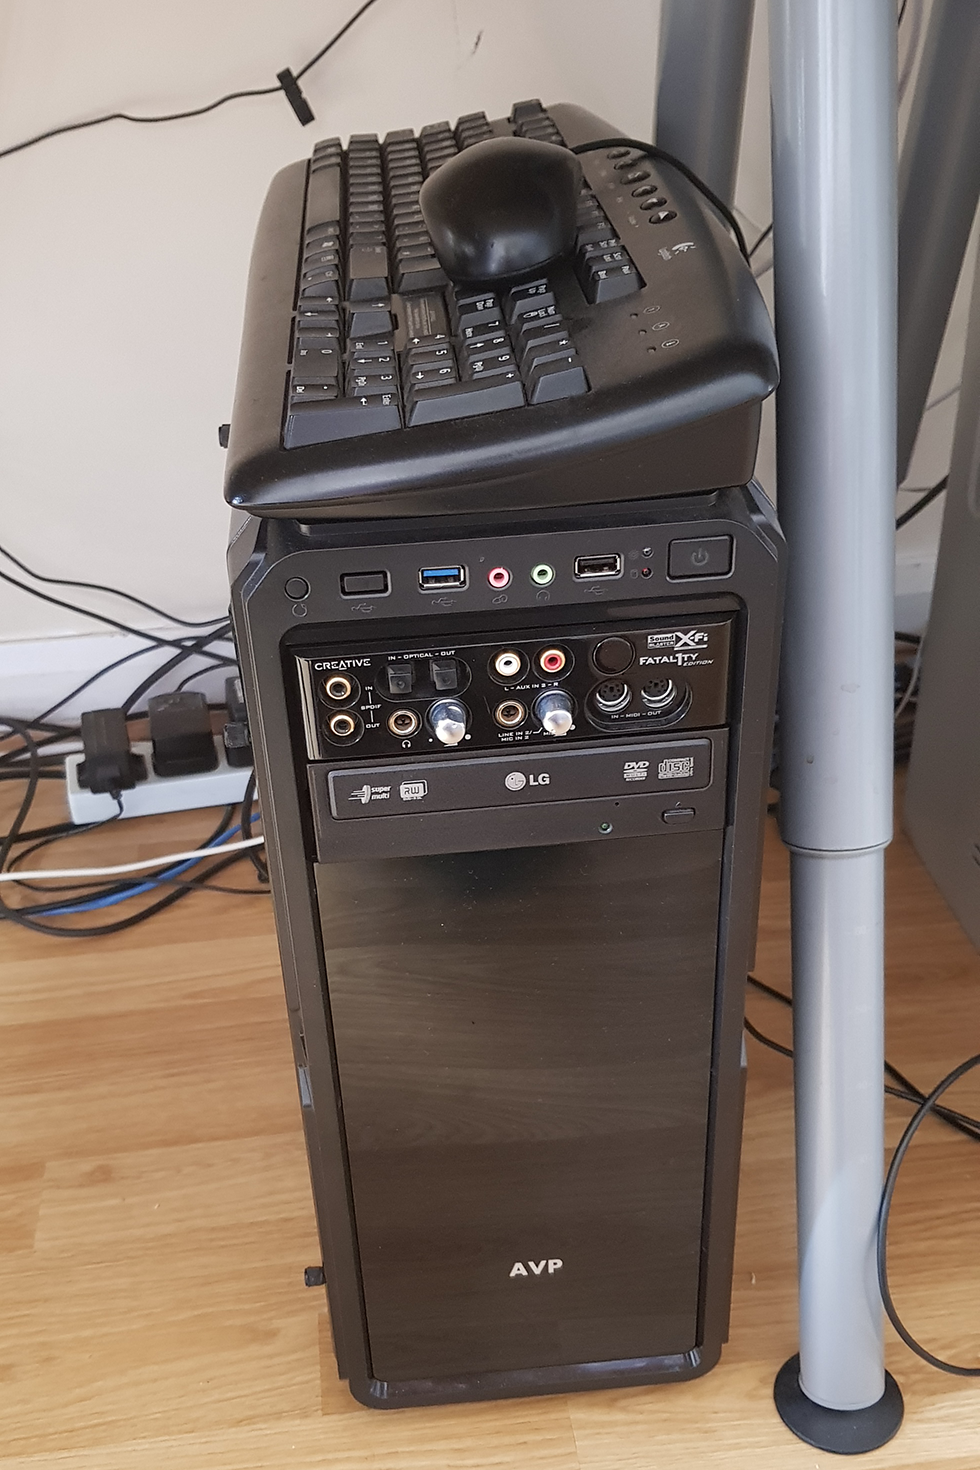
Creative X-Fi Fatal1ty PCI – Soundcard
Creative X-Fi Fatal1ty Front Panel – 5″1/4 Bay

1.4 Stream Rig (Windows 10)

Intel Core i7 7770K – CPU
Asus PRIME Z270-P – Motherboard
Kingston Predator 16GB DDR4 3200 – RAM
Creative X-Fi Fatal1ty PCI – Soundcard
Sapphire Radeon RX 570 8GB PCI-E – GPU
Startech PCIe HD PEXHDCAPVGA Capture Card
Elgato Game Capture HD60 ProHDMI Capture Card
Sewell Manta SW-30008 VGA to HDMIVGA Scaler

In the following posts I’ll go into detail on the building and usage of each of these computers. Covering the topics of hardware choices, operating systems, configuration/tweaks and performance.

Wednesday, 3 July 2019

Sunnycon 2019

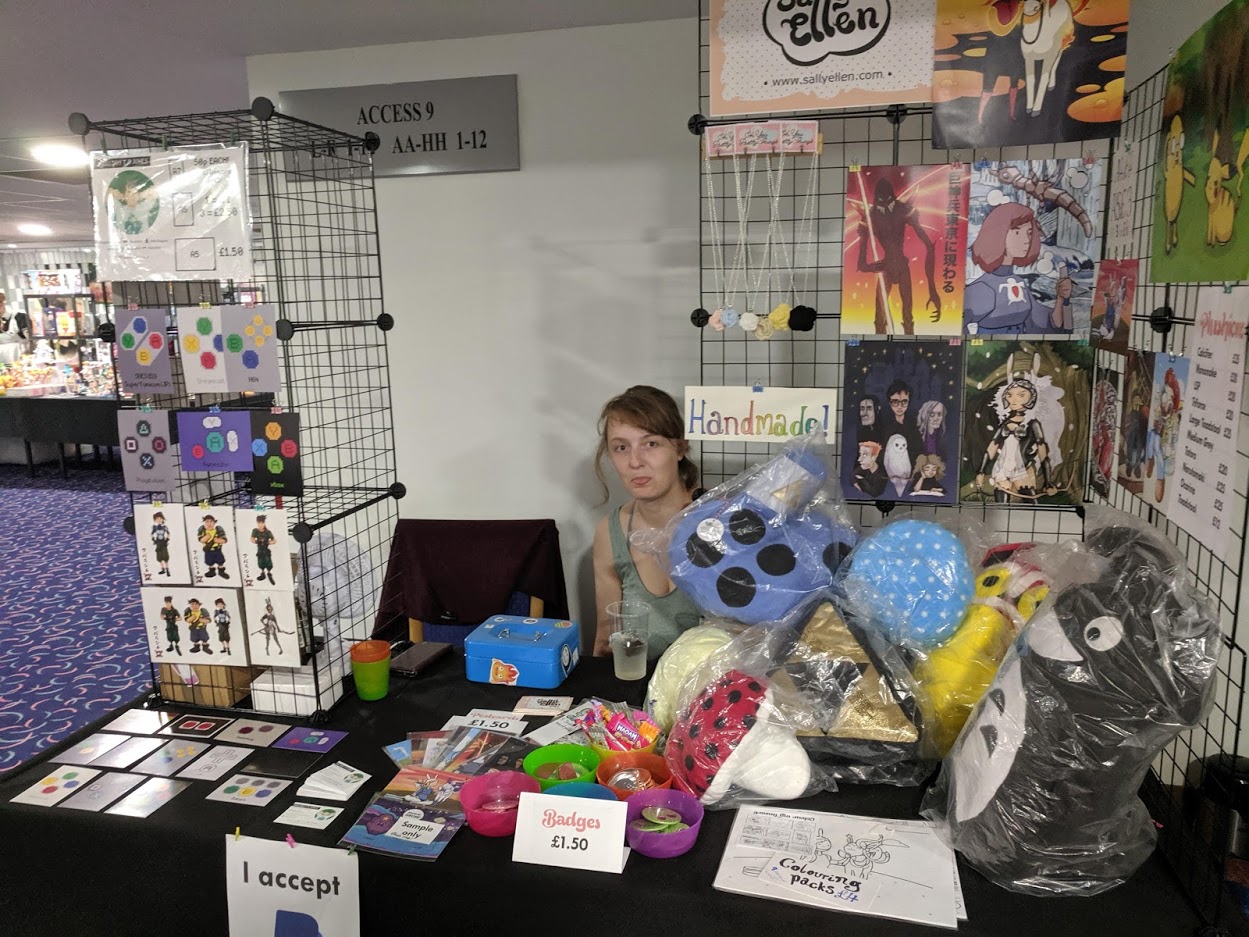
SunnyCon Expo in Newcastle has just come and gone and I shared a trader table with my partner Sarah for the 3rd time.
The turnout was fantastic and we did really well selling our prints and such. Looking forward to next year’s and having some new designs to sell.

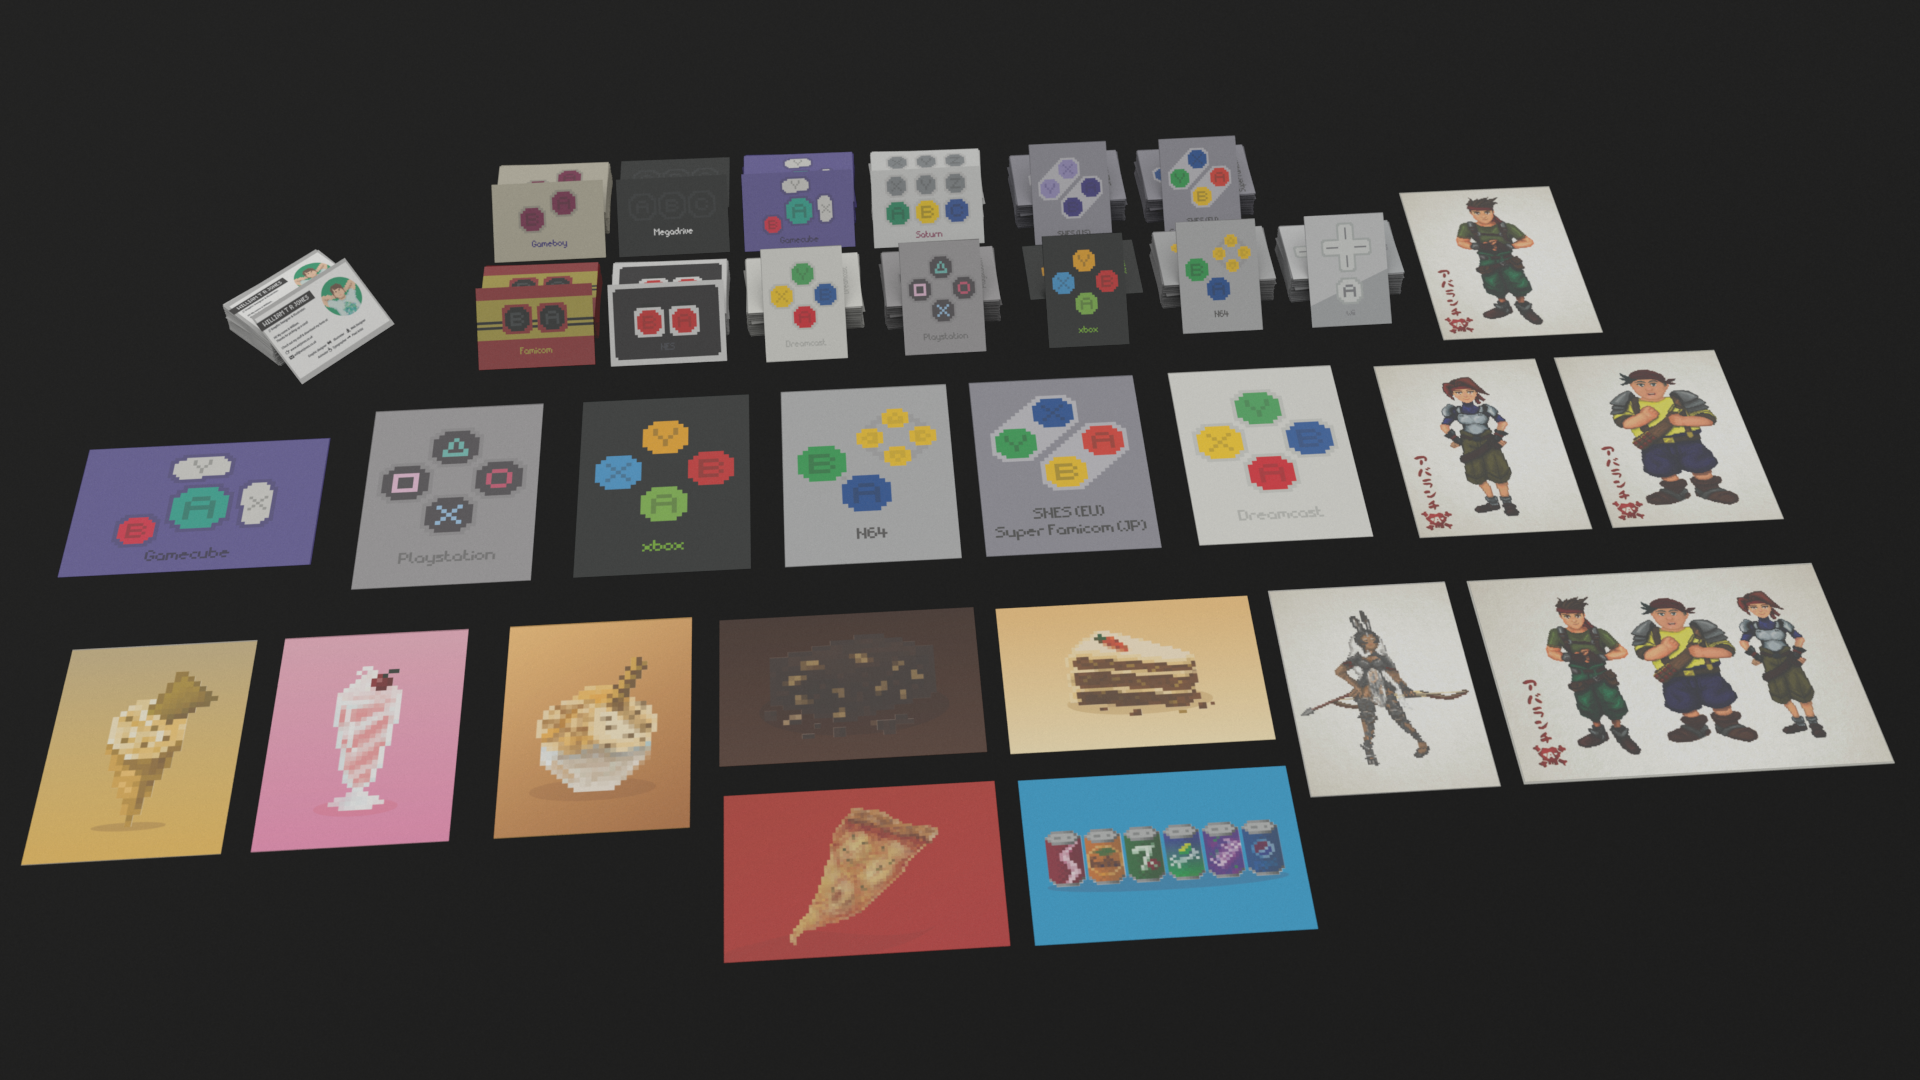
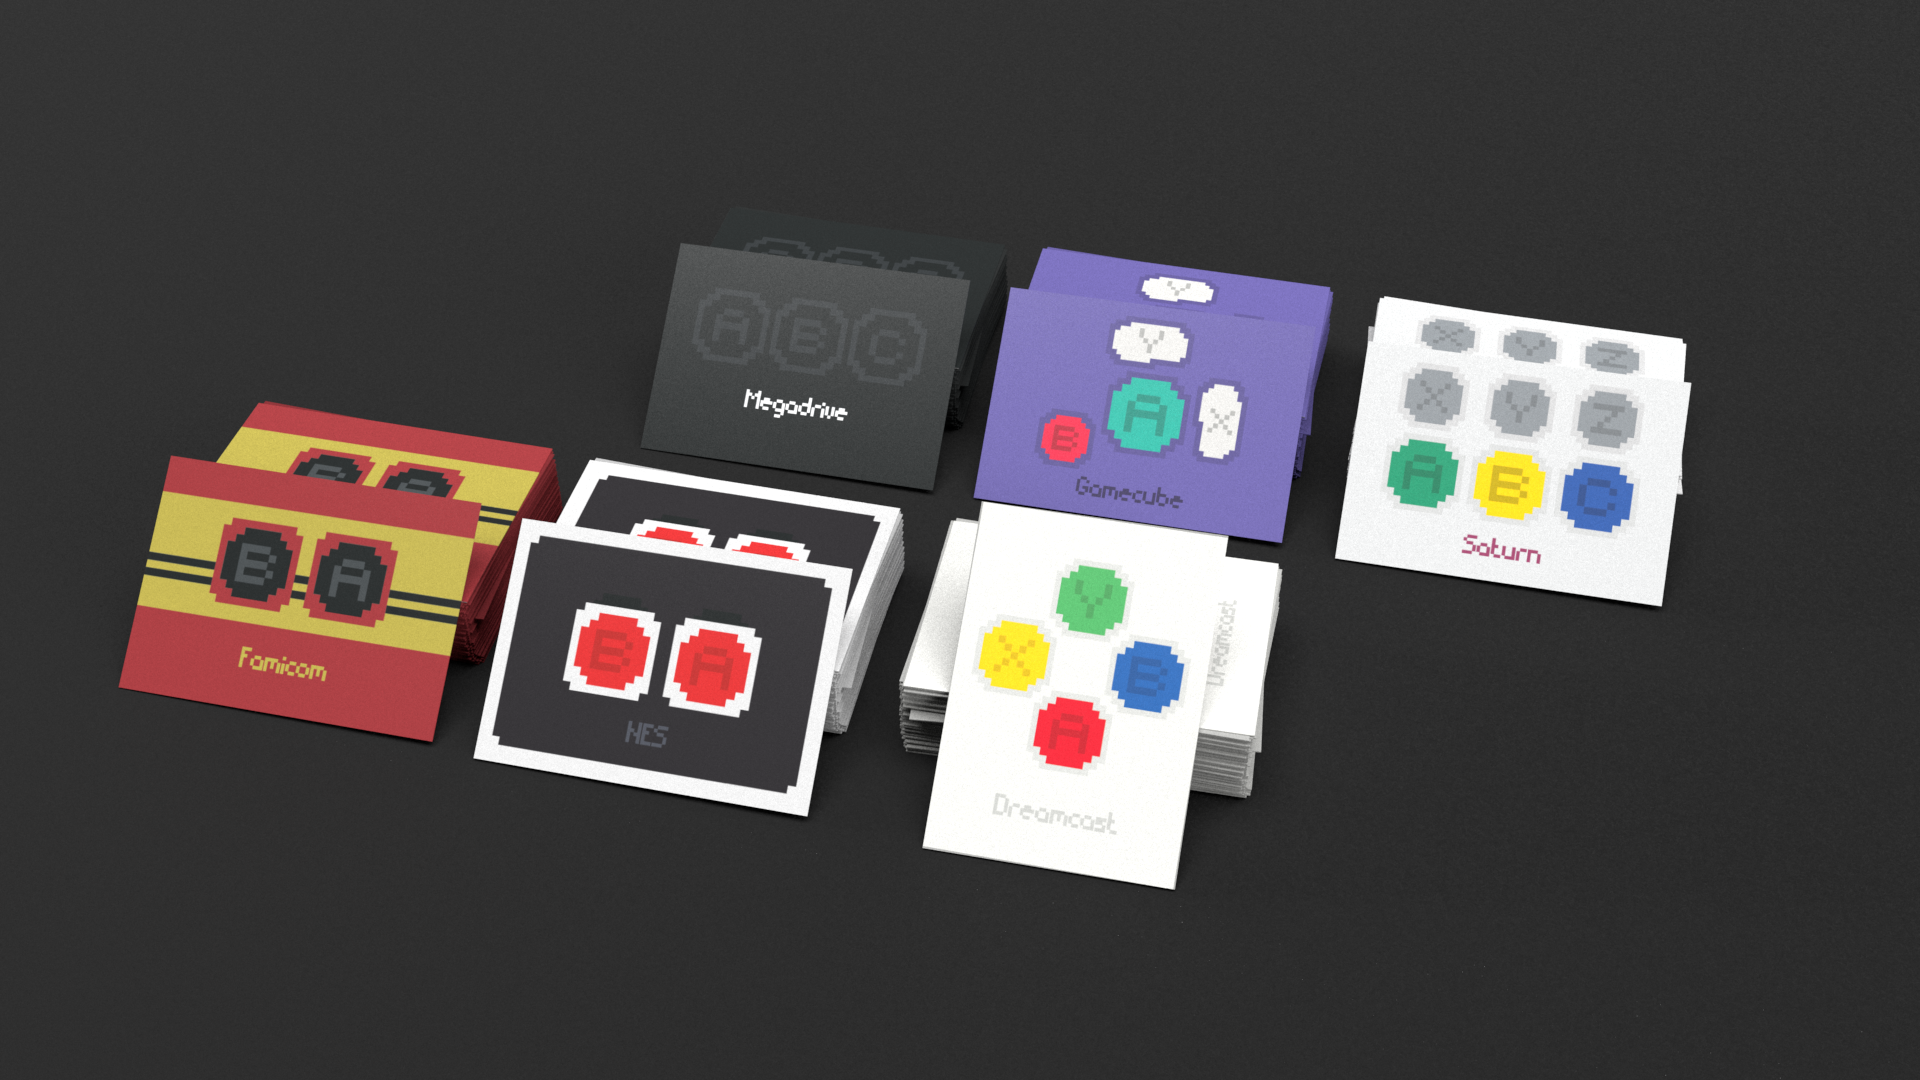
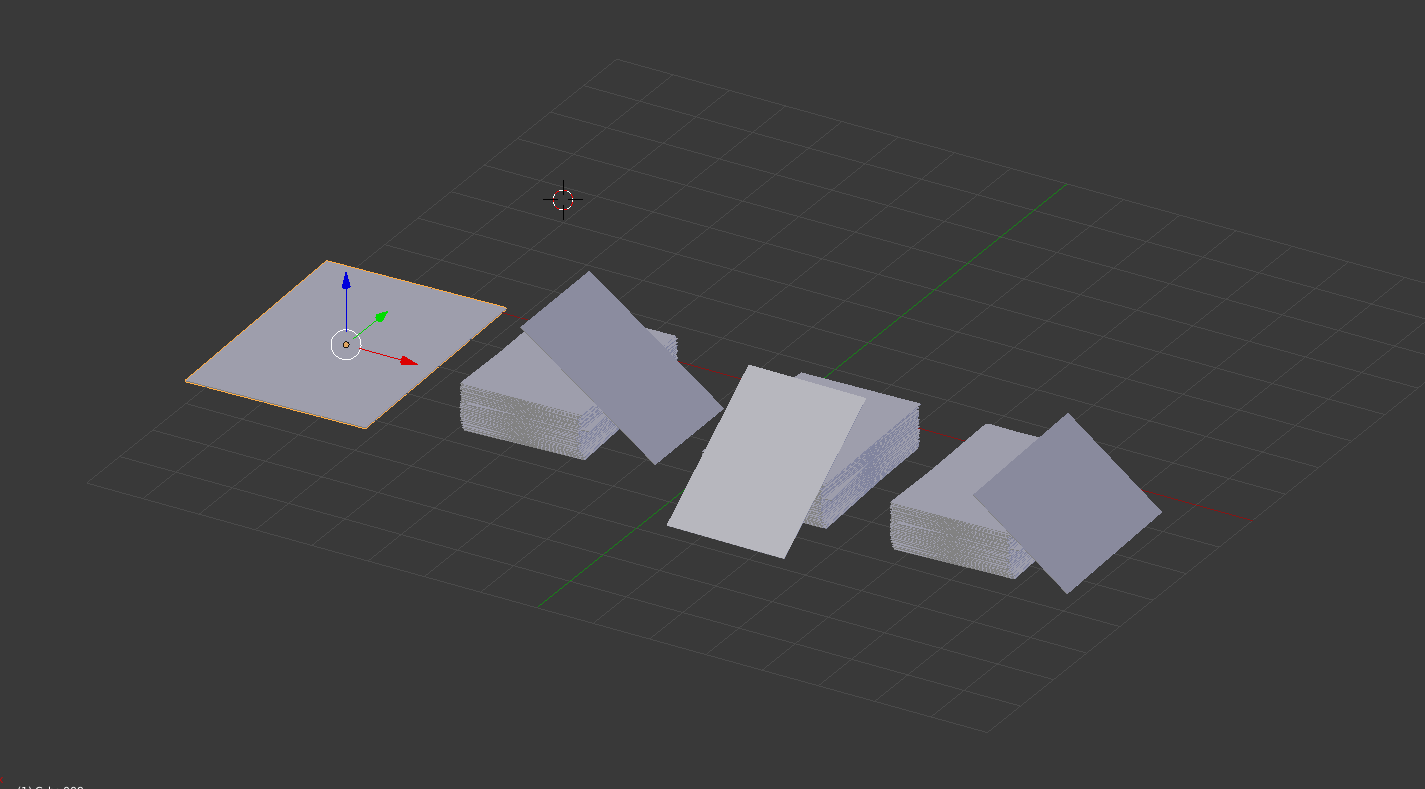
Alas, I didn’t manage to get any good photos of my designs close up on the table, but I’ve been teaching myself the new Adobe Dimension program. With it I have created some renders which I think look quite convincing. I was able to create simple models of the cards/stacks in Blender at the correct proportions and import them into Dimension. I found Adobe Dimension to be simple to use but also a little buggy when rendering multiple models at once, and would error when trying to render more than 4 items at once. A simple way around this was to arrange all the models and then hide all but 4 at a time and compose the images together after.

Thursday, 8 November 2018

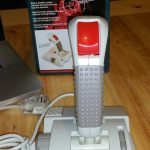
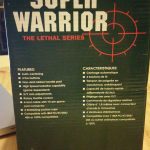
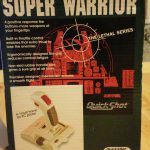
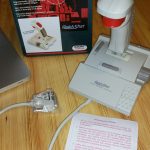
Quickshot QS-201 Super Warrior Joystick – NOS

Video Link

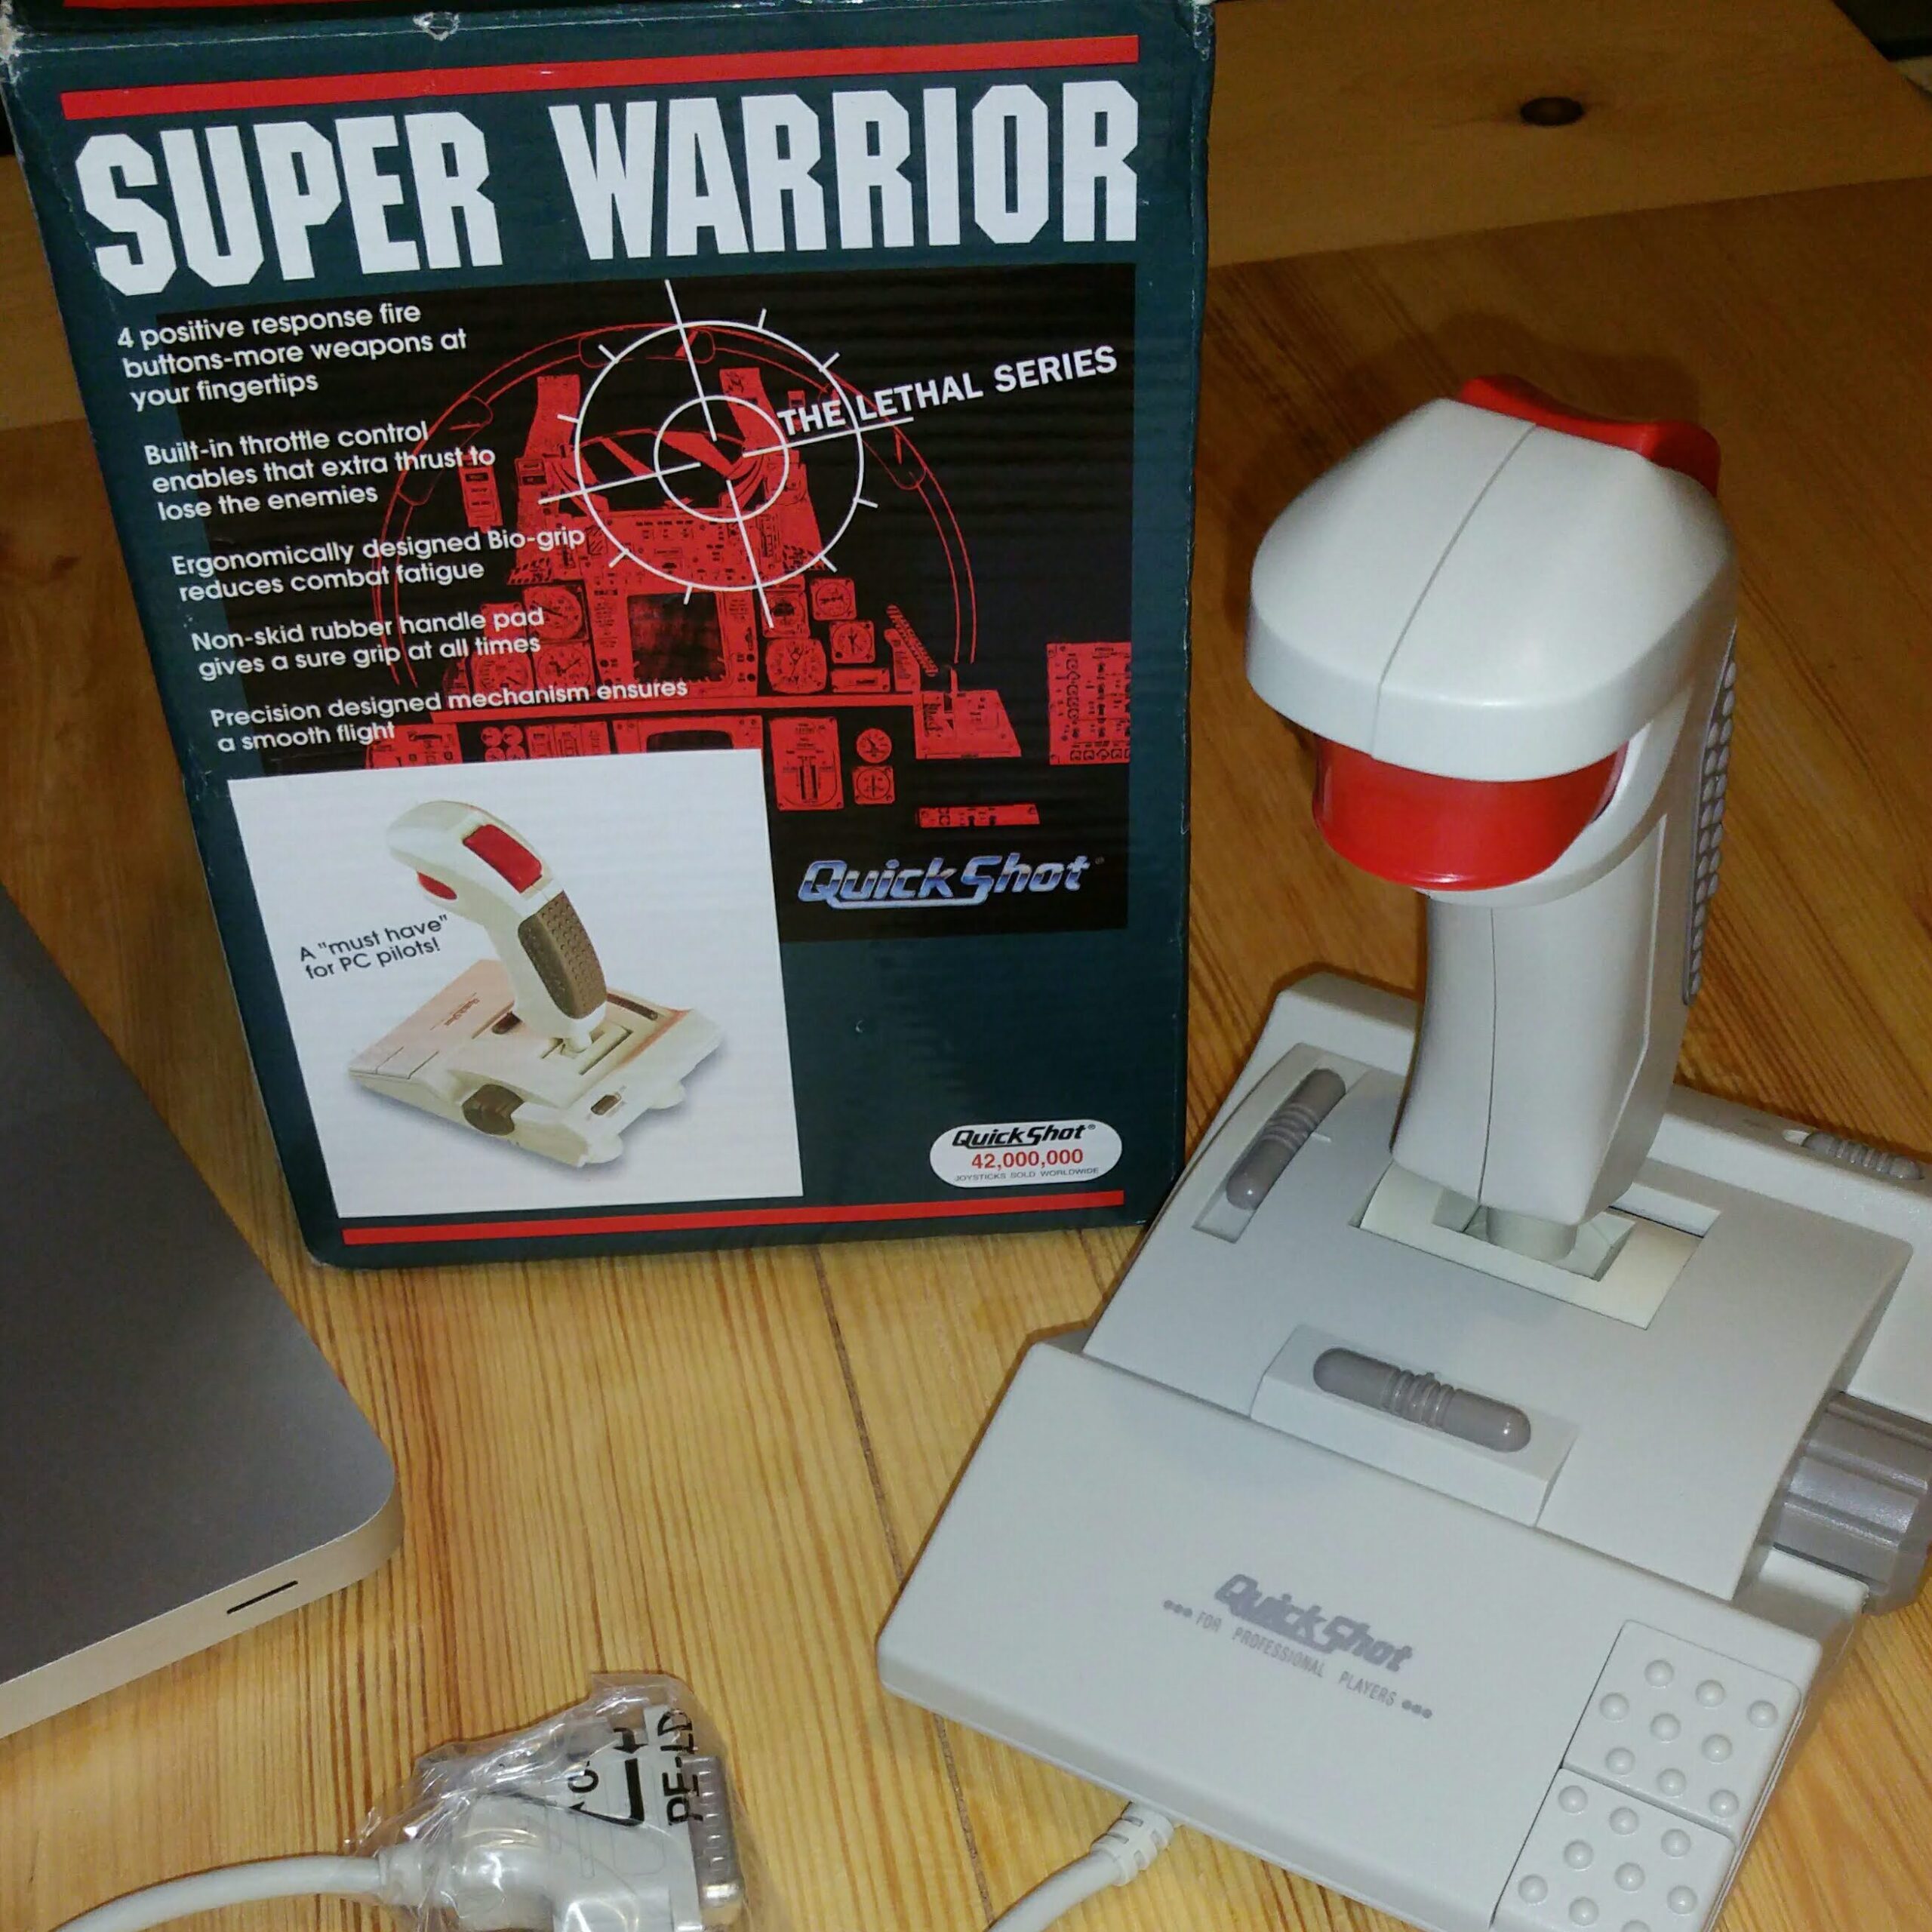
Found a New Old Stock boxed Quickshot QS-201!

This is the closest match I have found to my first ever joystick. The one I had was an even cheaper version of this stick with the same housing and body but only two buttons (red) and just had non moving solid parts for the extra body buttons and throttle control.

I bought it off ebay for cheap as it was only listed as old in box I wasnt expecting it to be in the best of condition. But on its arrival I was thrilled to find it was in fact New Old Stock still in its original factory seal!

As this was rather unexpected I decided to film the unboxing and take a few snaps. This model of the joystick launched sometime in 1993 and was a budget stick even for 90’s standards. I mostly remember playing Rebel Assault and Wing Commander III: Heart of the Tiger with my original stick.

Watch the unboxing video here!

Thursday, 31 May 2018

pxDingbats

pxDingbats – a pixel glyph font




+177 more!

An assorted collection of 218 glyphs and dingbats in true type font (ttf) format. Each character was drawn and vectorised by me. Most are tributes or simplifications of sprites from old games but some are originals. This is pxDingbats.

If your interested in using this font it’s available to download below for free for non-commercial use.
For a commercial licence please email me at licence@wtrjones.co.uk

Download pxDingbats.zip

Friday, 6 April 2018

Recordings from the X2 Dreamblaster - GUD Soundbank v1.0

Here are recordings from a range of titles all using the GUD v1 Soundbank for the X2 Dreamblaster. I’ll soon update the X2 to the newer v1.04 GUD sound bank and record new versions for comparison. All the tracks are recorded from a ESS Audiodrive with the X2 attached to the wavetable header using Audacity.

GUD Release v1.0 Playlists as MP3s
The Soundcloud playlist below are limited to only have a few example tracks. More extensive sets can be downloaded fromGoogle Drive in 320kbps VBR mp3s contained in .zip archives.

If you’d like to update your X2 to version v1.0 or any other version you can download the soundbanks available fromhere.

Friday, 15 December 2017

Central Tweaking Unit – Write Combining with an AMD K6-3+ and a Voodoo 3 3000 – Part 2

As a follow up to my previous post on enabling Write Combining in DOS to improve frame rates, here is how it can be done in Windows (9x).

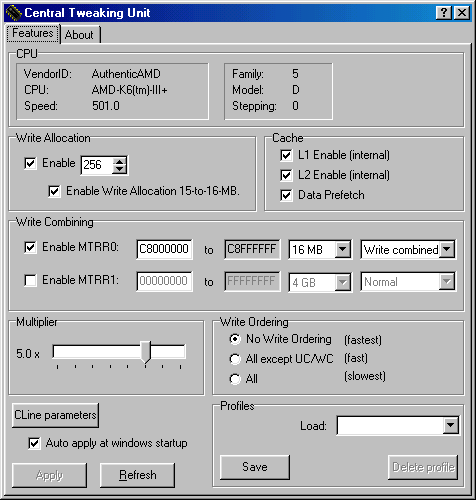
To do this I’ll be using the program Central Tweaking Unit, which looks like this.

Features from top to bottom are:

  • Write Allocation Settings.
  • Enabled / Disabled checks for CPU caches and Data Prefetch.
  • Write Combining settings ( this is what I’ll be explaining in this post).
  • CPU multiplier controls.
  • Write Ordering (Write Combining Methods).

With CTU we can simply plug in the information we used in DOS into the MTRR0 row. In my case the address for the memory on my Voodoo 3 (C8000000), the amount of memory (16 MB) and the mode (Write Combined). CTU will use this information to calculate the “to ADDRESS”. Enable MTRR0 and press apply. The improvements are instant and no system reboot is required. The 2nd MTRR1 row can be used if you have two graphics cards to enable Write Combining on that card also, an example would be if you had a GeForce or Radeon AGP card for D3D and a 3dfx card for Glide in a PCI slot.

With Write Combining enabled I see vastly improved frame rates in every 3D game I’ve tried. Turning Serious Sam from a stuttering slide show into a playable good looking experience. Another thing to note is I saw much better results using official glide libraries and minigl dll’s than with WickedGL.

Central Tweaking Unit is available to download from the VOGONS Vintage Driver Library.

Thursday, 7 December 2017

K6WCX - Write Combining with an AMD K6-3+ and a Voodoo 3 3000

The program SETK6v3 (SETK6D.exe for dos) will list available PCI Framebuffer addresses for the memory on my Voodoo 3 3000 (16mb). You can then use the program K6WCX to define them and the memory size which will enable Write Combing and thus a nice boost to FPS in benchmarks and games like Quake and PC Player Benchmark.

It should be noted that this only worked for me in Extended memory mode but not in Expanded.

C:\K6WCX\K6WCX.EXE C8000000 128

The “C8000000” parameter is the 2nd address reported by SETK6D which seems to be the one that works for me. The other being “CC000000” which although could be mapped did not boost performance.
The other parameter “128” is the amount of allocatable memory available multiplied by 8. In this instance 8 x 16 MB on the Voodoo3.

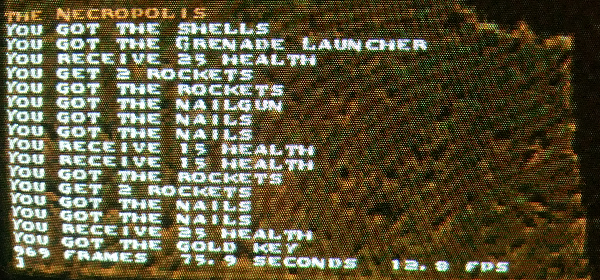
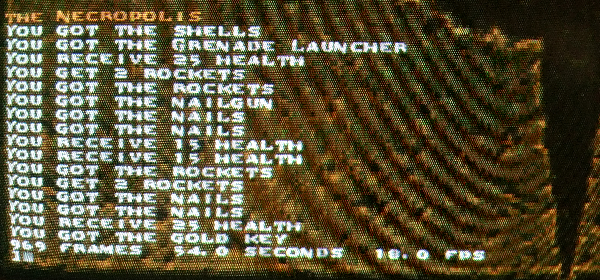
The performance boost gained is surprising and almost doubles frame rates in some cases.

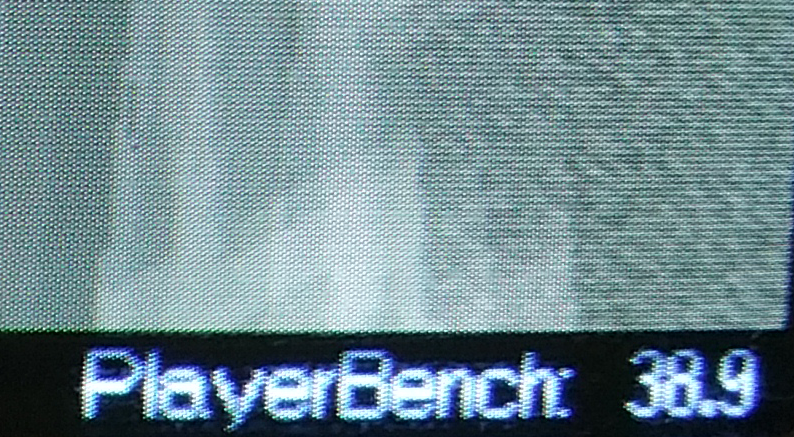
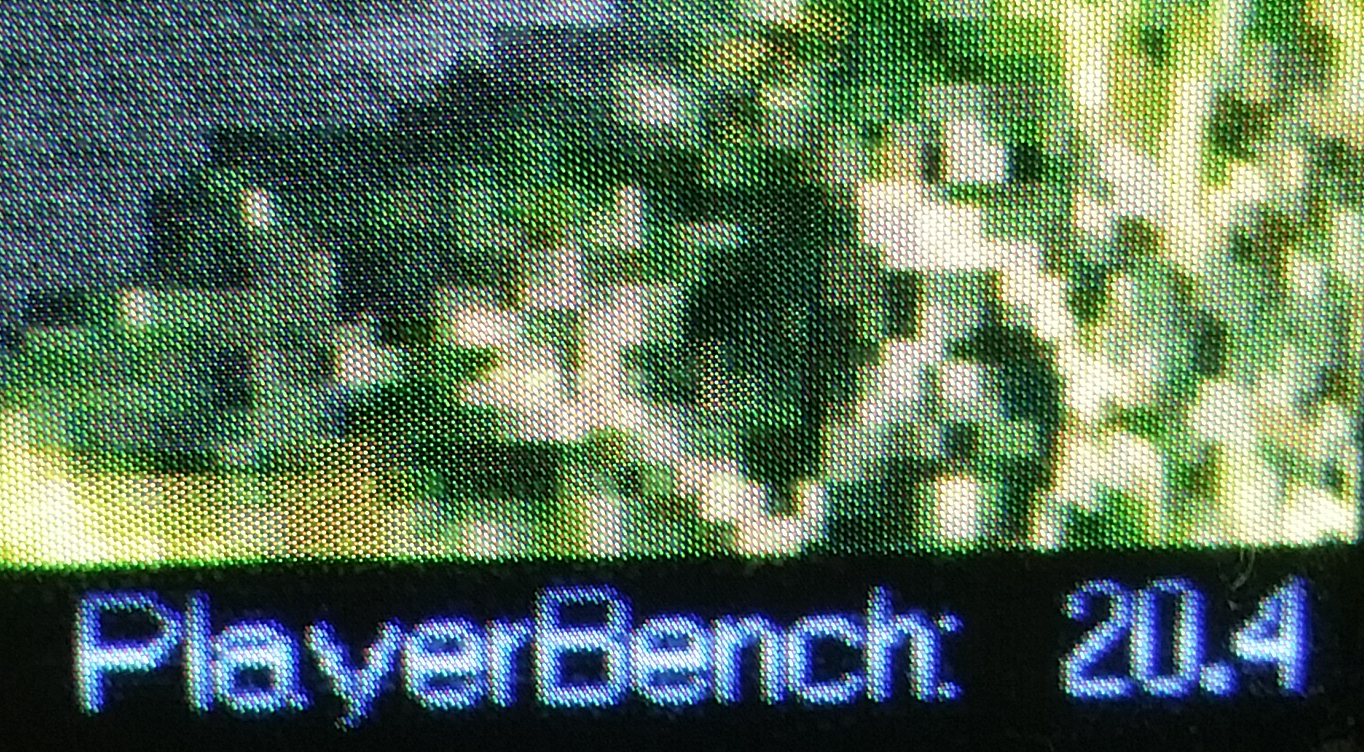
PC Player Bench at 640×480 goes from 20 to 39.9 fps.

Quake at 640×480 also sees a good increase in fps from 12.8 to 18 fps.

Doom benchmark on max details for Fast PCs timed 2134 gametics in 495 realtics with out WC enabled and 2134 gametics in 517 realtics with.
To calculate that into fps its “35*2134 / realticks”. The opposite happens here and we loose some frames, with Write Combining off we get 150.8 fps but enabled only 144.4 fps.

A quick runabout in System Shock showed some improvement in 640×480 at max details, but the extent of improvement in other games requires more thorough testing.
So in summery it seems like a handy feature which is able to squeeze a little more performance out of those graphically intensive later 3D DOS games, if your CPU supports it.

None of this would have been possible with out links to the tools and a great breakdown of how they work from Phil’s Computer Lab, I suggest you check him out on youtube and grab the tools mentioned in this post over on his site.


Dos Graphics Boost Tutorial – Phil’s Computer Lab | Phil’s Computer Lab Website | Phil’s Computer Lab on Youtube

Wednesday, 17 May 2017

Recordings from the X2 Dreamblaster - Update GUD Beta v0.7

Two more recordings from the Dreamblaster X2, using the new GUD Beta v0.7 sound bank and Preset Audit v2 for levels.

Track one is Duke Nukem 3D’s title song ‘Grab Bag’ and track two is Doom’s E1M1 song ‘At Doom’s Gate’.

This update brings the following changes to v0.6.

  • Reduced dynamics floor to -36dB on all 128 instruments for more modern, compressed sound. It sounds better on low levels when gaming.
  • Corrected “D149-Crash Lower” and “D157-Crash” volume/velocity curves. Crash now hearable in Doom.
  • Corrected “118-Synth Drum” Synth Drum tuning
  • Corrected “98-Crystal SFX” Crystal tuning
  • Corrected “77-shakuchachi” sample start, volume and tuning
  • Corrected “73-flute” sample start, volume and tuning
  • Corrected “78-Irish Thin Whistle” sample start, volume and tuning.

If you’d like to update your X2 to version 0.7 you can download the sound bank here.

Wednesday, 10 May 2017

Recordings from the X2 Dreamblaster

The X2 Dreamblaster is a Midi interface Wavetable board created by Serdaco BVBA a small company located in Oudenburg, Belgium.

Serdaco make a whole bunch of boards, devices and kits for legacy PC sound systems, such as Wavetable header boards, a Covox Speech Thing Clone (CVX4), external adapters and interfaces.

Some of which are compatible with older daughter boards and hardware. If you’re interested in retro sound hardware please check out their shop serdashop.com.

Recently they have released a new beta sound bank for the X2 board named GUD 0.6 which aims to be a more balanced general midi compliant bank. To help with testing I’ve made some recordings with the new bank.

These recordings are taken from the Line-out port on the X2 and saved using Audacity and the LAME mp3 codec. Dosbox was used to play Monkey Island and Sam & Max was played in Falcosoft’s Soundfont Midi Player 4.6.

First is the General Midi rendition of The Secret of Monkey Island’s intro song. The original DOS version is only MT-32 Midi compatible but that can be solved with the Ultimate Talkie Edition community patch.

This patch will compile DOS and SCUMMVM compatible versions of Monkey Island with full General Midi sound and voice acting from the Special Edition Re-release.

I strongly recommend grabbing a copy of that version from Steam along with LeChuck’s Revenge Special Edition too.

Second is a straight up recording of the intro credits song from Sam & Max Hit the Road, the midi is ripped from the game and obtained from the Mirsoft.info Game Music Base.

The GUD sound bank is shaping up to be a real upgrade to the base ‘Dream’ sound bank. If you would like to try the beta bank its available in the Serdaco X2 downloads section.
Along with instructions, existing sound banks and tools.