Friday, 6 November 2020

Retro Game Wednesdays (Part 4)

2.2 DOS Drivers, TSR’s and Utilities

There are many drop in replacements for old DOS components thanks to the work of individuals or groups like the Free Dos Project. A fantastic resource is the Vogons Wiki page called Useful DOS utilities. I experimented with a range of Drivers, replacement TSR’s and Utilities until I settled on this combination.

XMGR – An Extended Memory Manager replacement for HIMEM by Jack R. Ellis.

JEMM386 – An Expanded Memory Manager replacement for EMM386 based on the source of FreeDOS EMM386. Made by Andreas Grech.

UMBPCI – A TSR which enables Upper Memory without switching CPU to Virtual 8086 mode. Handy for freeing up a lot of Conventional memory by loading other TSR to the Upper Memory while staying in Real Mode for older games. Currently maintained and updated by Uwe Sieber.

SHSUCDX – A Modern CD-Rom Driver replacement for MSCDEX, with caching, single-sector buffering and a smaller memory foot-print by Jason Hood.

CuteMouse – A replacement mouse driver. It is one of, if not the smallest memory foot-print mouse driver for DOS. It supports three button scroll wheel mice in DOS with very granular control over sensitivity. Made by Eric Auer and Daniel Nagy.

SetMul – A utility which changes the CPU multiplier, L1 and L2 cache operation on the fly within DOS for AMD K6+ processors. By gerwin on vogons.org. This is by far the most useful tool for getting older games to behave as they should.

k6wc/k6wcx – A utility for enabling Write-Combining on the AMD K6 by Uart. This massively speeds up 3D games. See this post I made previously on calculating your memory ranges and getting it to work.

Documentation for each of these utilities is included with the downloads from their respective sites. Most are quite simple to use and work in a similar manner to what they are designed to replace. However I have included copies of my autoexec.bat and config.sys because examples always help. These files will also contain my modified boot-menu.

A Quick Thanks
I’d just like to thank Philip Hoefer of Phils Computer Lab, Jack R. Ellis for XMGR, Andreas Grech for JEMM, Uwe Sieber and Andreas Stiller for UMBPCI, Eric Auer and Daniel Nagy for cutemouse, John H. McCoy and Jason Hood for SHSUCDX and finally all the folks at Vogons.org who keep these files alive, downloadable and documented. Without a community such as this my task would have been almost impossible.
Autoexec-Config.zip (4859 downloads )

A zip file containing copies of my AUTOEXEC.BAT and CONFIG.SYS.

Thursday, 5 November 2020

Retro Game Wednesdays (Part 3)

2.1 Disk Operating System aka DOS

There are many flavours of DOS; the most common was MS-DOS but there were alternatives like DR-DOS, IBM’s PC DOS or 86-DOS and now there’s the likes of FreeDOS, the free DOS Project which is a modern Open Source variant. Now the machine I intended to play DOS games with was also to be the one I’d use to run early Windows 9x games. So the simplest solution was to just spend some time configuring the underlying DOS that’s included with Windows 9x versions.

Windows 98 Second Edition is what I intended to use so that meant I’d be using DOS version 7.1. The first problem arose here with some DOS programs checking for a minimum version requirement on launch, but errored out because 7.1 is not a recognised value. This is likely to be because most software was not updated beyond the last retail release of DOS (version 6.22).

Luckily the tool SETVER has been included with MS-DOS since version 5 to configure any programs looking for specific DOS versions earlier than the one you’re running. You can add a program to the version table with the following syntax.

 SETVER [d:]:path][filename (number)][/delete][/quiet]
For example: SETVER C:\doom\doom.exe 6.22 

The flag /delete or /D can be used to remove a program from the version table and /quiet /Q stops any message being shown.

 SETVER C:\doom\doom.exe /delete 

To view all the entries on the version table you can run SETVER with no flags from the command line, this list can be long so you can use the “| more” option to paginate it. Once configured add SETVER to your CONFIG.SYS file using DEVICEHIGH.

 DEVICEHIGH=C:\WINDOWS\SETVER.EXE 

When I first configured DOS I used Phil’s DOS boot menu from his very helpful MS-DOS Starter Pack along side his DOS Mode Super Easy guide. These are fantastic and give you a clean starting point for boot-up configurations for Conventional, Enhanced and Extended Memory options. This also covers the setting up of the ‘Exit to DOS’ shutdown option in Windows. A essential resource for new users it helps you understand how the autoexec.bat and config.sys files are structured and how the drivers and TSR’s (Terminate and stay resident programs) are loaded.

As time went on I customised this menu with additional boot-up configurations, these allowed for better support for hardware and in some cases led to a more stable system. The Microsoft provided default memory managers and drivers for DOS are HIMEM (Extended memory manager), EMM386 (Expanded memory manager) and MSCDEX (CD-Rom driver). These however can be a bit clunky and can take up too much space in the lower memory bounds.

I started using other memory managers and drivers so I could run games and software I couldn’t with Microsoft’s old ones, at least not without having an excessive amount of system boot discs. These new drivers and memory managers help to free up more Conventional memory while still having sound, CD-ROM and mouse support. Being able to use Write-Combining along side EMS and XMS to improve 3D rendering times. Also in some cases it made games work that under HIMEM and EMM386 were prone to crashes or not even launching.

Wednesday, 4 November 2020

Retro Game Wednesdays (Part 2)

2.0 A Machine to Run Two Decades of Gaming (1989-2001)

I’ll going to start off looking at the oldest machine (referred to as ‘Retro Rig #1’ in my previous post), which I use for DOS and Windows 9x games. I’ll cover my hardware choices, any changes I had to make to those choices, discoveries I made while tweaking, optimising and fixing the problems that arose during usage. My aim was to build a single machine which could give an enjoyable experience playing a wide range of games, from early DOS all the way to the end of Windows 9x with the release of XP in 2001. I initially began building this machine in 2016 and made a thread on vogons.org at the time, since then its evolved somewhat.

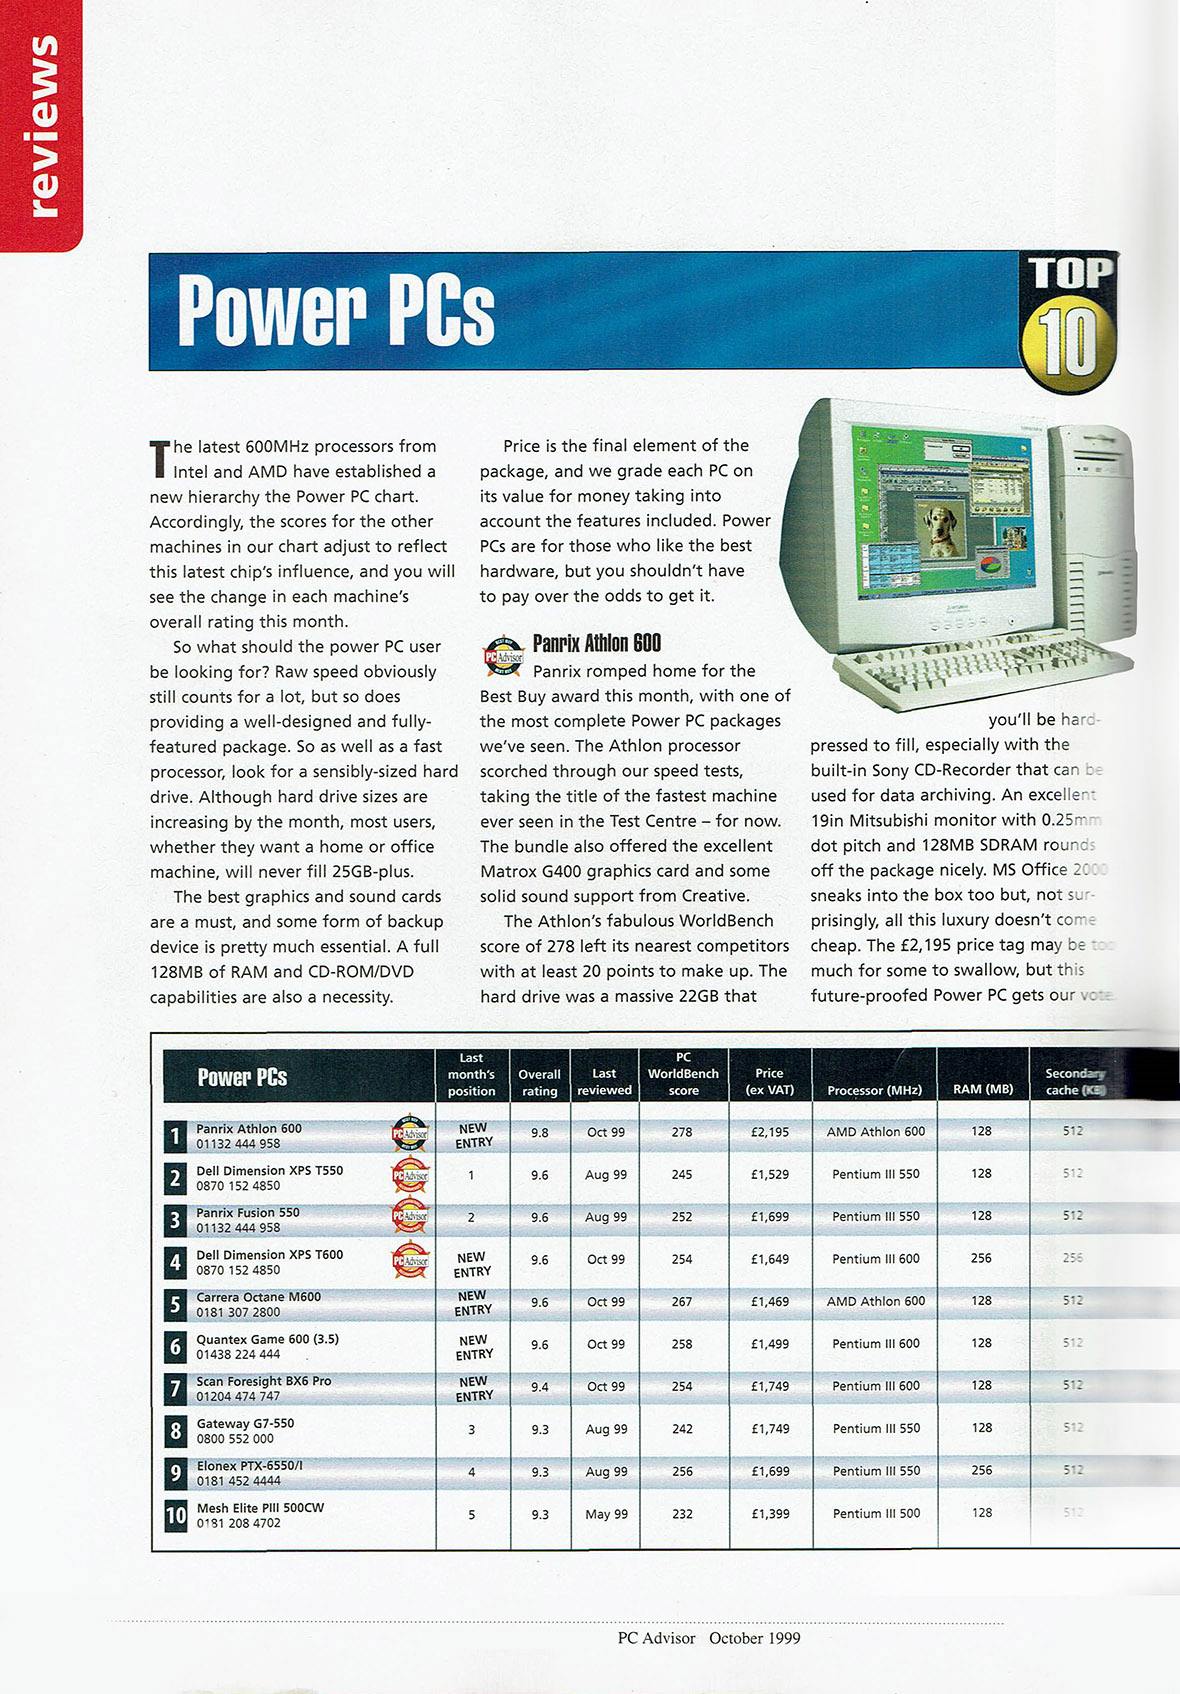
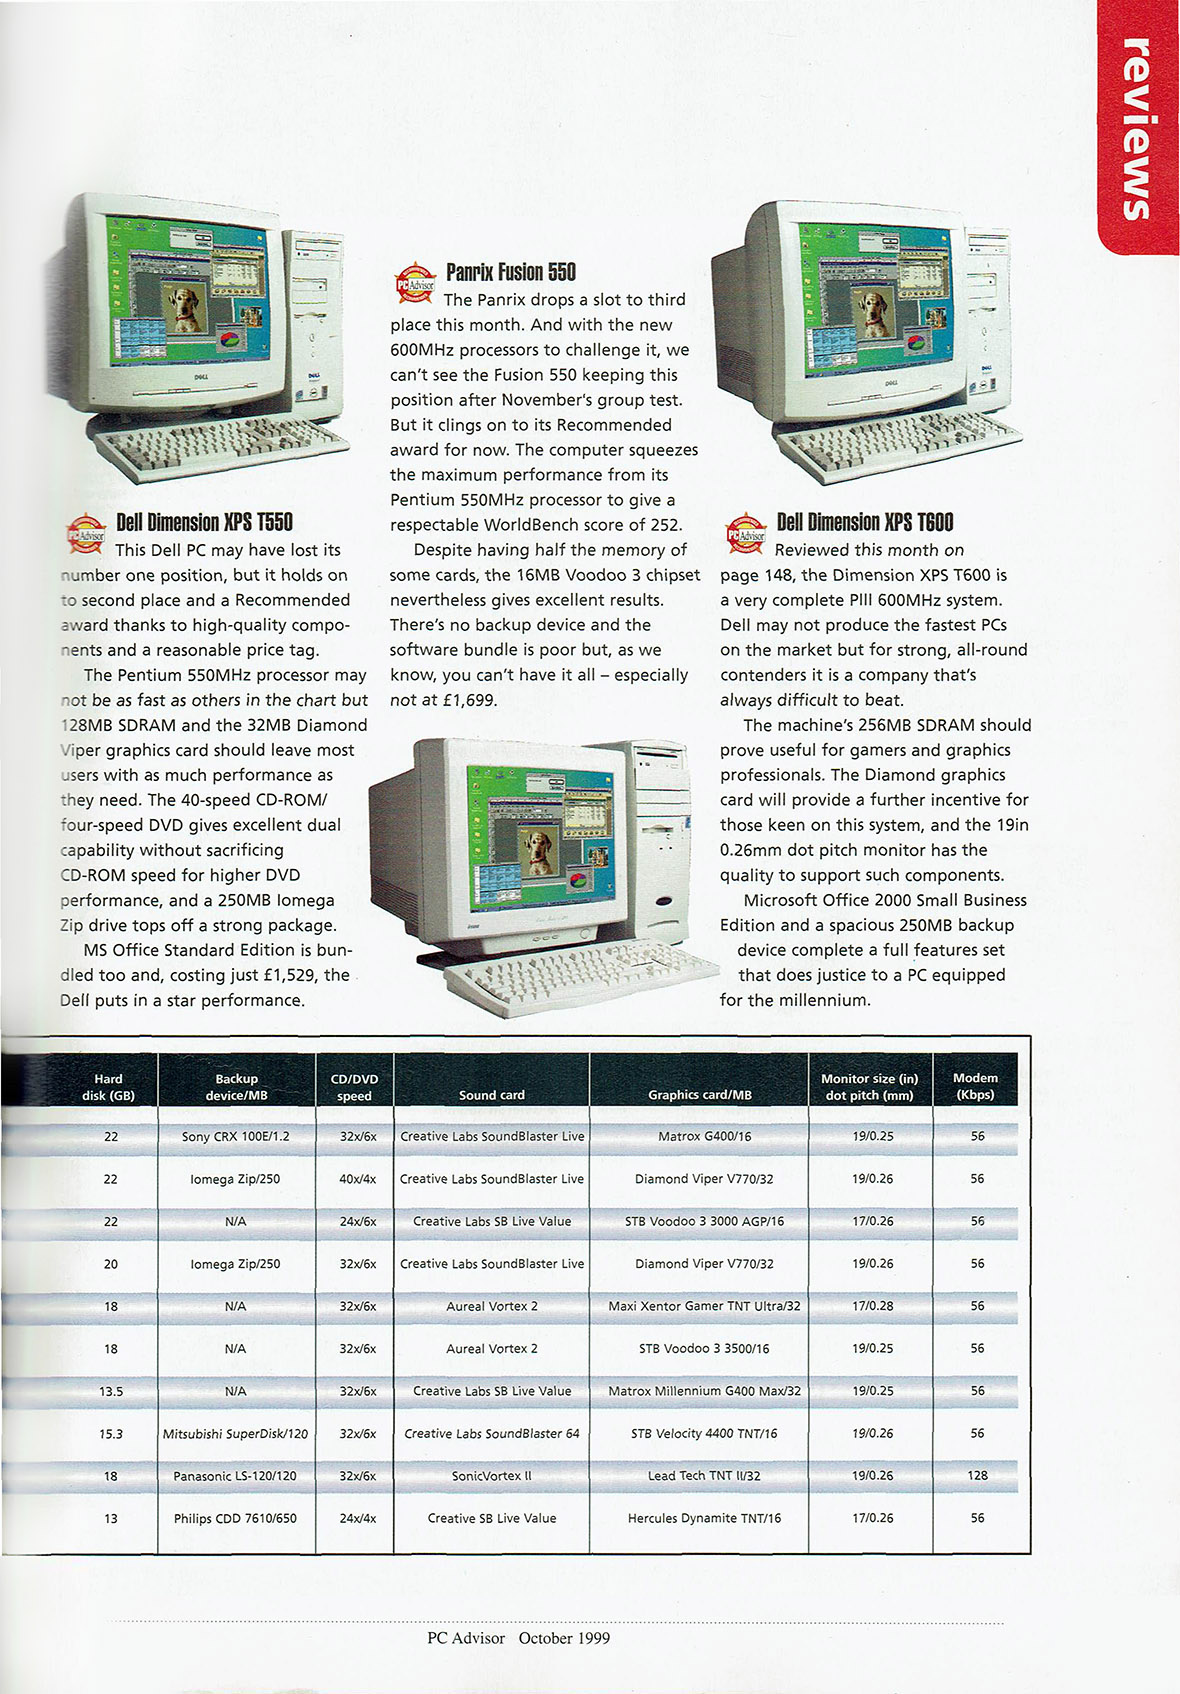
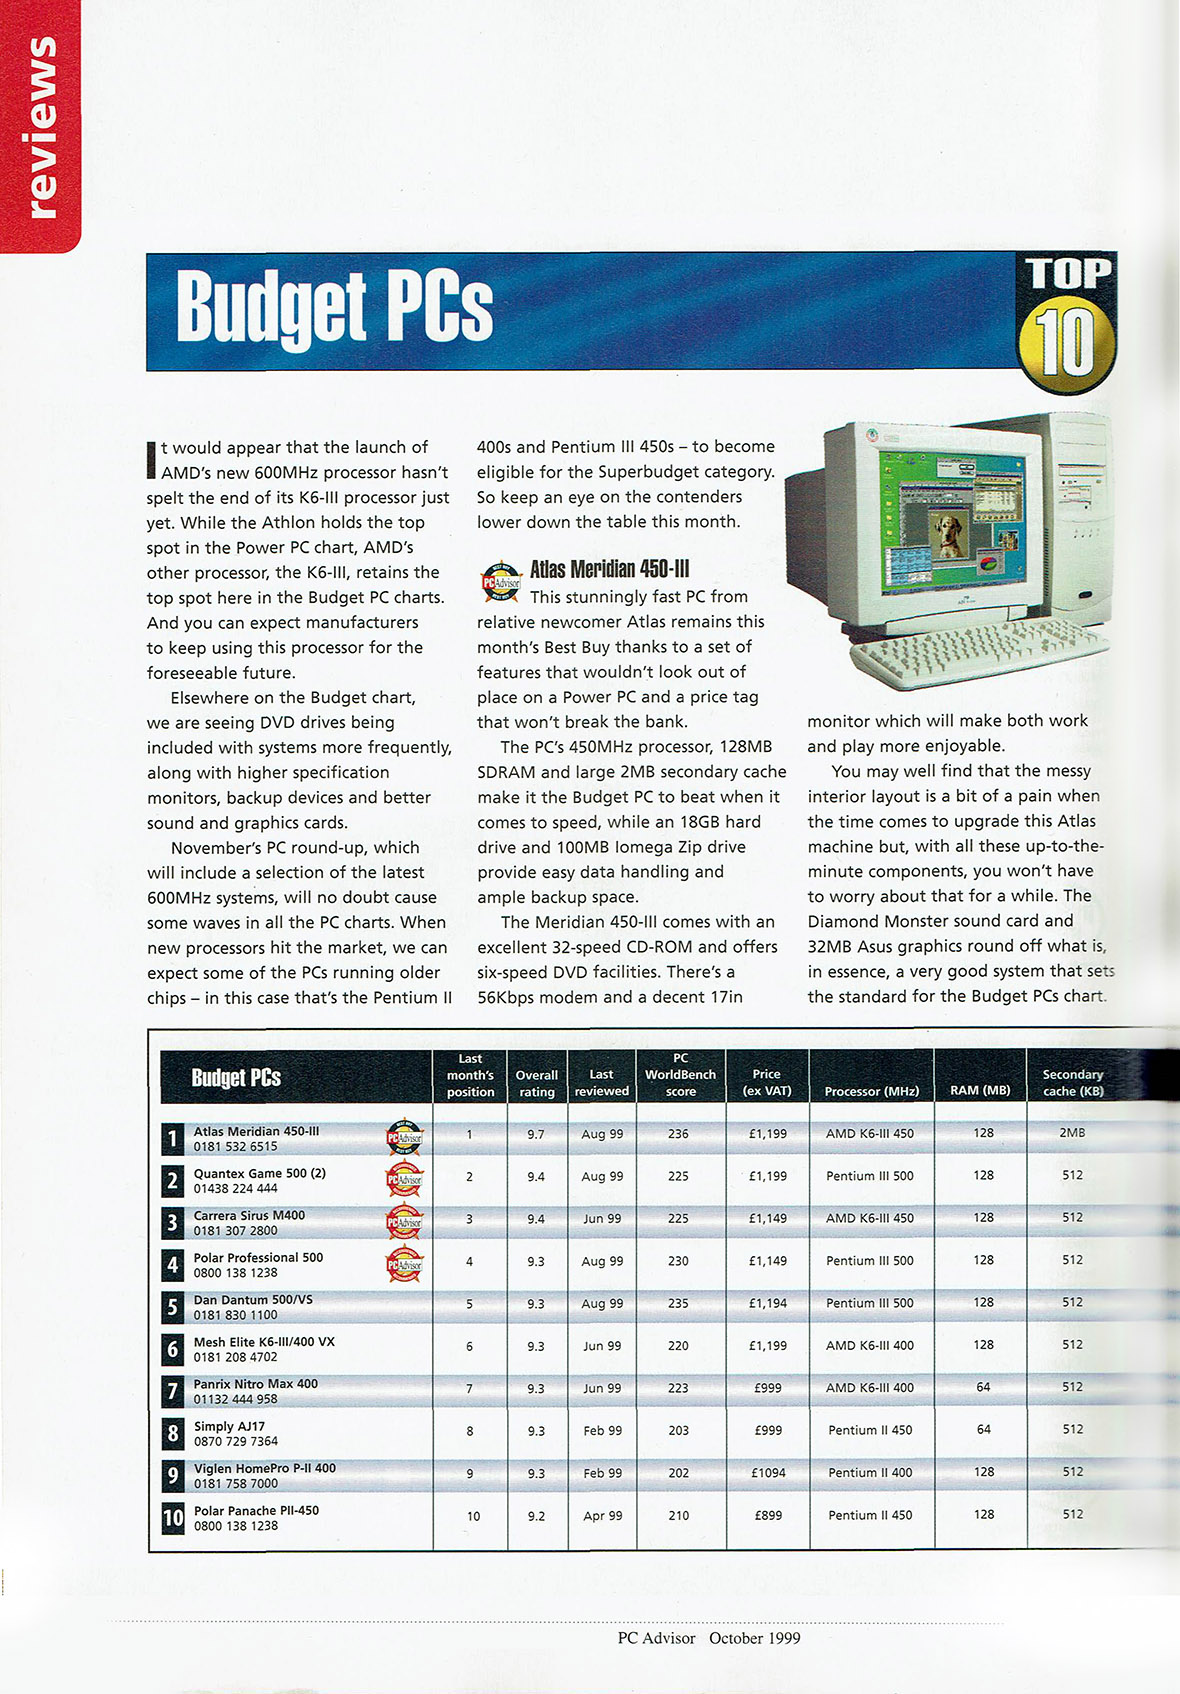
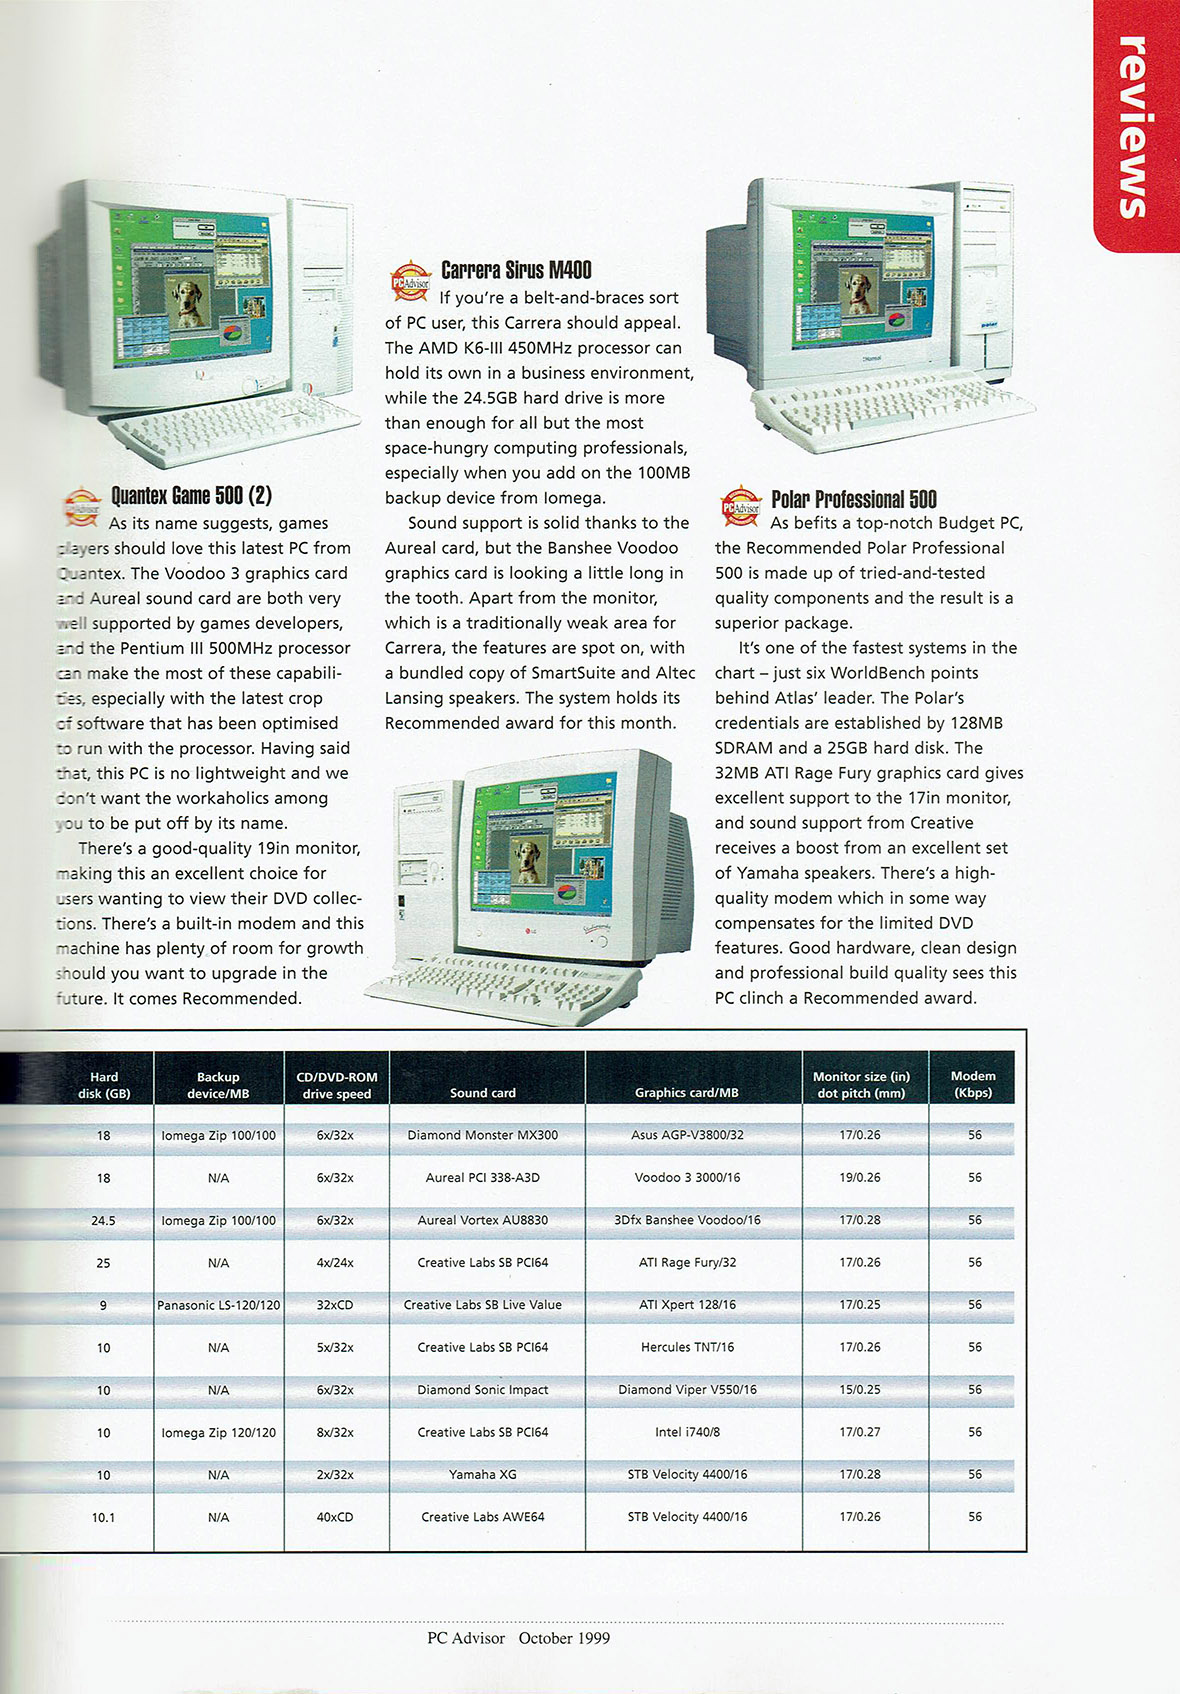
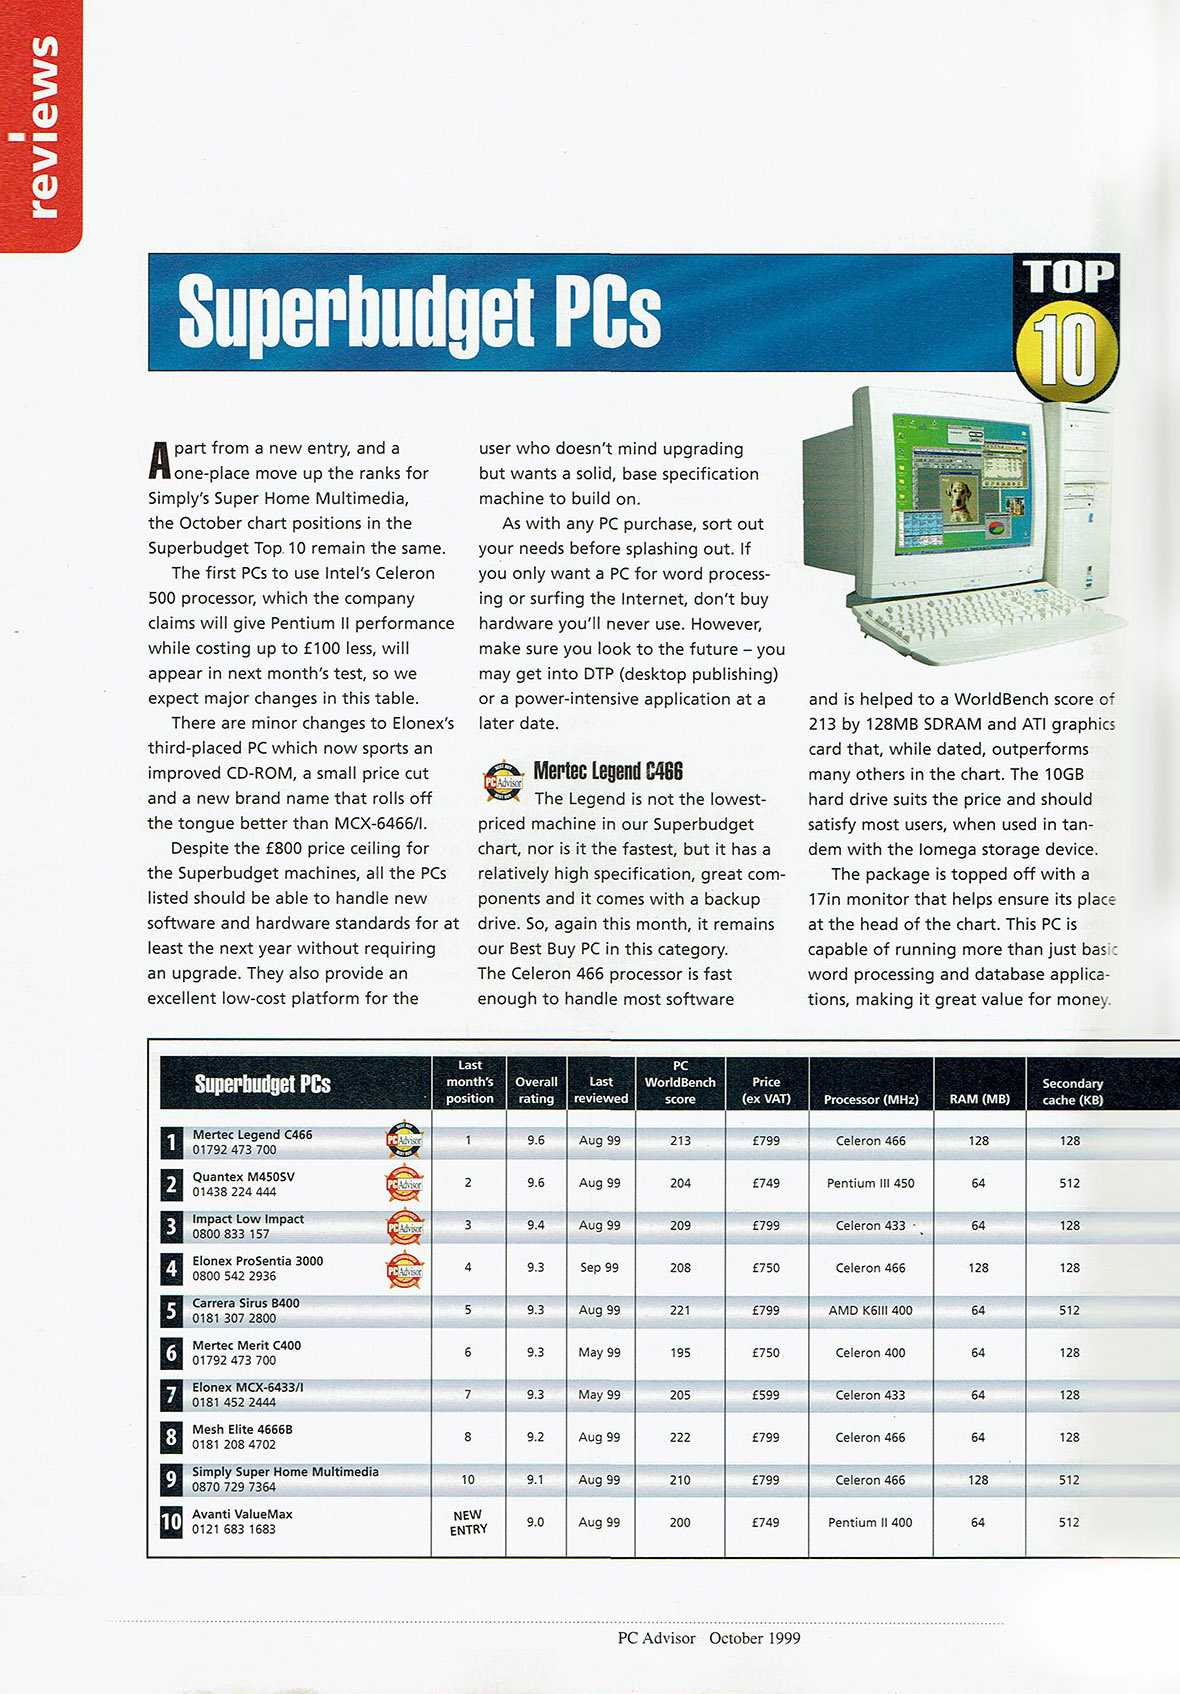
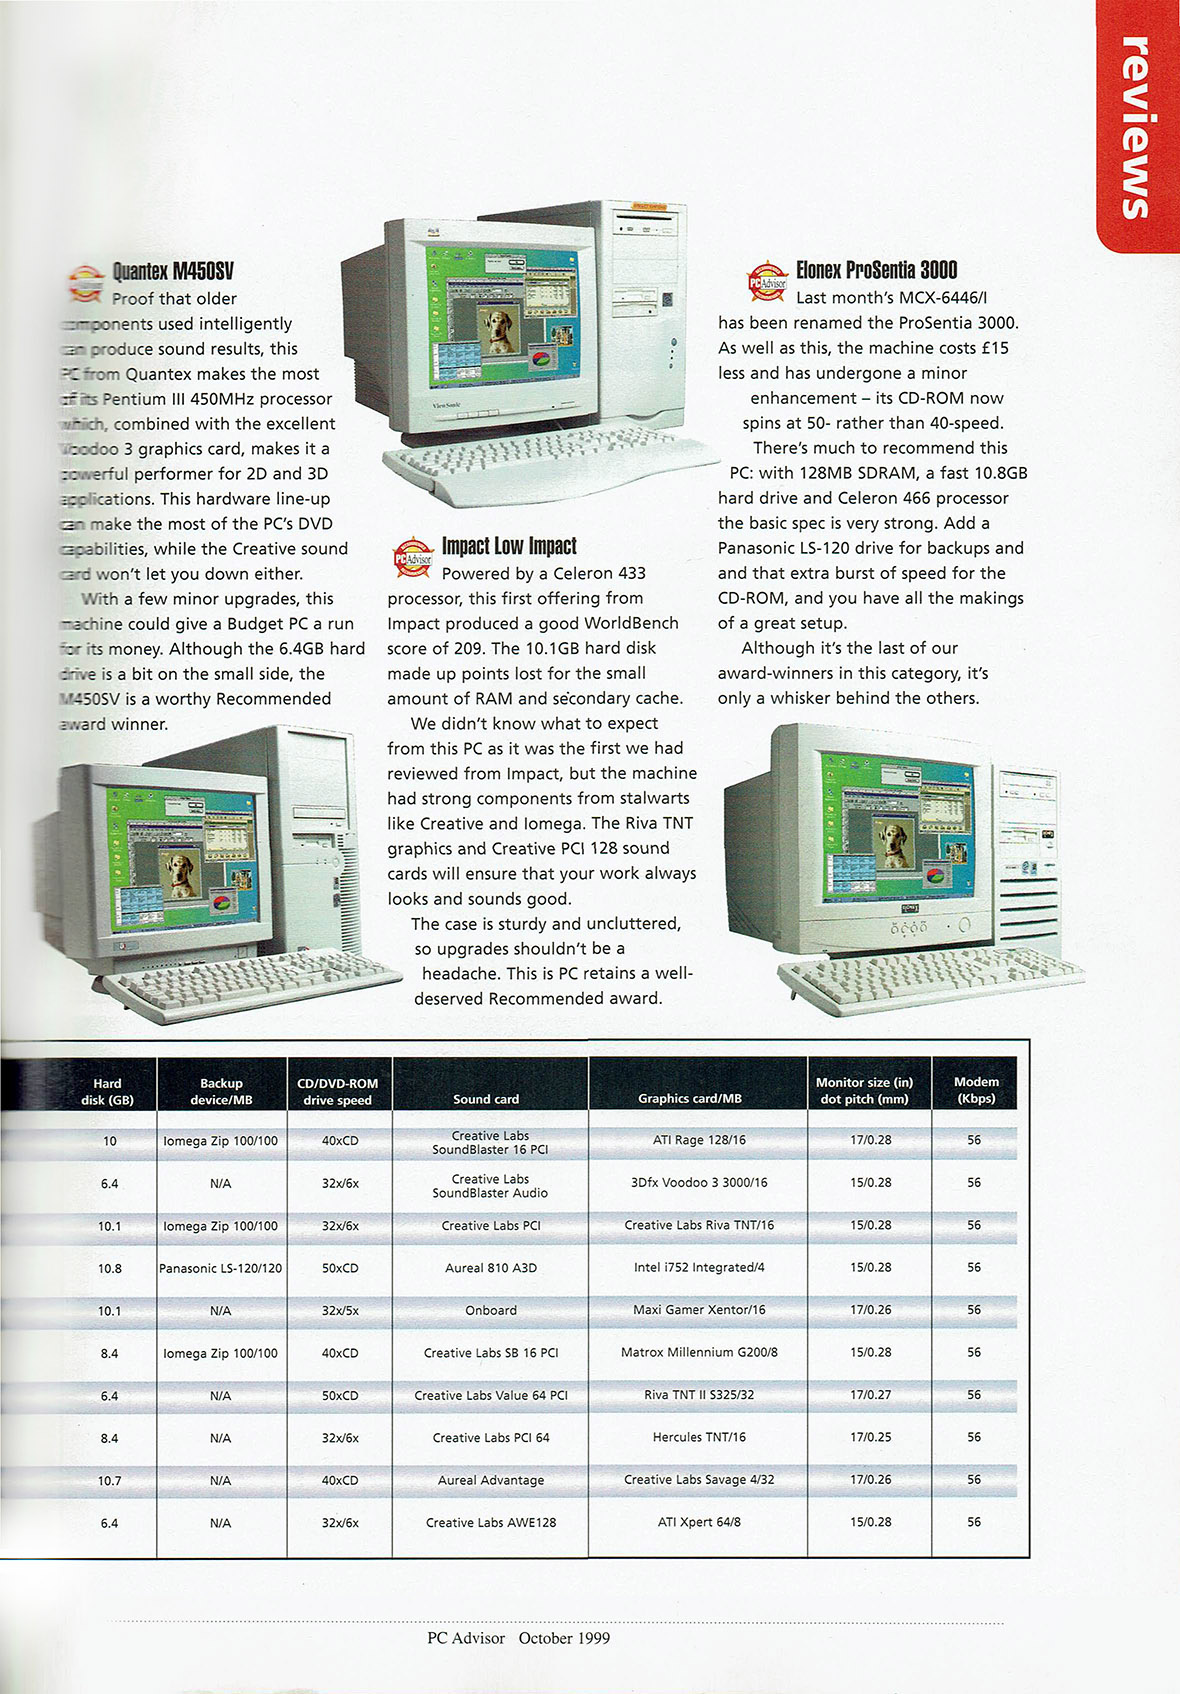
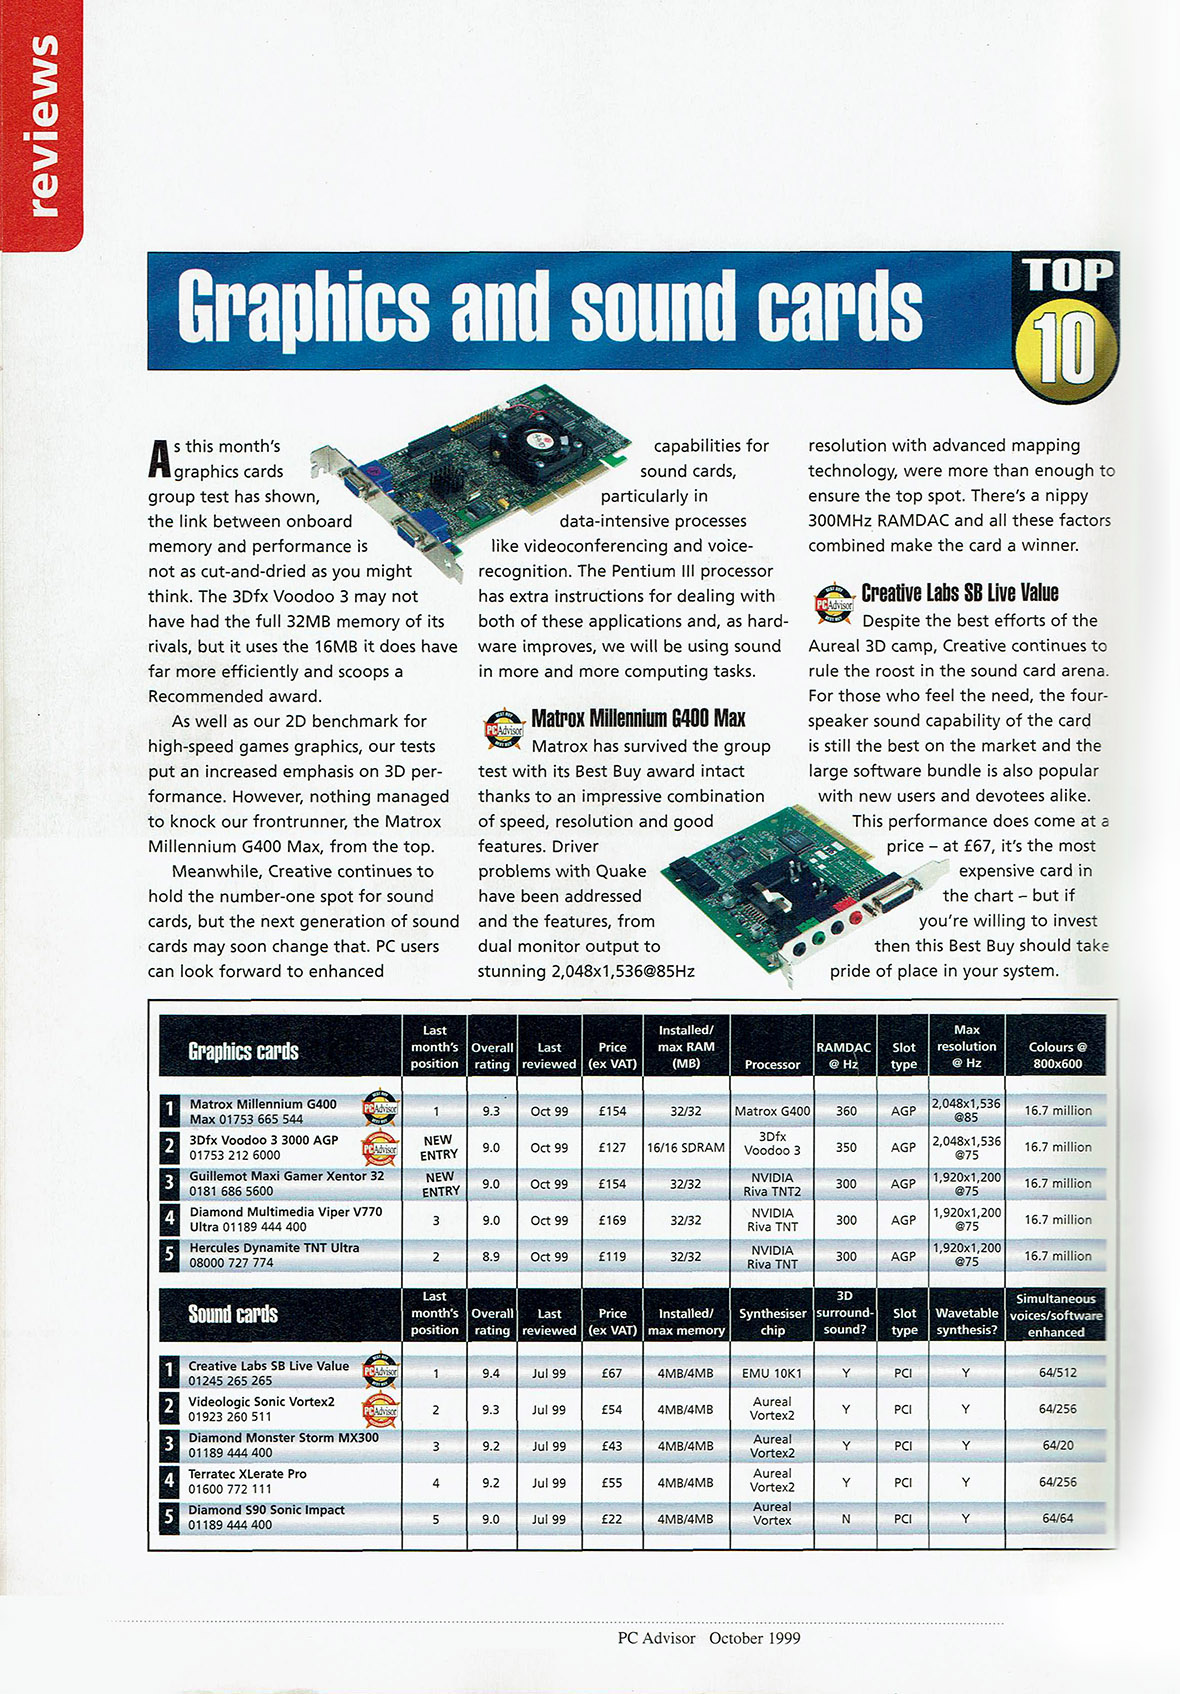
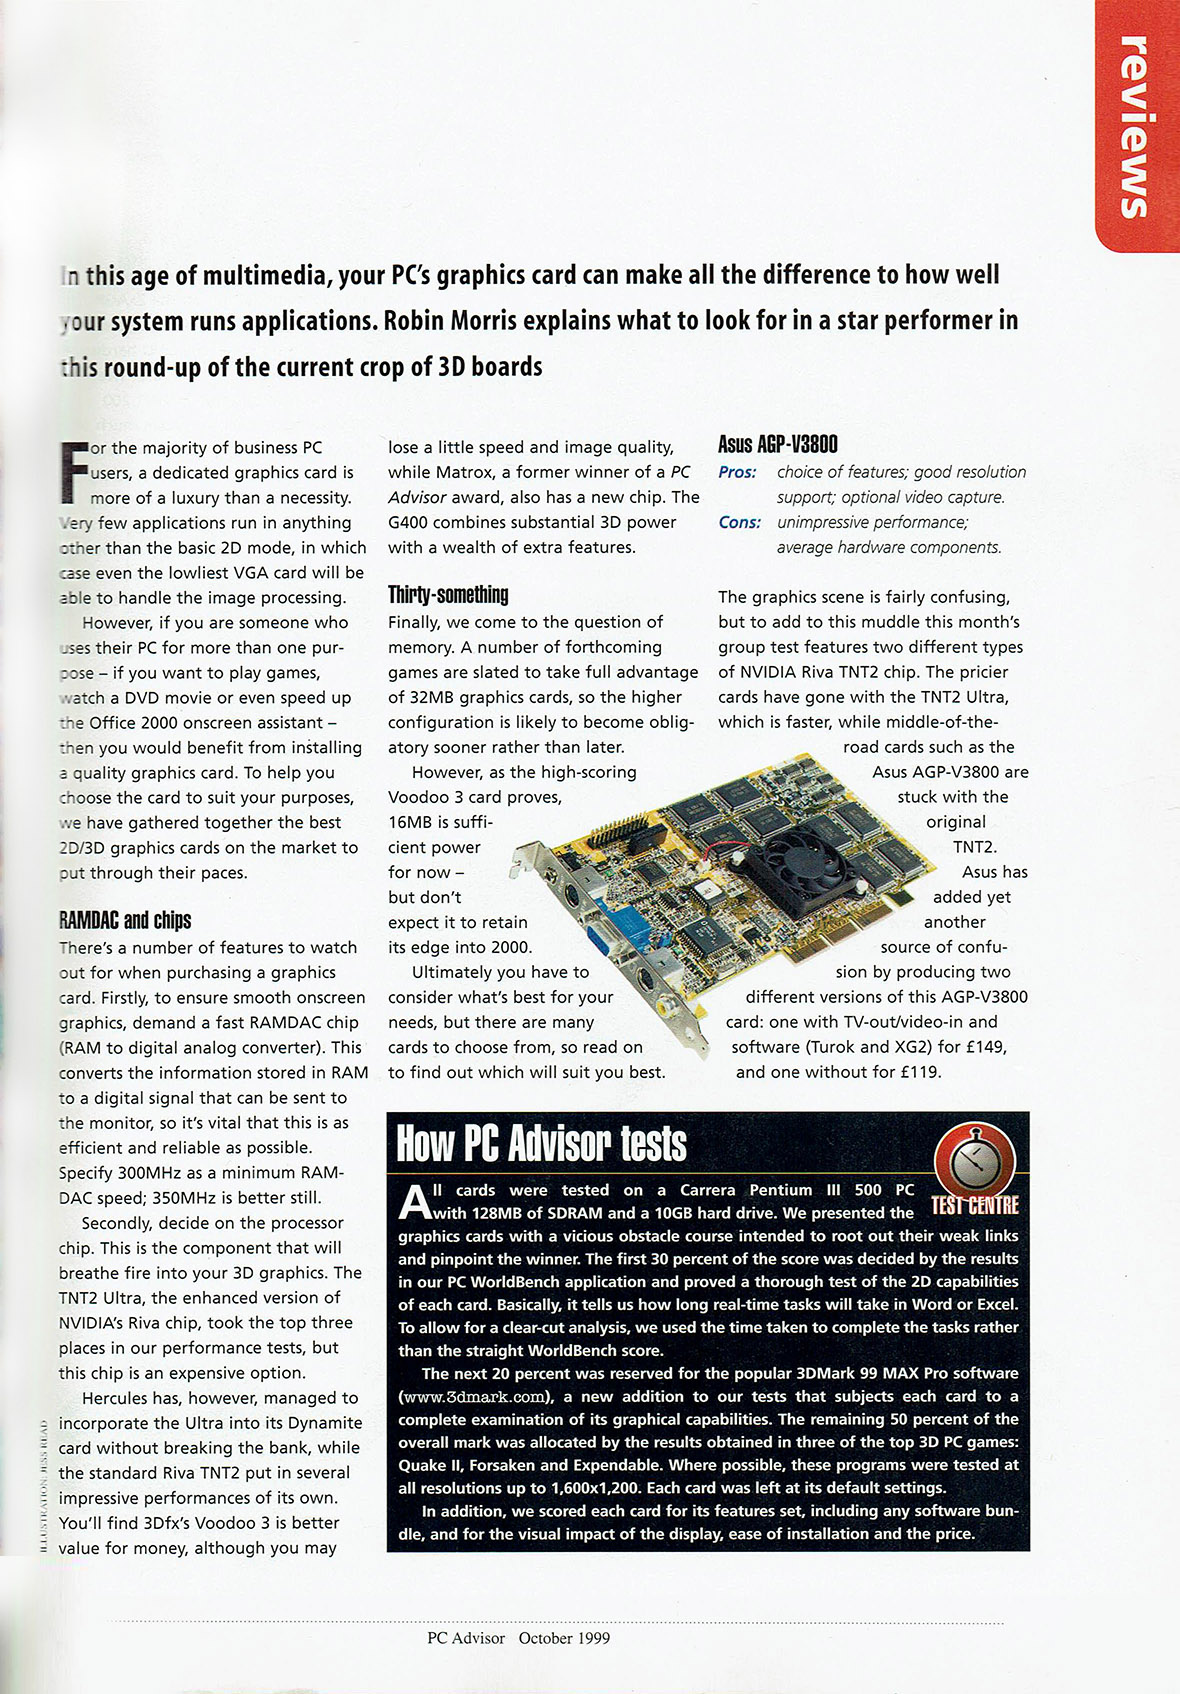
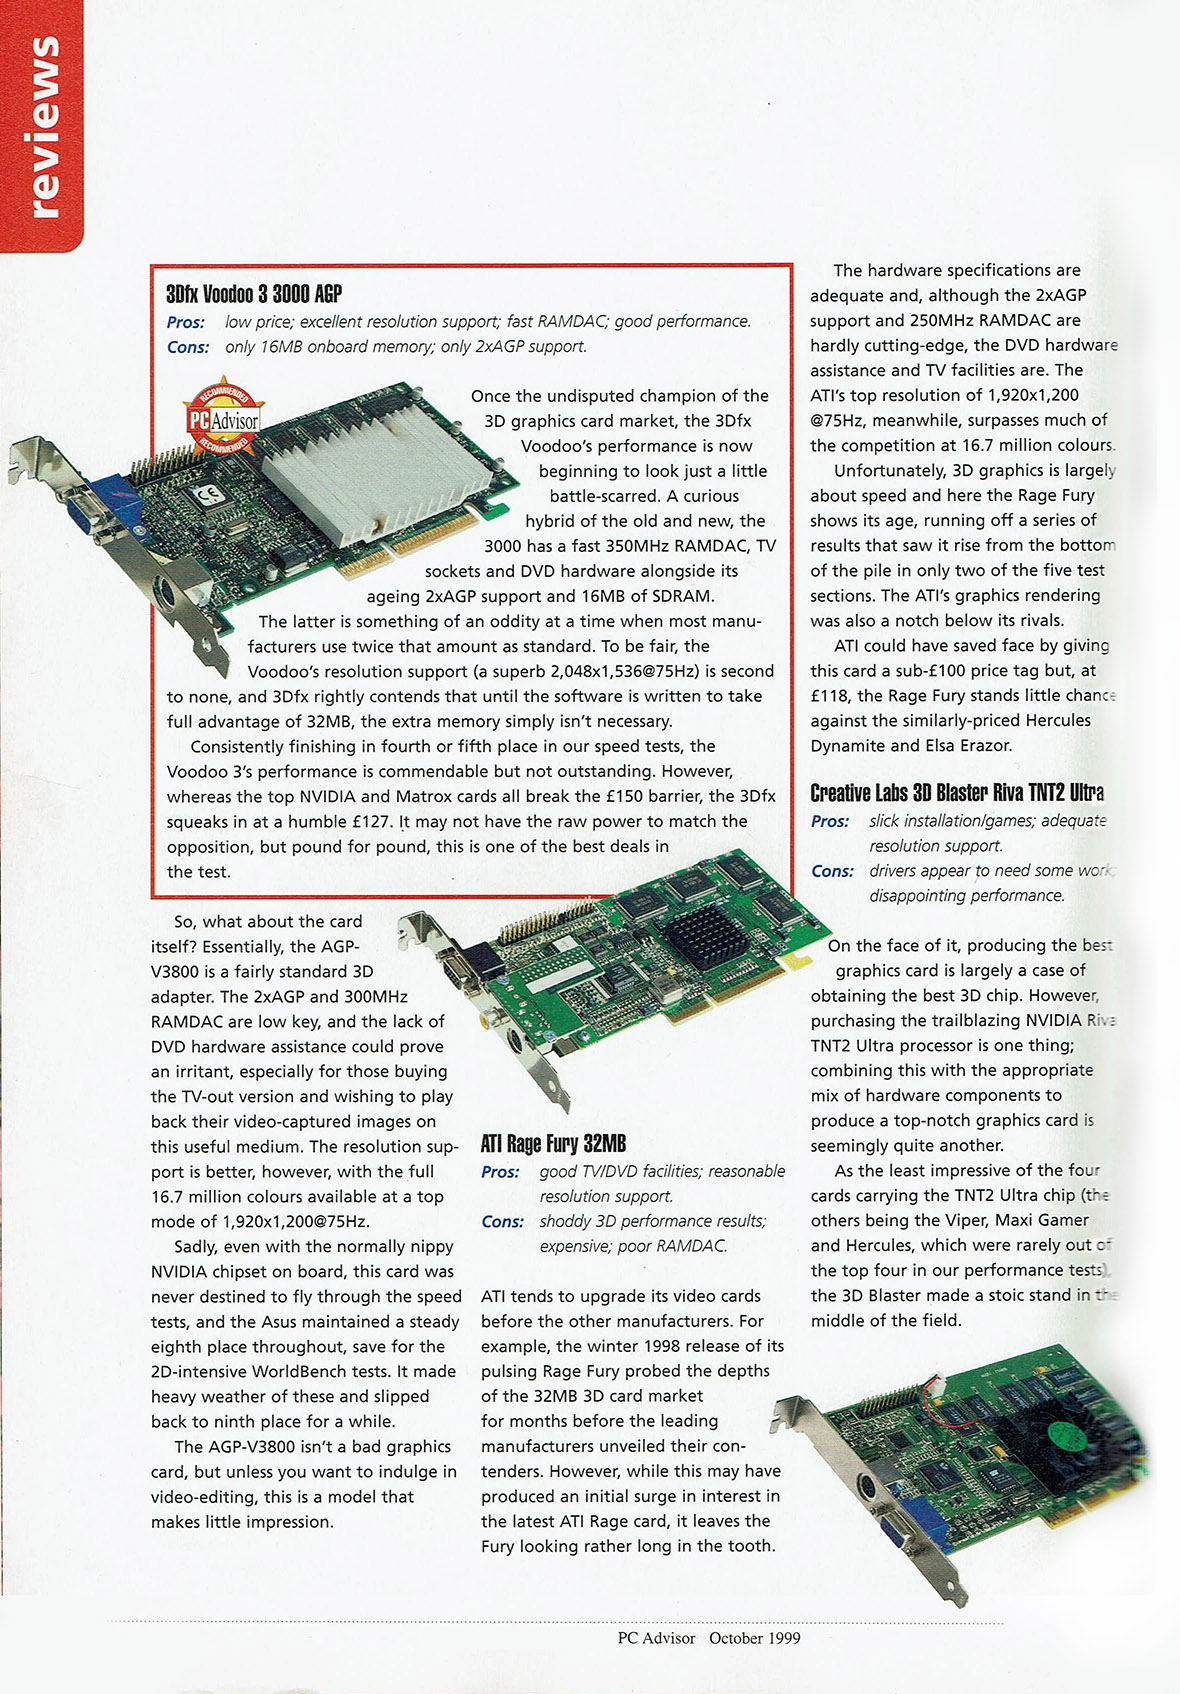
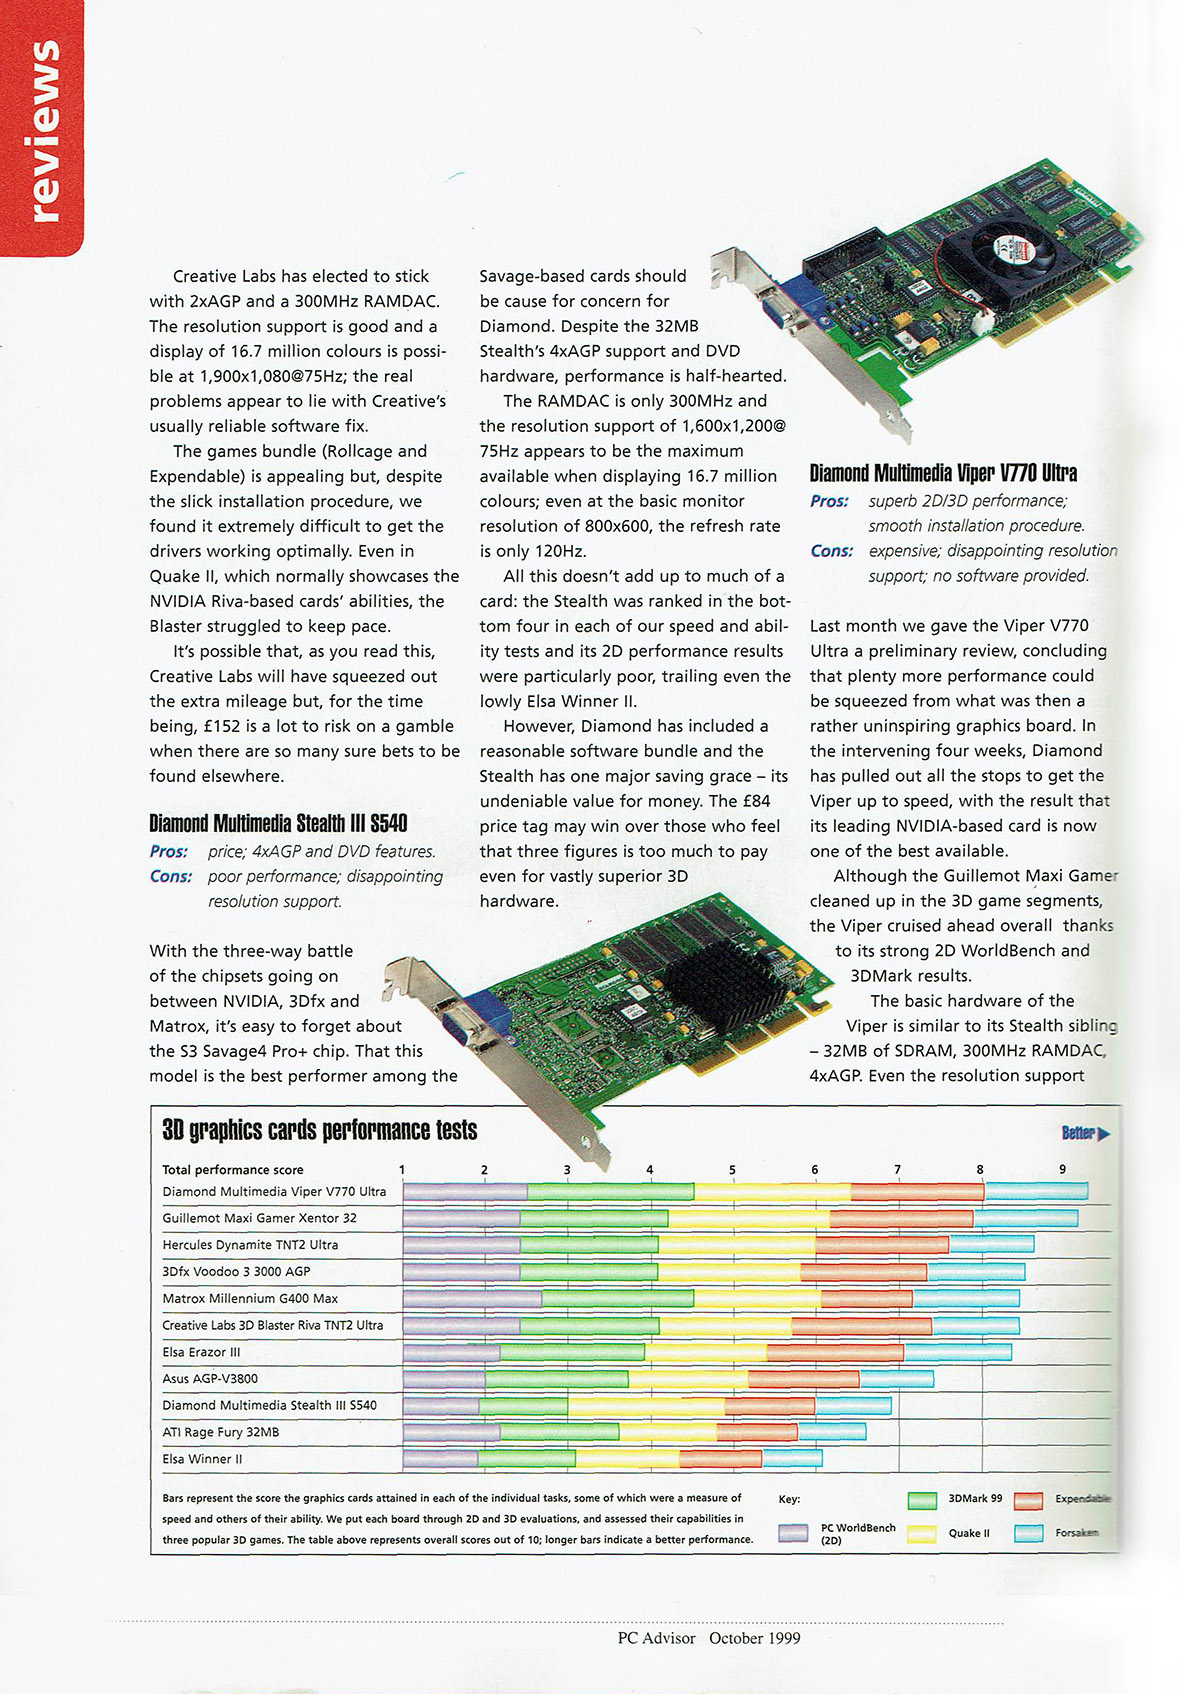
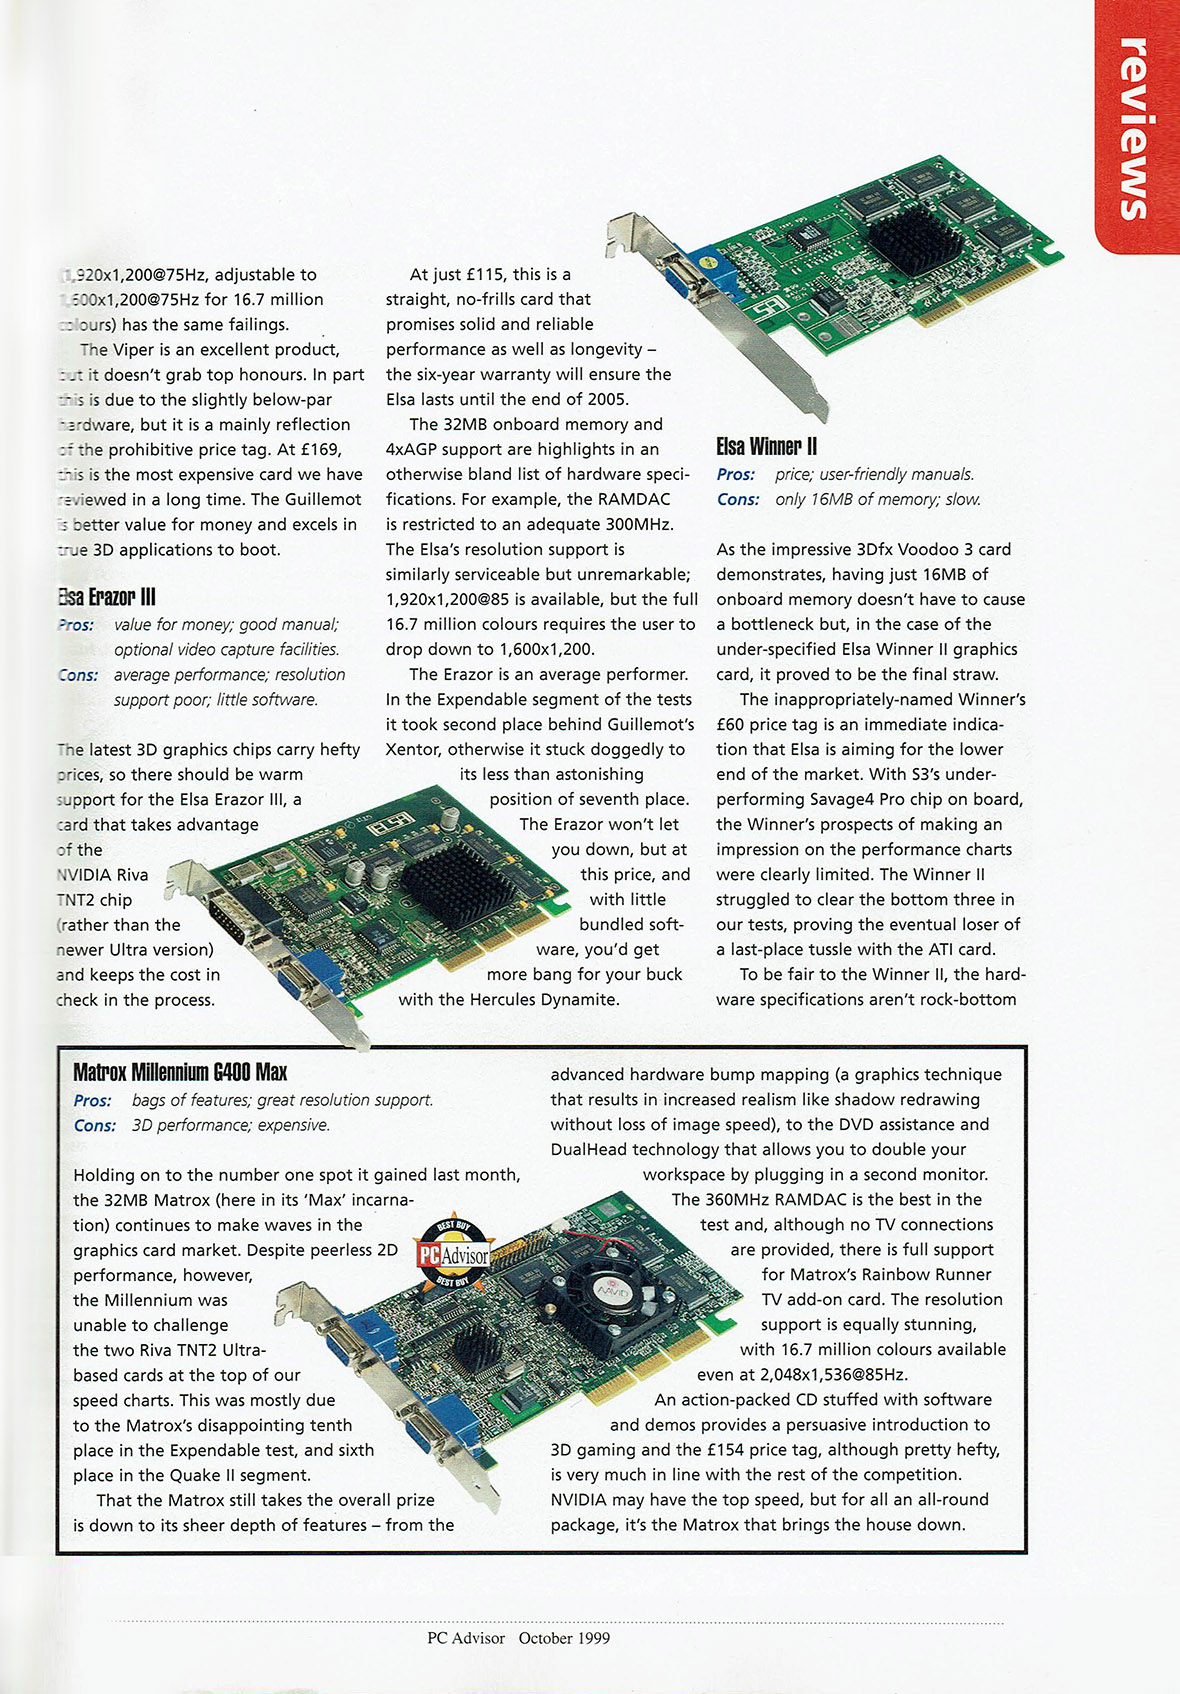
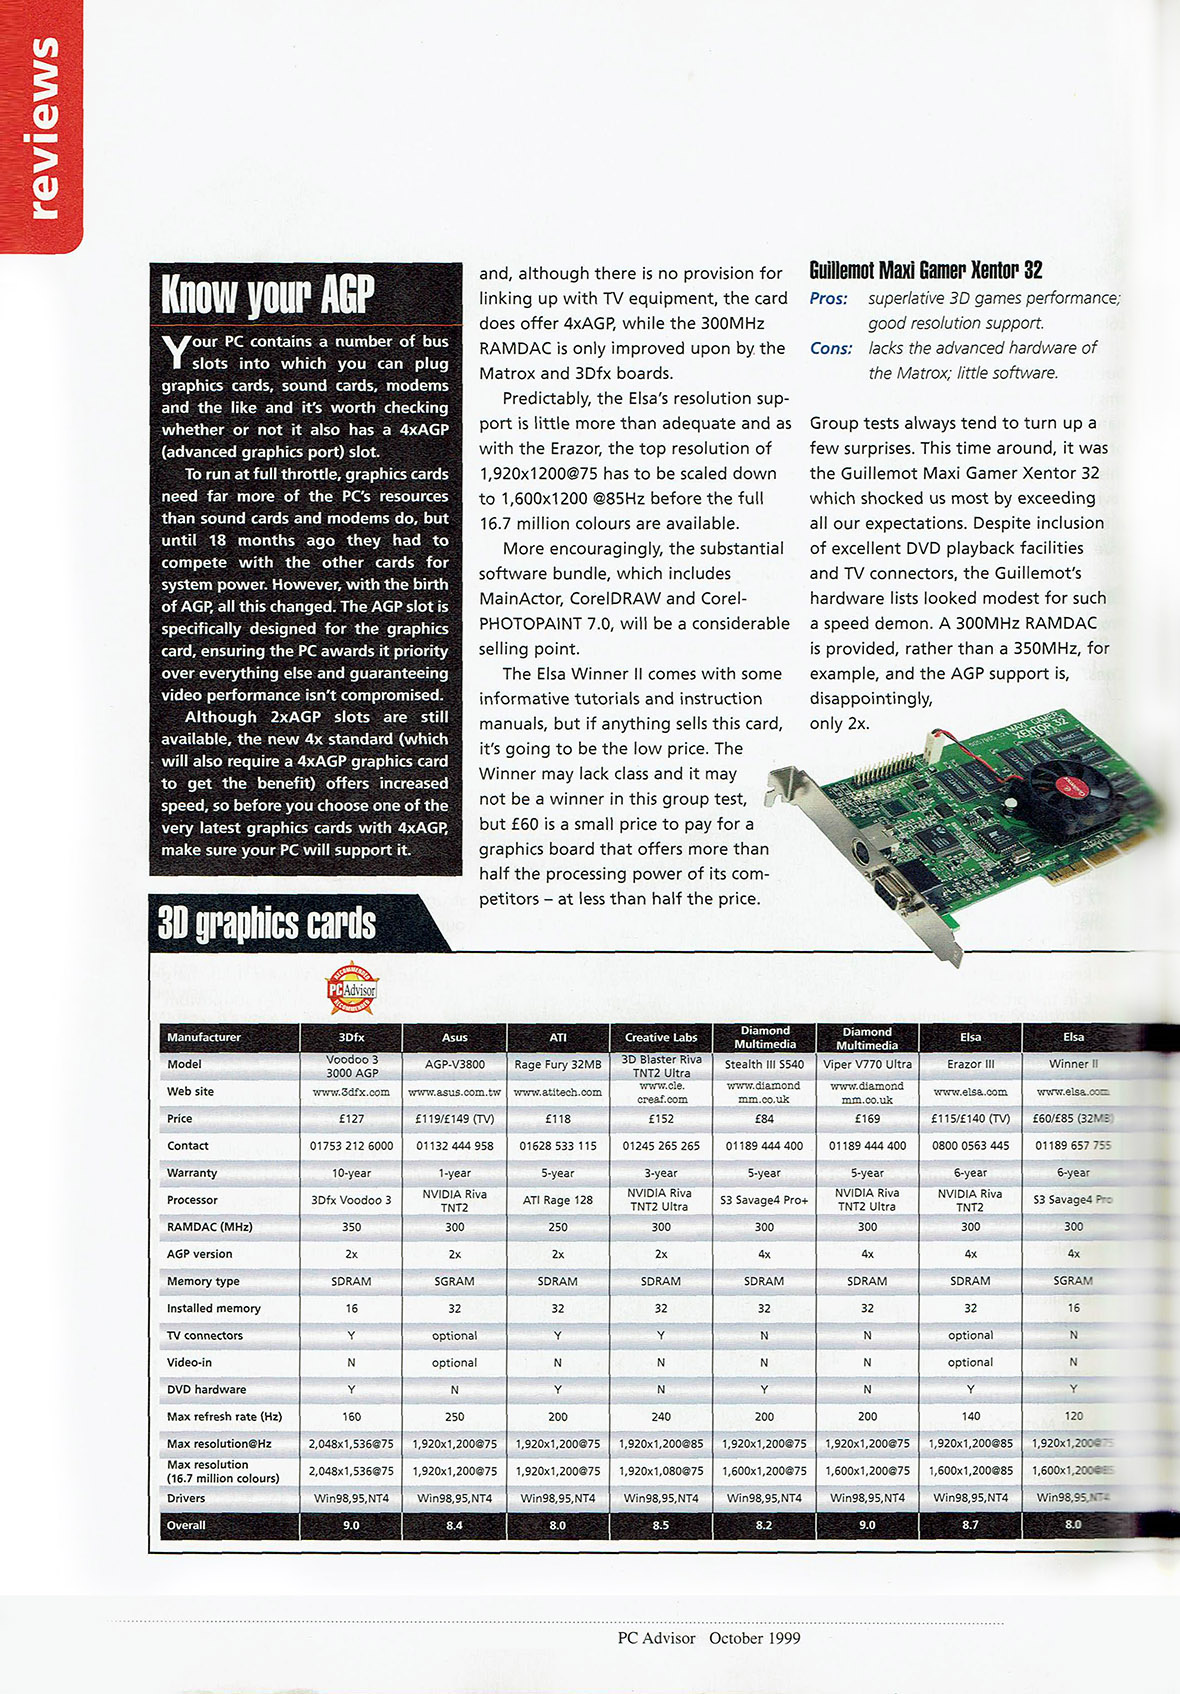
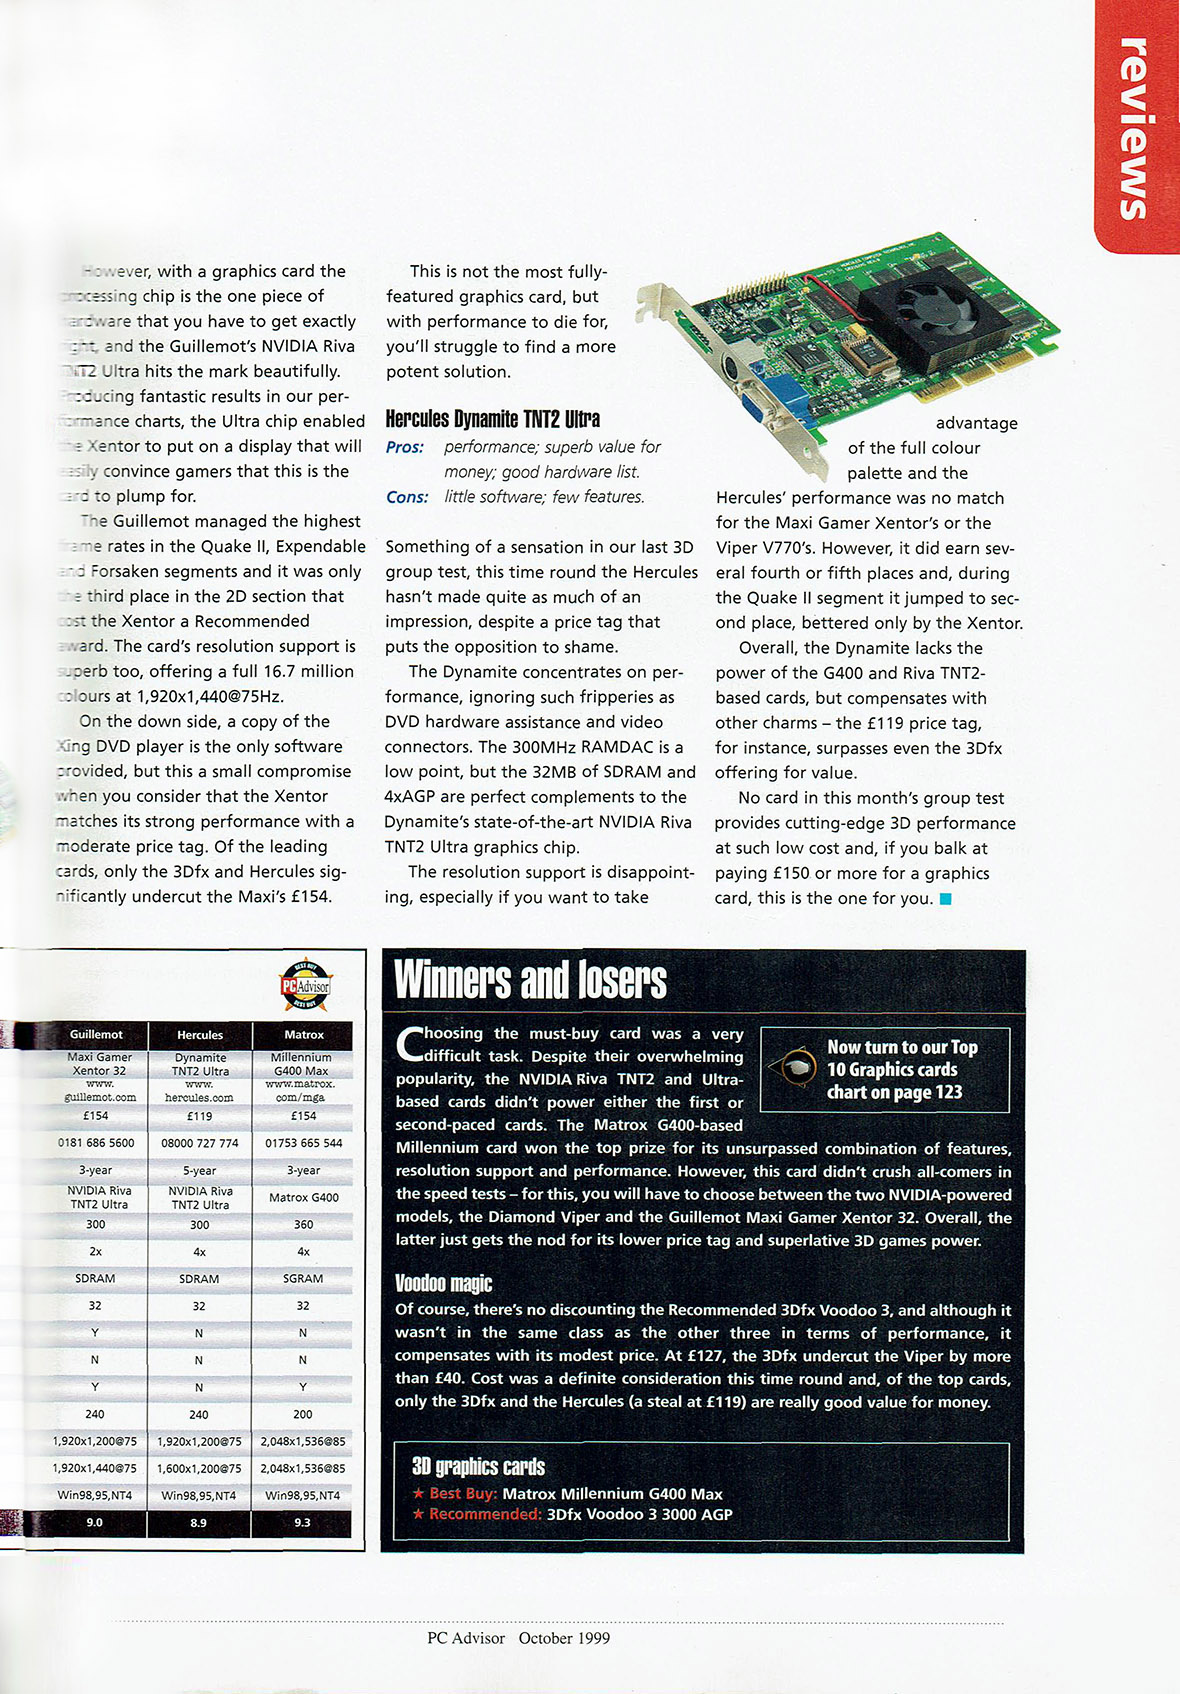
To achieve this I needed a versatile processor at the computers core, which allows for good compatibility with speed sensitive 16-bit DOS software but also has enough oomph for demanding 32-bit 3D accelerated games. Both Intel and AMD had good offerings in 1999 with a range of Pentium II/III models and K6/K7 (Athlon) CPU’s respectively. The Higher end being the 600Mhz AMD K7 Athlon and the Intel Pentium III with more affordable mid-range chips sitting at the 450~500Mhz at almost two thirds up-to half of the cost in pre-built machines of the time. See the scanned system round-up from Issue 49 of PC Advisor dated October 1999.*

Mobile variants of these popular chips had speed-stepping or other power management technologies which allowed laptops to save battery by limiting performance and power of the CPU on the fly. It’s these processors which are perfect for older more stubborn DOS games which depend on slower speeds to function as intended. As far as I could tell the Intel chips needed to have their multipliers ‘unlocked’ and even then the multiplier value could only be changed in the bios on a system reboot. This left the AMD K6 mobile series denoted by a plus, in this case I used a K6-III+ 450Mhz.

It can downclock to 200Mhz or effectively even slower by disabling the L1 and/or L2 caches which makes it ideal for the slow stuff, but it can also overclock nicely to 500Mhz for a nice little boost. This speed pairs it nicely with a must-have piece of hardware from 1999 – a 3Dfx Voodoo 3D accelerator card for all games that support the 3D graphics API Glide. Luckily I still have my original STB Voodoo 3 3000 AGP 16MB which should hopefully run early Windows 3D games like a dream and even get a decently playable experience out of more demanding games like Quake 3 Arena or UT ’99. The Voodoo 3 also benefits from having drivers that are optimised for AMD’s 3DNow! instruction-set and many games received special 3DNow! patches to boost performance.

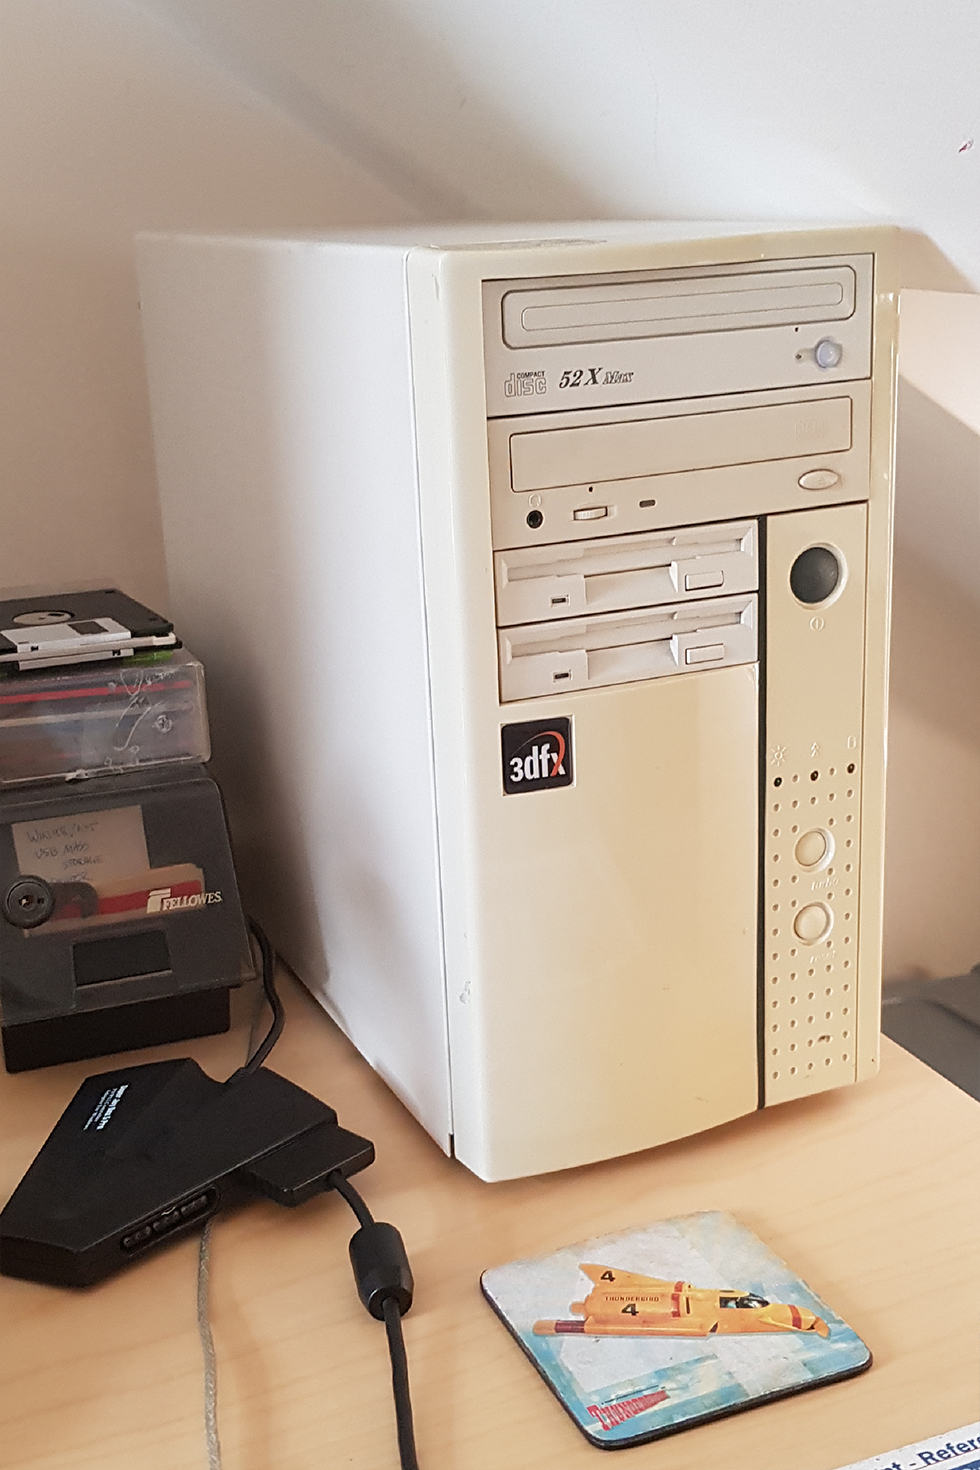
I now had a list of requirements to help me pick a suitable motherboard. It needed to be Socket 7 for the CPU, and it needed AGP as the variant of the Voodoo 3 I had was in that formfactor. While searching for candidates I stumbled upon a WYSIWYG computer that was retired from some factory floor on ebay listed as “Computer Cyrix M II 333Mhz 64MB SDRAM 4.3GB 2xISA 3xPCI”. No real details in the listing but I could see from the photos that it had an AGP slot and the CPU socket was branded with SOCKET 7, not bad for £30 for a complete system. When it arrived it did contain a Cyrix M-II as listed but to my surprise the motherboard was a Gigabyte GA-5AA which is a Super Socket 7 board.

The chipset is a ALi Aladdin V which before it’s release was not expected to be much compared to the likes of Intel, VIA or even SiS chipsets, based on it’s predecessor the Aladdin IV reputation which was a budget chipset used in some really cheap boards. The Aladdin V however ended up being a power house chipset which met all the requirements for the AMD’s Super7 specification plus more. It supported all current Socket-7 processors, the new Accelerated Graphics Port standard and the fast at the time 100MHz Frontside Bus. The Gigabyte website even claims it supports up-to 140Mhz FSB. The chipset also featured an internal L2 cache, cacheable 133Mhz fast memory SD-RAM support and a USB 1.1 header on the board. So by chance the Gigabyte GA-5AA ended up being a perfect fit for what I needed. This chipset guide article on anandtech.com was very insightful and helped me tremendously at the time when I was identifying the board and its features.

For memory I went with 256 Mega Bytes of 133Mhz SD-RAM since it’s supported by the chipset, later on I discovered that the memory bandwidth caps out at about 313MB/s so any value higher than that would just be diminishing returns. The storage devices I used were a MAXTOR DiamondMax 10 120GB Hard-Disk Drive for game storage and a generic SD to IDE adapter paired with a Samsung Pro 64GB SDHC Card. The Drive shows up as SINTECHI HighSpeed SD to CF Adapter and while it doesn’t get linear speeds as high as the HDD it does have a really low random access time at 0.78ms. I believe the model is SD35VC0 and has a FC1307A chipset. There are two optical disc drives; one 52x speed Samsung CD-ROM drive and a generic CD-RW drive (CDR-7S52), oddly the CD-RW drive has problems reading discs burnt on other machines.

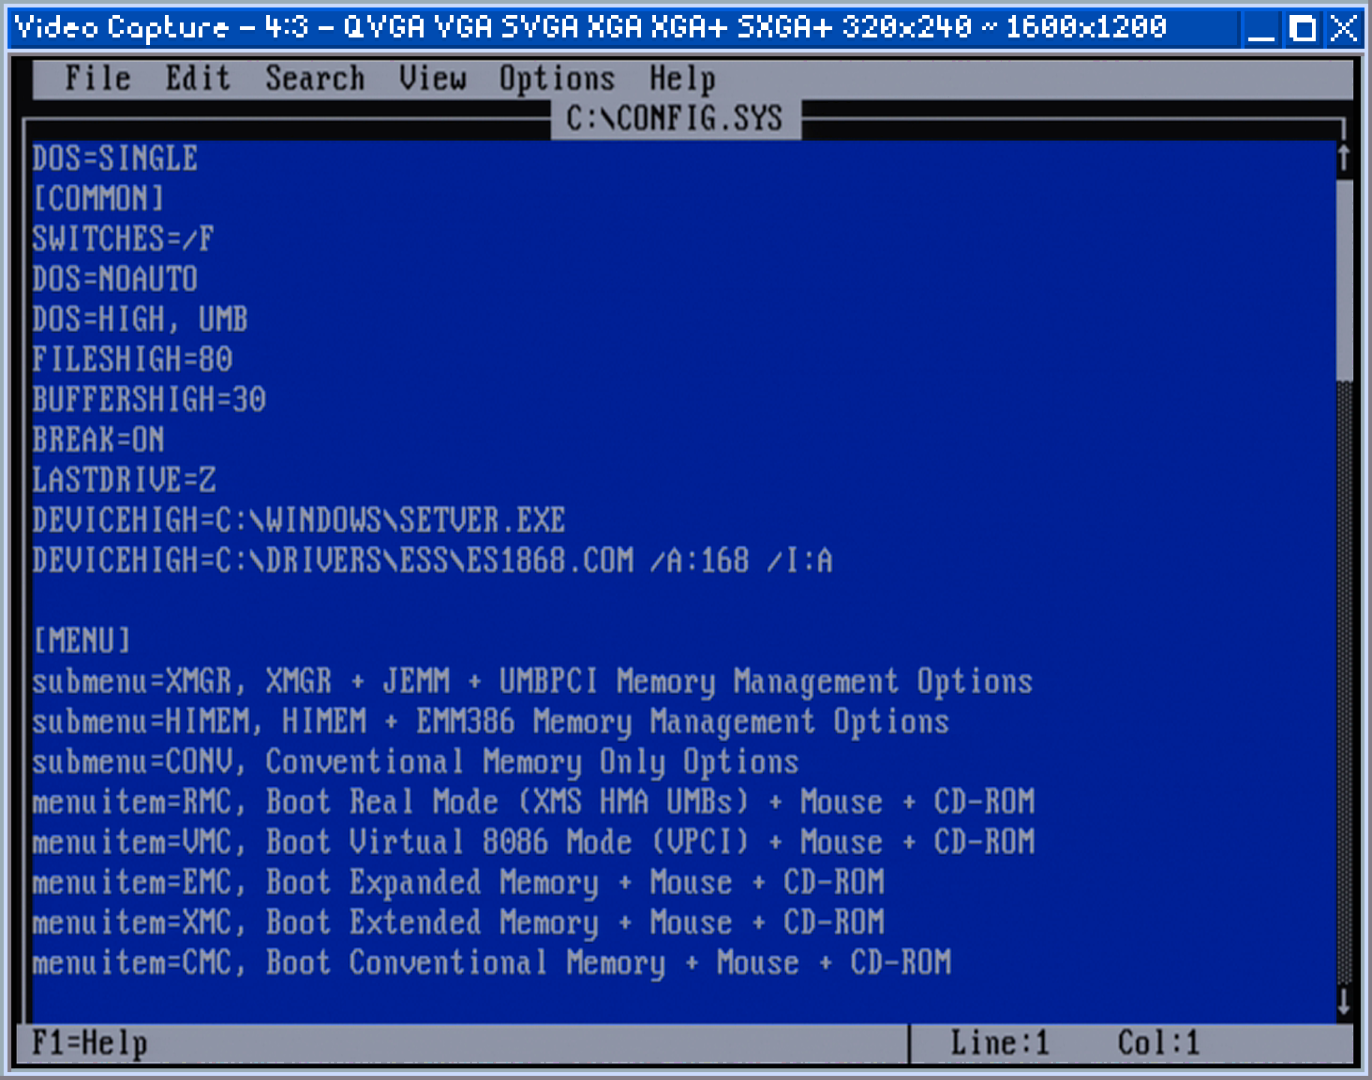
Lastly the most important decision when building a DOS gaming pc is the sound card. I wanted good adlib sound in dos, support for General MIDI, Creative Sound Blaster compatibility and some basic 3D sound support. This meant it had to be an ISA card for true DOS support, some PCI sound cards were able to give DOS sound support through emulation but this always comes at a performance cost.

I started with a Sound Blaster 16 CT2230 which worked well until it didn’t. After an hour or so the voice channels on the card would stop leaving only the MIDI output but no adlib sound or PCM samples. This problem couldn’t be solved so I moved onto a Creative Sound Blaster AWE64 Value ISA CT4500 which worked fantastically and had both support for Sound Blaster 16/AWE and SB2.0/Pro. The General MIDI samples on the AWE64 were somewhat lacking and left a lot to be desired.

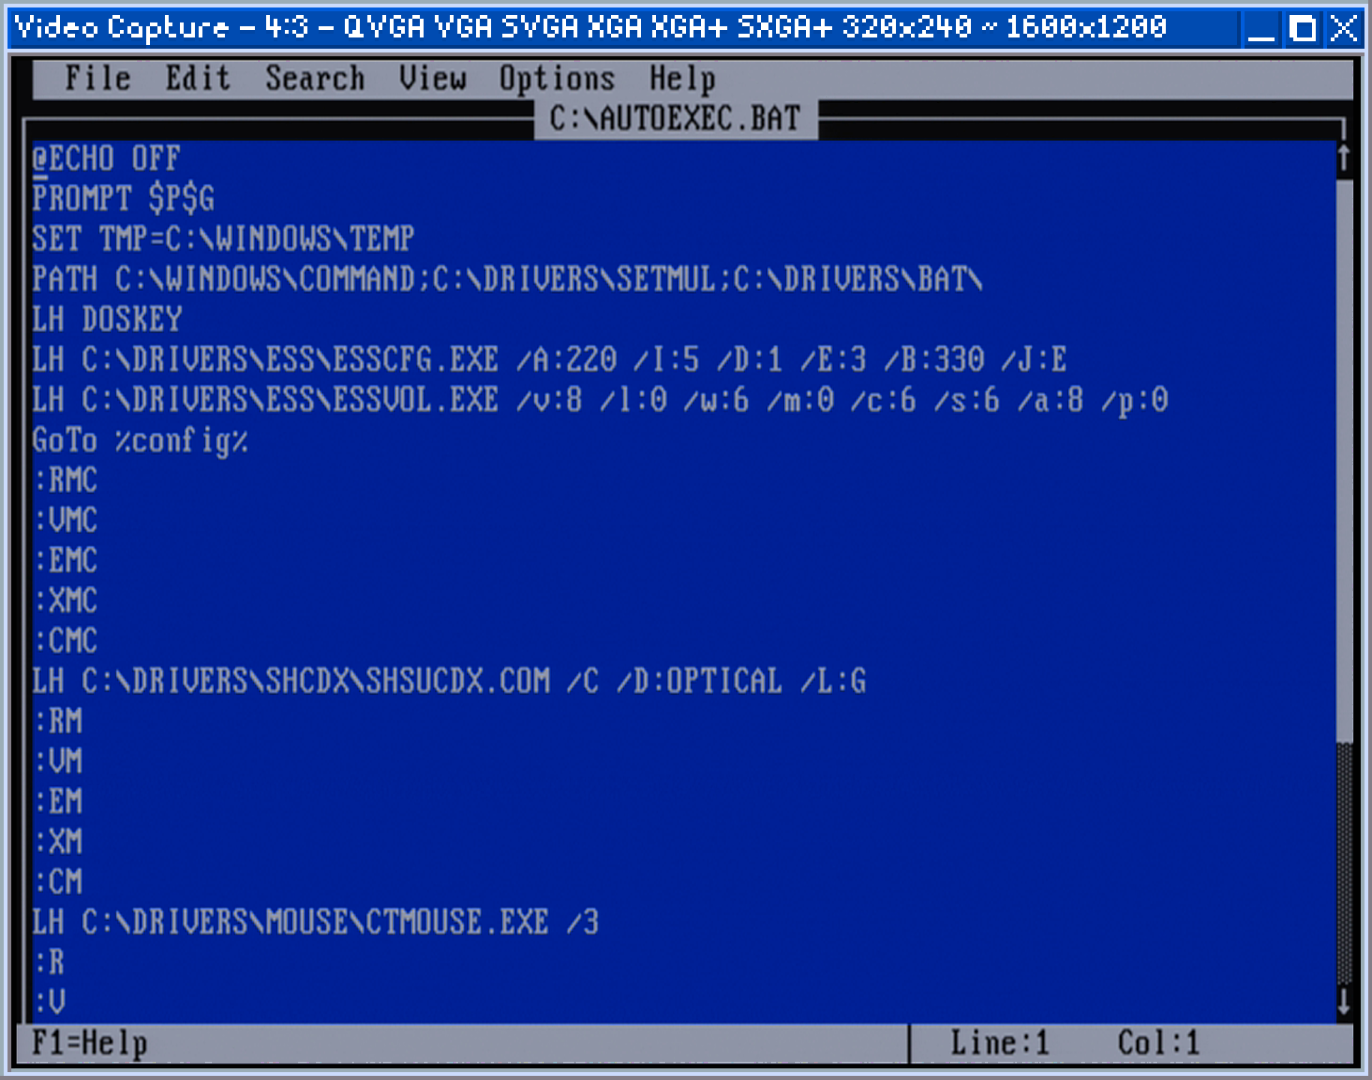
The solution to the lacklustre MIDI sound was to switch to a sound card with a Wavetable header. I used the ESS Technology Schubert v1.2 with a AudioDrive ES1868F chip. This card ended up sounding fantastic in DOS and the Wavetable header allowed use of any of the Serdaco DreamBlaster daughterboard solutions. I started with the S1 and upgraded to the X2. Here’s some posts I made on the X2 and how it sounded at the time. The ES1868F drivers were simple to setup in DOS and has a fast VXD driver component for Windows 9x.

Tuesday, 3 November 2020

Retro Game Wednesdays (Part 1)

A year of streaming with retro hardware.

On September 27th 2019 I began streaming retro pc games on a variety of systems at twitch.tv/whiskey_juliet. I now do this every Wednesday from around 12 midday until 5.30pm GMT.

Over this last year I’ve worked hard to create a decent setup of hardware and software to allow me to stream some of my favourite games and discover some gems I missed thanks to the suggestions of great community. During this time I’ve done a lot to tweak and improve that setup. Swapping out hardware, changing methods of capture and solving all the usual problems that go hand in hand with old exhausted computers.

I figured it might be sensible to document the details of what I’ve learned along the way, lest I forget some vital step and have to spend hours pulling my hair out trying to remember some odd config.sys setting. As an extra bonus it might be useful to some one else.

1.0 The Systems

First up are the computers themselves. There are three rigs which together allow me to play roughly 30 years of gaming history on their intended hardware without emulation or (that many) technical issues. Each rig is connected via a KVM switch (Keyboard, Video and Mouse). This allows for easy switching between each source, without having to rely on changing OBS/capture settings or constantly having to un-plug and swap hardware.

1.1 Retro Rig #1 (DOS/98)

AMD K6-3+ 450Mhz – CPU
Gigabyte GA-5AA Super Socket 7 – Motherboard
256MB 133Mhz SDRAM – RAM
3DFX Voodoo 3 3000 AGP – GPU
ESS Audiodrive ES1868F ISA – Soundcard
X2 Dreamblaster – MIDI Daughterboard

1.2 Retro Rig #2 (XP)

AMD Athlon 64 X2 4600+ 2.4 GHz – CPU
ASUS A8N-SLI Deluxe – Motherboard
4GB Patriot DDR PC3200 – RAM
ATI Sapphire Radeon HD 7770 PCI-E – GPU
Creative Audigy Platinum PCI – Soundcard
Creative Audigy Front Panel – 5″1/4 Bay

1.3 Retro Rig #3 (XP/7)

Intel Core 2 Quad Q9650 3GHz – CPU
Gigabyte GA-P35-DS3L – Motherboard
8GB OCZ DDR2 PC2-8500 – RAM
ATI Sapphire Radeon HD 7970 PCI-E – GPU
Creative X-Fi Fatal1ty PCI – Soundcard
Creative X-Fi Fatal1ty Front Panel – 5″1/4 Bay

1.4 Stream Rig (Windows 10)

Intel Core i7 3770K – CPU
Asus P8Z77-V LX – Motherboard
16GB DDR3 Vengeance – RAM
Creative X-Fi Fatal1ty PCI – Soundcard
Sapphire Radeon RX 570 8GB PCI-E – GPU
Startech PCIe HD PEXHDCAPVGA Capture Card
DIGITNOW 4K60 Pro PCIeHDMI Capture Card

In the following posts I’ll go into detail on the building and usage of each of these computers. Covering the topics of hardware choices, operating systems, configuration/tweaks and performance.