2.4 DOS Networking, Internet and Multiplayer.
DOS networking is great! You can play games together over LAN or the Internet, transfer files to and from other PCs using FTP, or even browse the web. But it’s not as simple as networking today where you just plug in a network cable and you’re off the races. MS-DOS has no always on auto-configuring network support, it must all be configured and executed using the following:
- A driver for your network card also known as a Packet Driver or ODI (Open Data-Link Interface).
- A network stack which defines the protocol such as TCP/IP, IPX/NetBIOS or Novell NetWare.
- A TSR (Terminate and Stay Resident program) for requesting a address from your DHCP if you’re connecting to an IP4 network.
2.4.1 Drivers for your Network Card
When I first set out to get networking going in DOS I struggled to get my head around packet drivers, how they worked and what exactly they did. Now I know the ins and outs it seems obvious but for anyone approaching it without any prior knowledge it can be a real headache.
The first thing first you need to know is what network card you are using. If for any reason you don’t know or cannot workout what NIC (Network Interface Controller) you are using there’s a handy tool called NICSCAN which will help you identify the correct card and driver.
NICSCAN and a great collection of packet drivers can be found on Georg Potthast’s website.
I’m using a REALTEK RTL8139(A) PCI fast ethernet card which can use either the RTSPKT.COM packet driver or the RTSODI.COM ODI Driver. The main difference between these two drivers is the intended application, with the packet driver being a generic driver for TCP/IP and the ODI driver being for use with Novell NetWare protocols like NW 3.x, 4.x, NetBIOS and IPX.
I’ve created a set of disk images for the setup disk for the REALTEK RTL8139(A) PCI available here.
If you are limited by only having an ODI driver or packet driver, translation layers or converters are available, but with most common network cards you shouldn’t need to worry. More information on these converters can be found here.
2.4.2 Network Stacks & Protocols
Now you know what network interface you have and the corresponding packet driver to load we need to set it up along side a protocol or network stack. The two most common (and the only ones you really need) are TCP/IP and IPX/SPX.
- The TCP/IP protocol is what modern networks still use and allows you to connect your computer to the internet. I will outline using the mTCP suite to achieve this later in this post.
- IPX/SPX is a protocol that was popularly used on LANs (Local Area Networks) when MS-DOS and Windows 3.x were the popular choice for home and office PCs. A lot of multiplayer games such as Doom. Duke3D and Blood for example use this protocol for network play.
- Novell NetWare is a protocol used primarily as a foundation for Novell business network solutions.
- NetBIOS is another protocol used primarily as a communication layer for IBM PC networks.
You can configure and use both the TCP/IP & IPX/SPX protocols for your network device but usually only one stack can be initialised at a time. Except in some instances where both a separate ODI and Packet driver can be run without conflicting resources. A reboot of the system will most likely be required if you wish to change from using one protocol to another.
2.4.3 IPX/SPX, Novell NetWare & NetBIOS
IPX/SPX, NetWare and NetBIOS all have their own TSRs that just need to be run in sequence along with the ODI or packet driver depending on your network card.
For this example I will be using the Realtek ODI driver RTSODI.COM, along with LSL.COM (Novell Link Support Layer for DOS ODI) and IPXODI.COM (IPX/SPX Protocol).
LSL.COM and IPXODI.COM are usually provided with your network card driver, for the RTL8139 they are in a folder named NWCLIENT on the install disk along with an example NETSTART.BAT. RTSODI.COM is located in the NETWARE\DOSODI folder on the same disk along with NET.CFG and RTSODI.INS. Or you can download them here.
I recommend putting all these files into a single folder on the local drive of the system you wish to configure eg. C:\DRIVERS\IPX\*.*
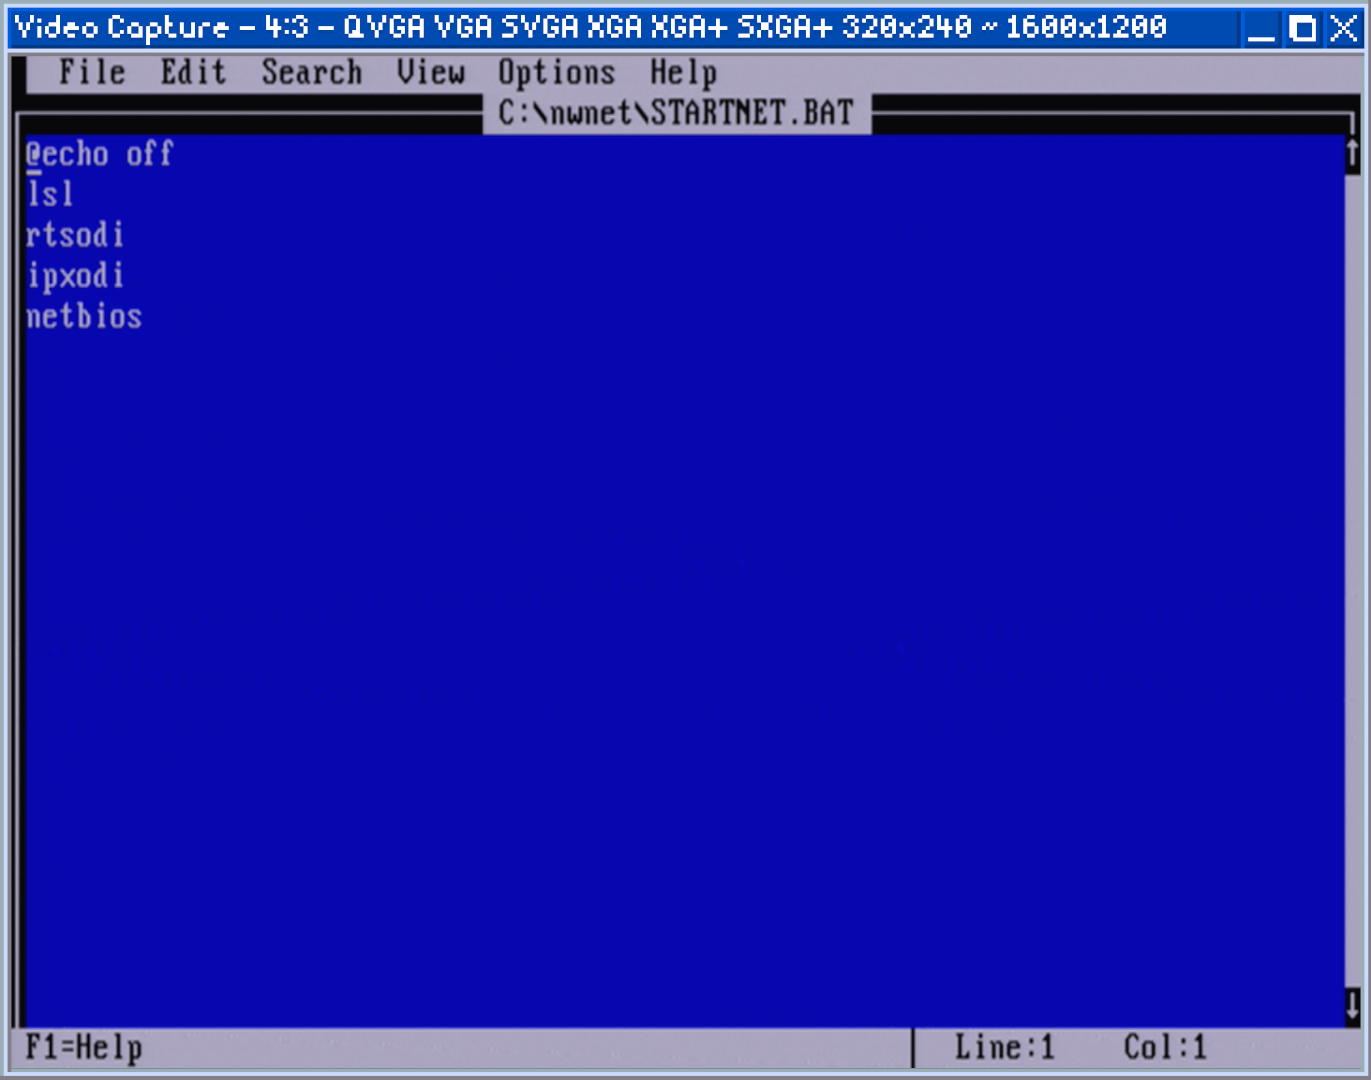
For launching the IPX ODI drivers see the example below and create a batch file ie. NETSTART.BAT to launch them in sequence.
@echo off
lsl
rtsodi
ipxodi
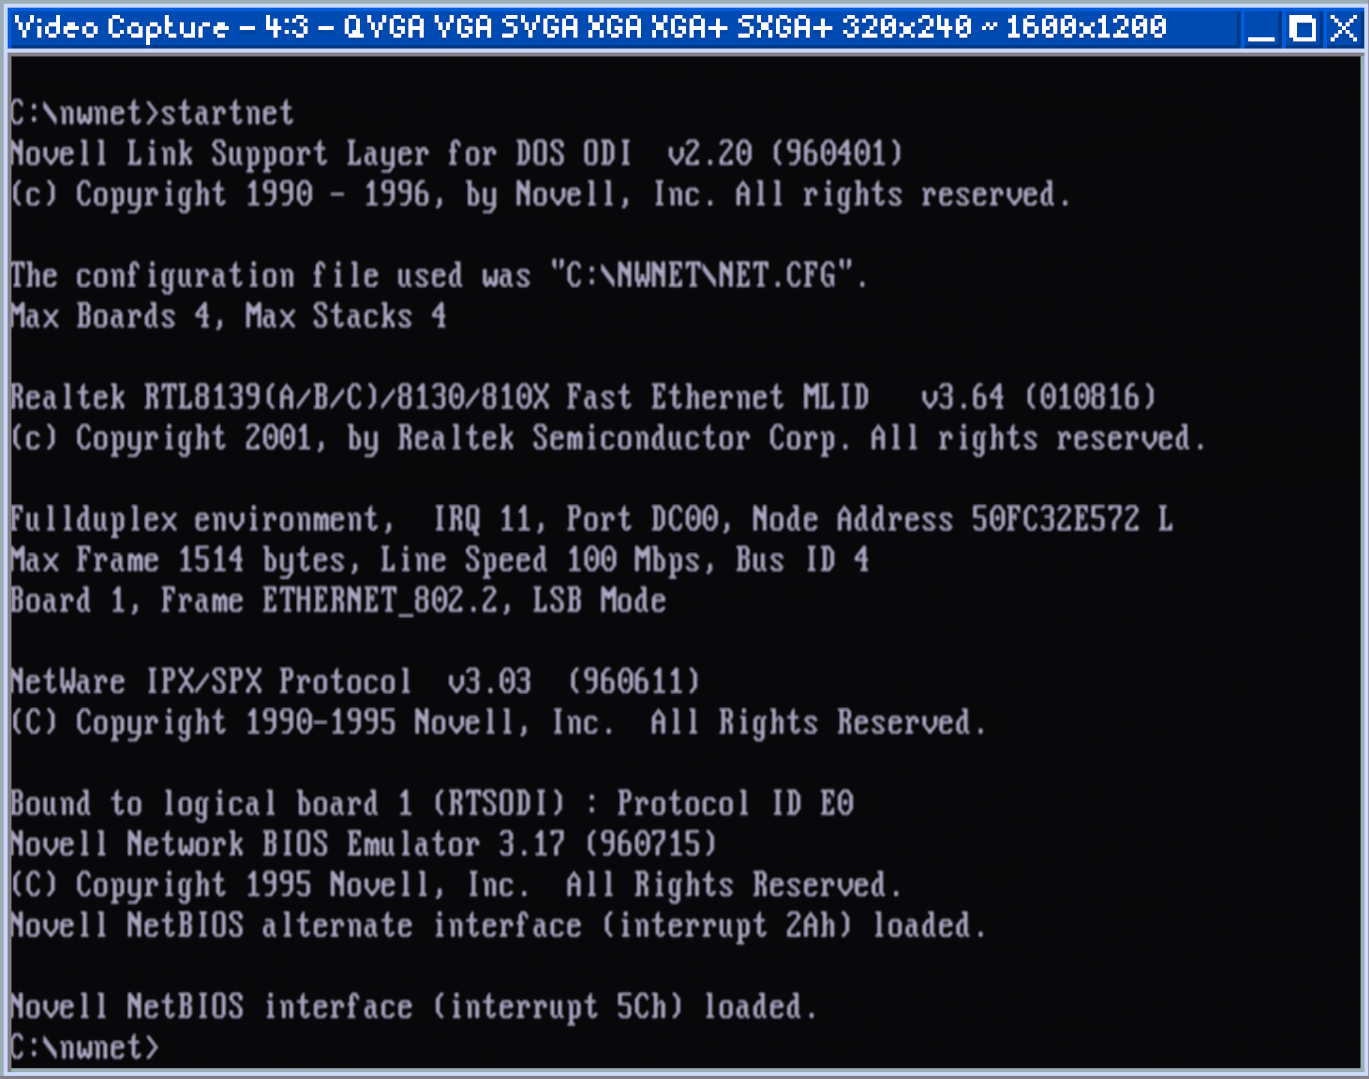
Additionally NETBIOS.EXE (NetBIOS) and NETX.EXE (NetWare v3.x) can be launched afterwards or included at the end of your batch file. A successful initialisation should look like the screenshot provided.
You should now have initialised the IPX network stack on your network so any other machines also connected should be able to communicate with each other.
That’s all you need to do to prepare for network multiplayer gaming in DOS!
See 2.4.5 later in this article where I’ll cover how to host/join local IPX game lobbies, playing IPX based multiplayer over the internet using a program called Kali, along with connecting virtual DOSBOX clients to real machines on the same network.
2.4.4 TCP/IP using mTCP
For TCP/IP to work we need a packet driver and a software suite called mTCP the latter is available for free from Michael Burtman’s website. The TCP/IP packet driver can be found in the PKTDRV folder on the RTL8139 install disk or can be download on its own from here . The same as before I’m using the REALTEK RTL8139(A) for this example.
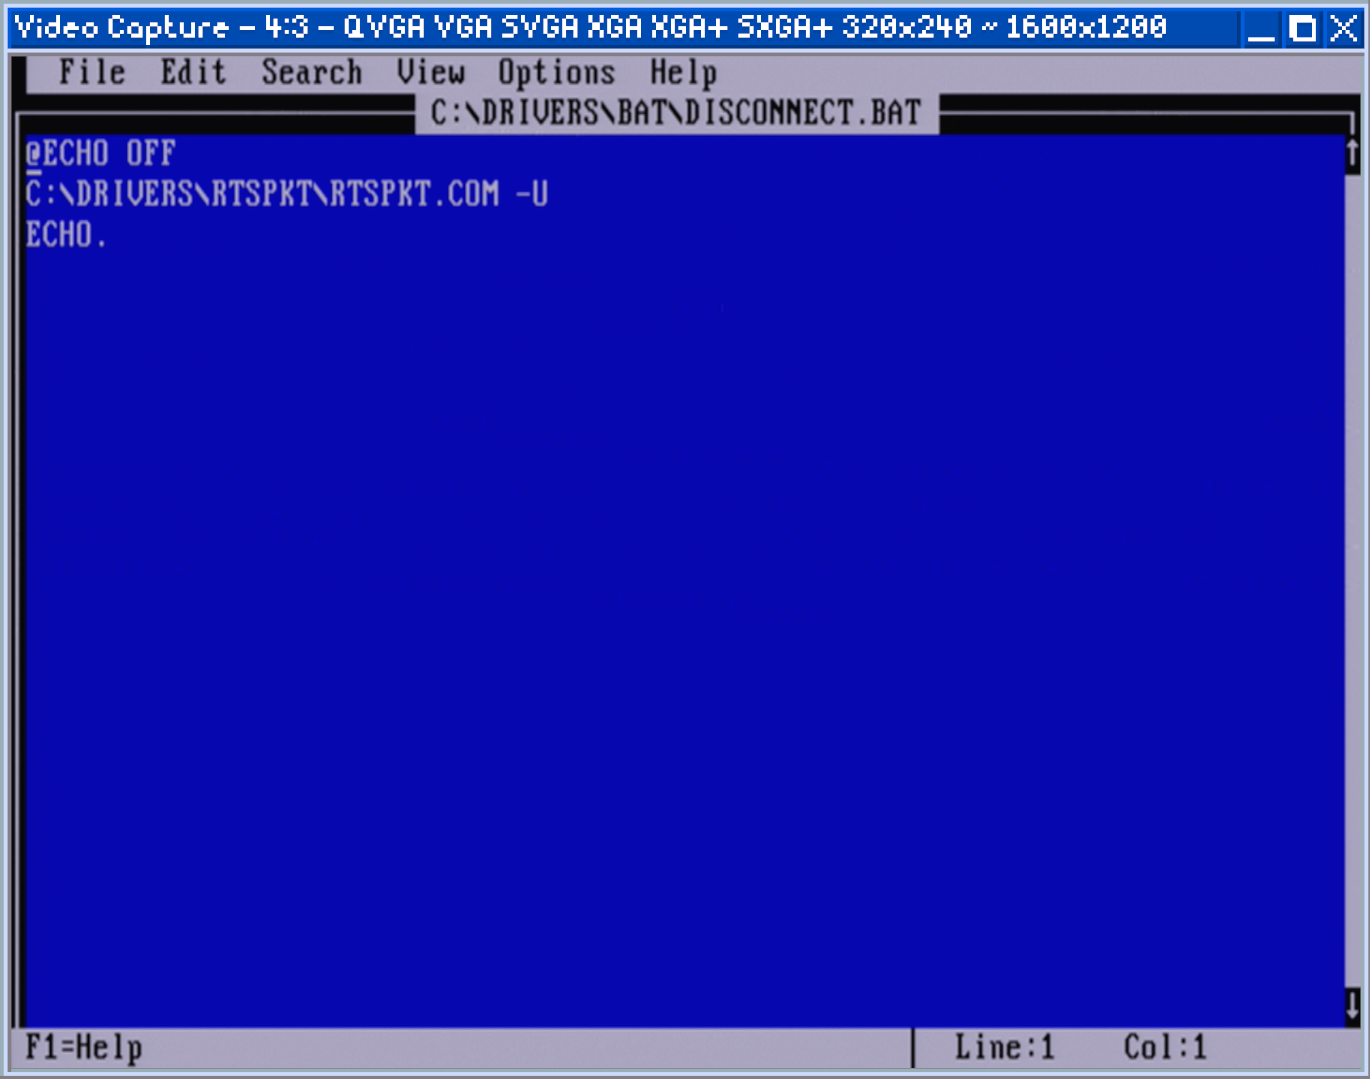
Running the packet driver is pretty simple, only one launch parameter is required for RTSPKT and that is the software interrupt so other programs can access it. The default as described in the readme is 0x60. Move the packet driver to somewhere onto your hard disk ie. C:\DRIVERS\TCPIP\*.*
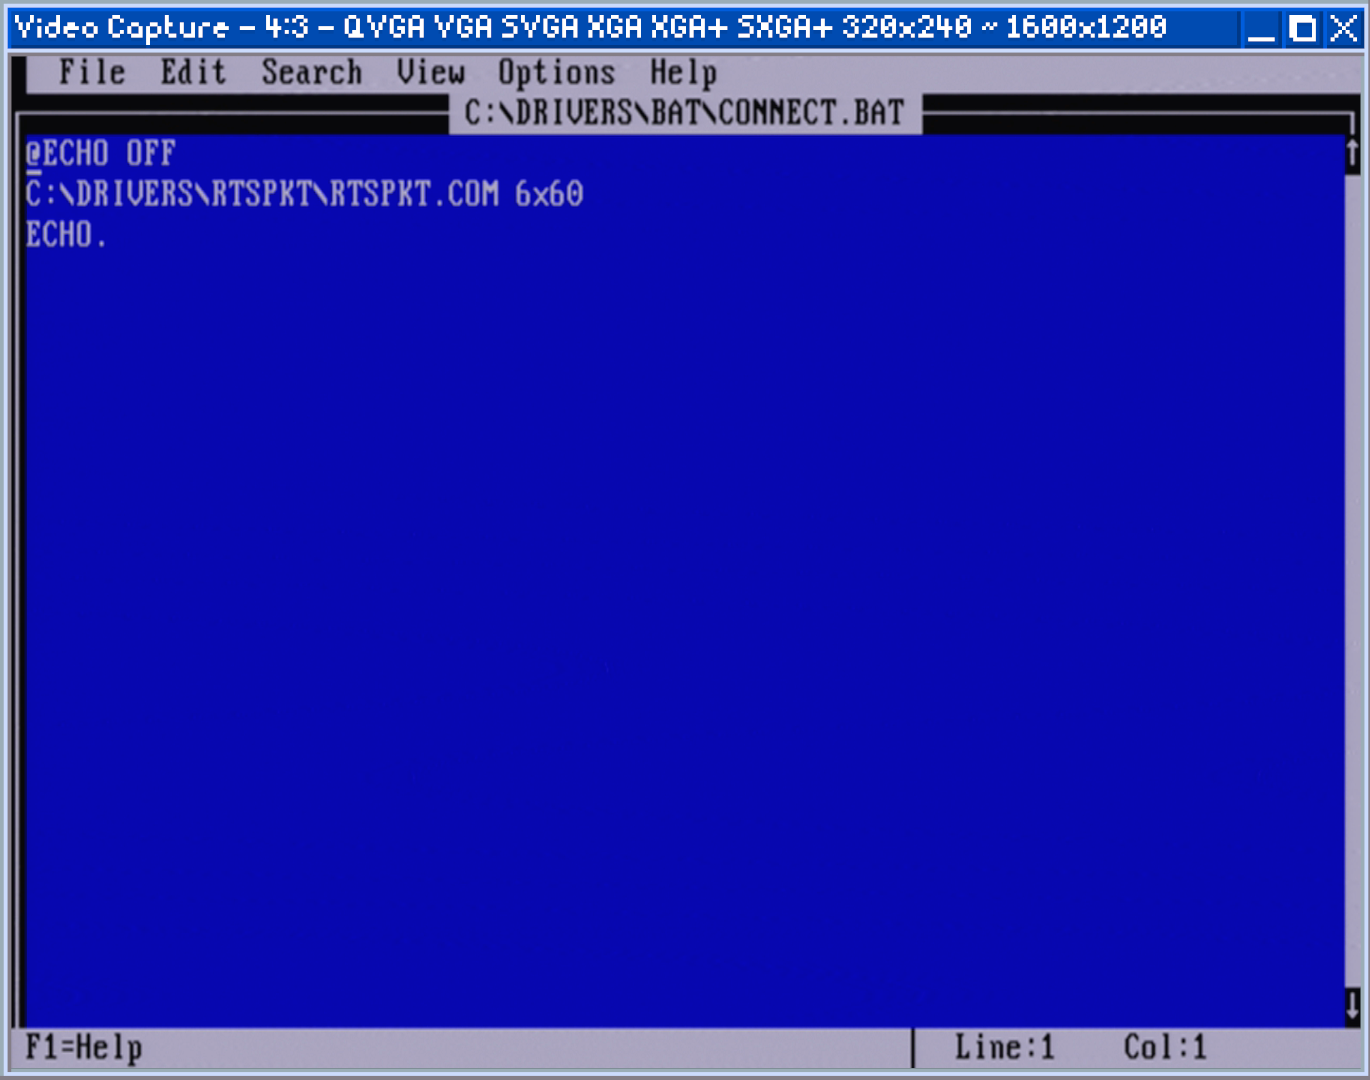
You can add the following to a batch file or your autoexec.bat if you want it to auto load on start-up.
C:\DRIVERS\PKTDRV\RTSPKT.COM 0x60
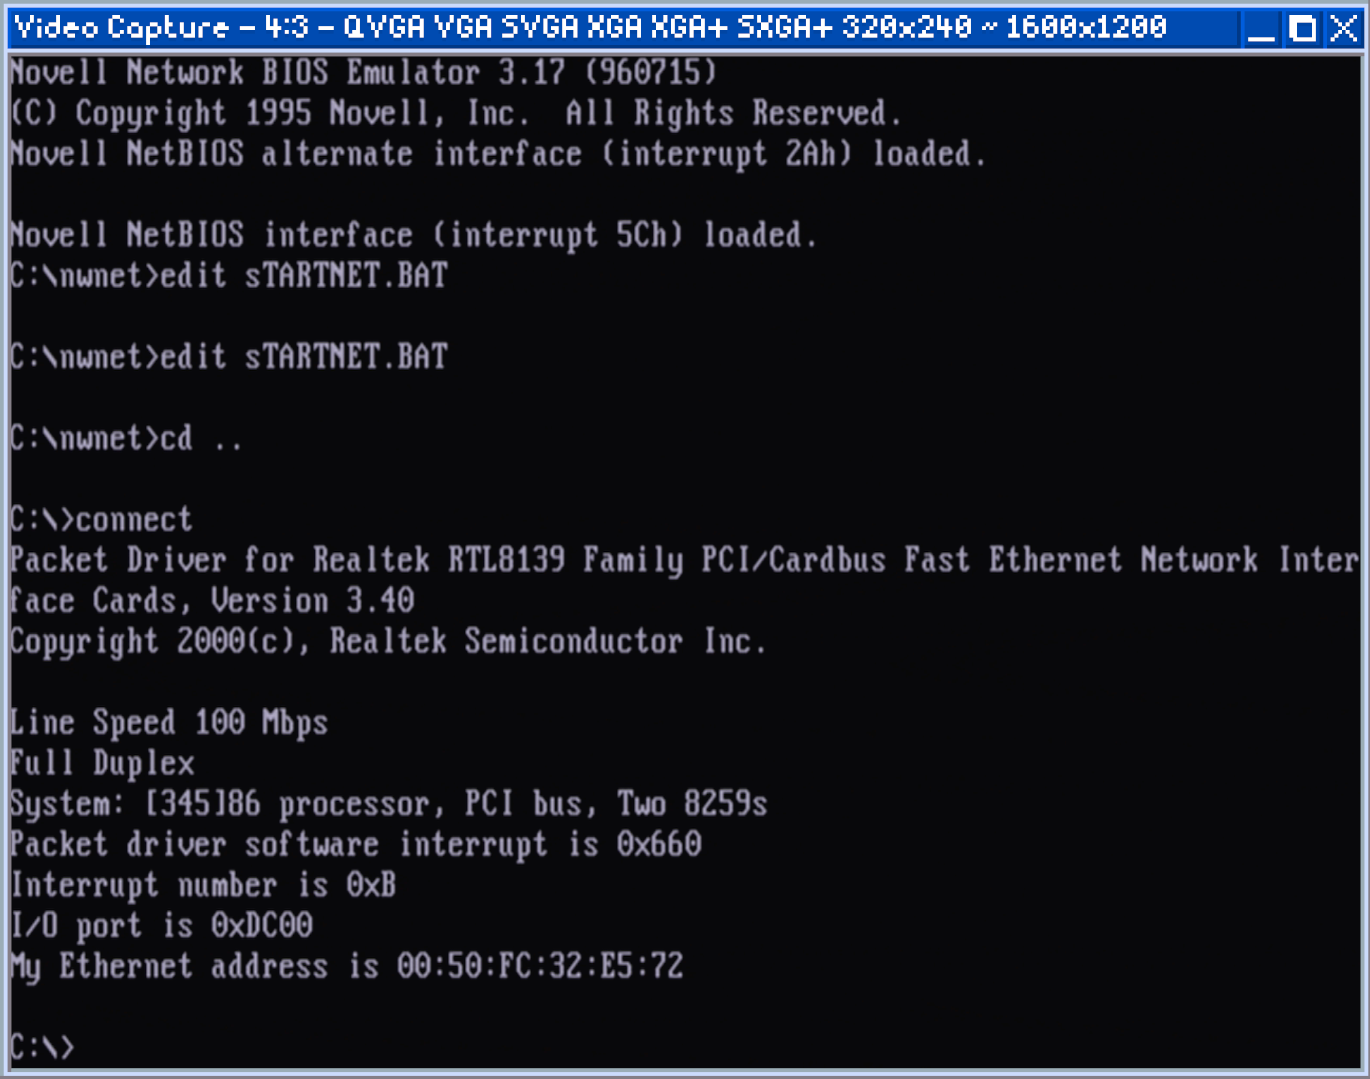
When executed you should see a message like the following that means the packet driver is loaded and running successfully.
System: [345]86 processor, PCI bus, Two 8259s
Packet driver software interrupt is 0x60
Interrupt number is 0x9
I/O port is 0x6100
My Ethernet address is 52:54:4C:29:29:AD
The last line will display the mac address of your network card if you wanted to note that down for whitelisting, or address reservation on your network later.
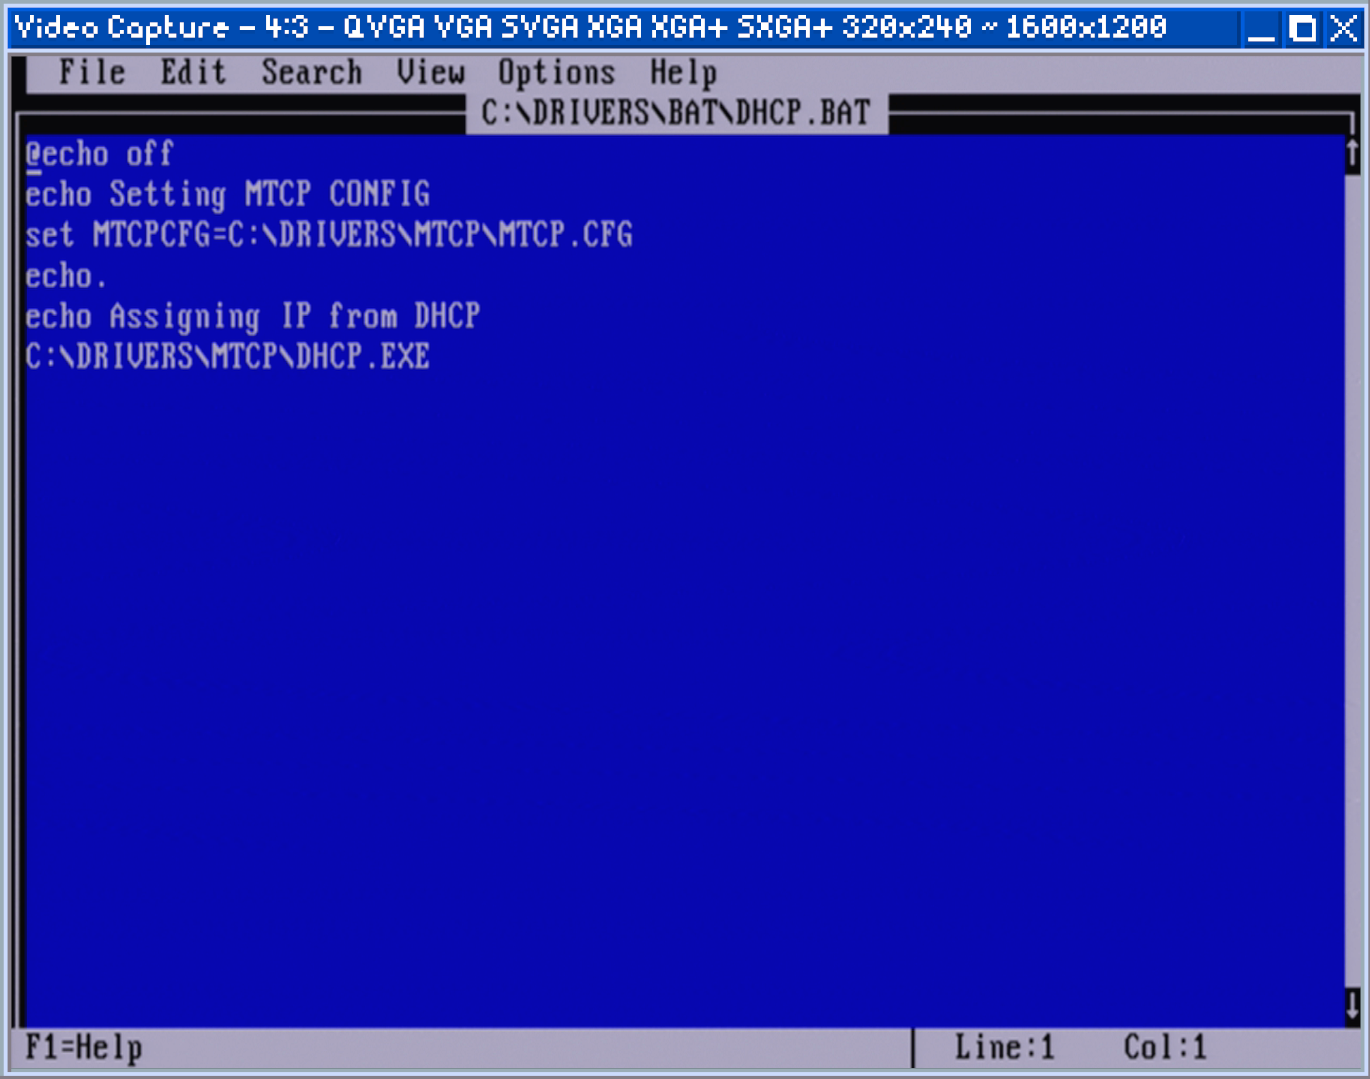
mTCP requires configuration before we can use it. Firstly extract the contents of the standard binaries zip file to your system (eg. C:\DRIVERS\MTCP\*.*). Next MTCP.CFG needs to be filled out with your packet drivers interrupt we used earlier (0x60), a host name needs to be chosen and ftpsrv_password_file location needs to be set. Save the file and add the following line to a batch file or your autoexec.bat.
SET MTCPCFG=C:\DRIVERS\MTCP\MTCP.CFG
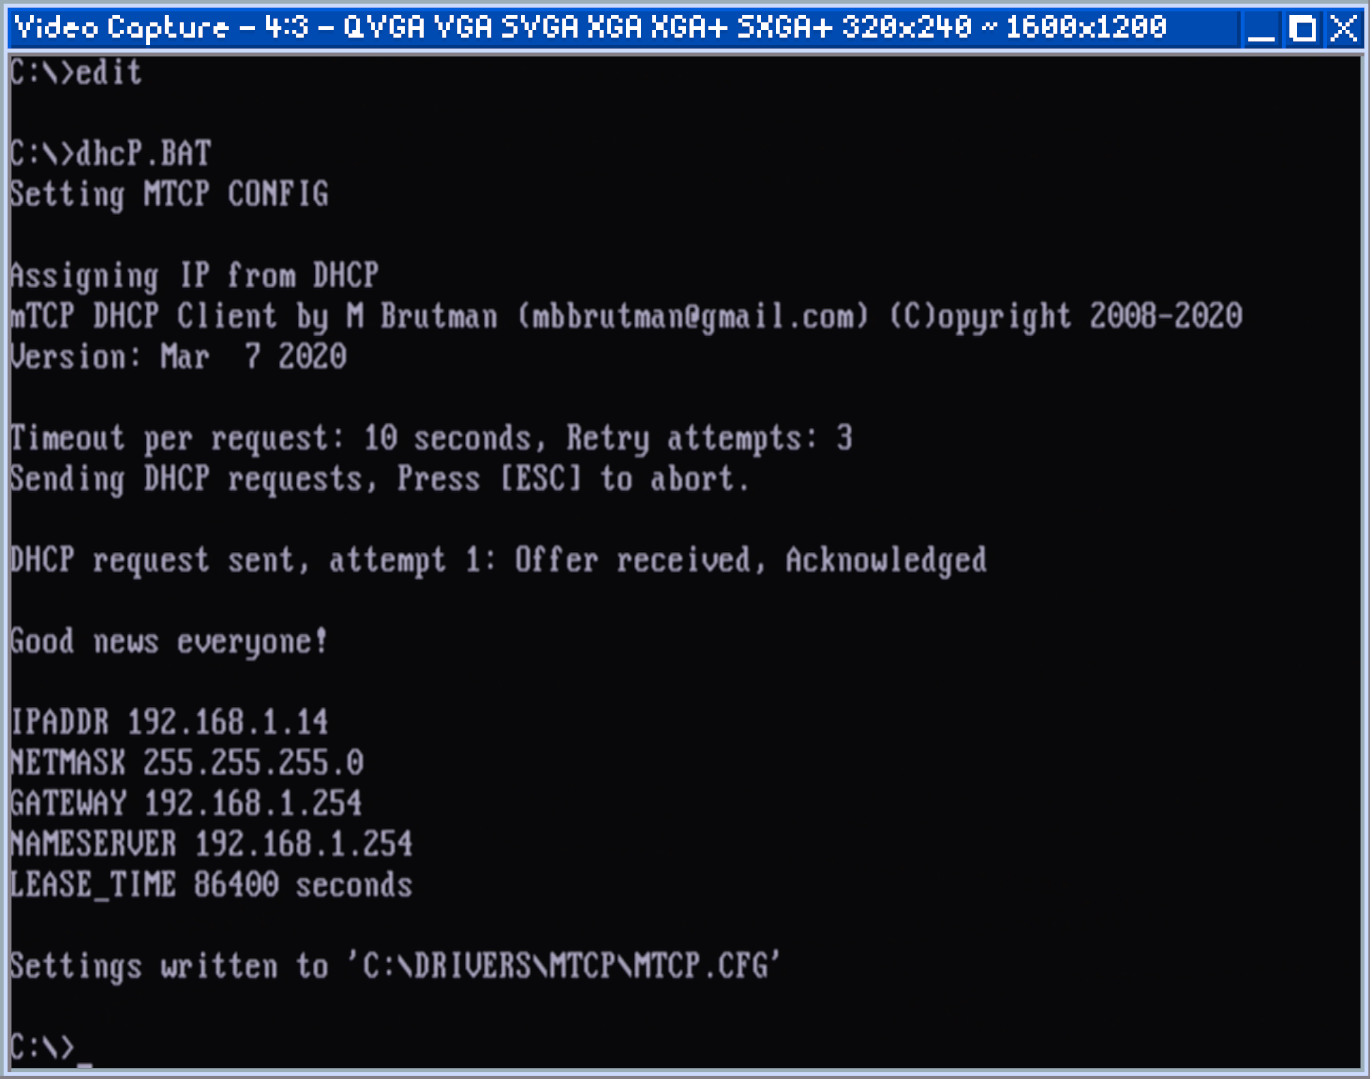
After editing your autoexec.bat and rebooting or alternatively launching your own custom batch file with the SET value, you can re-run your packet driver and then launch DHCP.EXE. If all is correct you should see the line “Good news everyone!” with your assigned local network IP address details (see images below).
You are now connected to your local network via TCP/IP and should have internet access if it’s available on that network. This allows you to use a web browser such as Arachne or play any TCP/IP compatible games online such as Quake World.
Transferring files is also easy if you have a ftp server on another machine to connect to using mTCP’s FTPSrv utility, I highly recommend Phil’s Computer lab video on the subject which you can find here.
2.4.5 Connecting DOSBOX to Real Hardware
I made this video as a guide that covers all the steps necessary for getting a portable DOSBOX distribution up and running, which can connect real computers and DOSBOX instances over your TCP/IP and/or IPX network.
The first half of this video covers everything from points 2.4.1 to 2.4.4 in this post but for the virtual NE2000 network adapter this build of DOSBOX uses.
The latter half of the video covers creating/joining game lobbies in DOS and also how to setup and use Kali 1.4a for DOS. You can skip to the time 6:38 for those details which also apply to real MS-DOS.
Kali 1.4a is a Client and TSR for DOS which allows IPX traffic to be captured and passed through the internet over TCP/IP, allowing games designed for local network play only to be played online.
Unlike modern games which allow players to join a match in progress any time, IPX games tend to use a lobby system. This is when the game finds and syncs all the players running the game on the network and then creates the game instance once they are all ready.
In the next post I’ll be finally moving onto Windows 9x!